
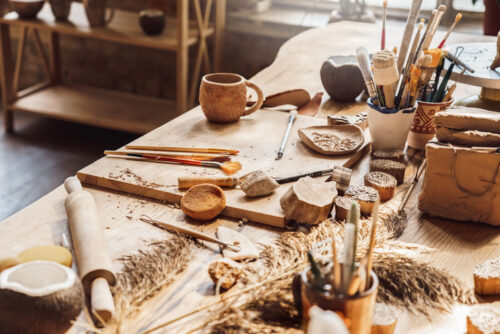
How To Set Up A Home Pottery Studio
So, you have taken classes at a local teaching studio and feel that you want to take your craft to the next level or even turn it into career. What now? Most people find they not only want more convenient access to the equipment and tools used to create their work, they want to choose them. They want to create an environment that uniquely fits their style, work habits and functional needs. The obvious next step is to create a studio at home.
There is a lot to consider when planning out a functional and safe home studio. In this article we will try to guide you through this process touching on the key aspects you must address:
- Where to put your pottery studio
- Kiln location
- Space considerations
- Aesthetics, functionality, and safety
Where to Locate Your Studio
Where you live will obviously affect many of these choices. Most of us do not live in palatial estates with endless option of rooms to locate our studios. Chances are, your options will be slim. The amount of space you need will be determined by: the size and volume of your work, the techniques you use to construct it, and the equipment you will require.
You may determine that locating your ideal studio in your home is not practical and decide you need to rent a commercial space to fit your needs. That’s okay. Most of the information we provide here will apply wherever you set up shop.
Since most studios will want to have a kiln, let’s start there:
Kiln Location Considerations
- Kilns and other equipment need to be located inside, protected from excess moisture and heat.
- Kilns need to be set on non-combustible surfaces such as ceramic tile or concrete.
- Kilns need to be located in rooms with access to proper ventilation in order to evacuate fumes and excessive heat.
- Many new controllers, like Skutt’s KMT, have features (like KilnLink) that require a Wi-Fi connection to the kiln. Make sure the space you choose can be provided with a strong, dependable Wi-Fi signal.
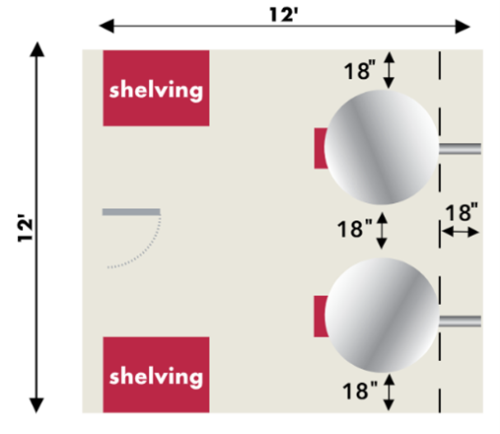
- Kilns require 18” of clearance from any wall, other kilns, and any combustible items. Find the outside dimensions of the kiln you wish to install and add 18” of clearance around it to determine the space needed. Example: KMT1027 – Outside Width = 28.5 “ + 40” (for clearance) = 68.5”. This is the total diameter of the space needed to place your kiln.
- The closer you can locate your kiln to the incoming power source of your home, the less expensive the wiring will be. Make sure it is wired by a certified electrician and complies to all applicable codes.
- Having your kiln close to your studio is convenient for loading. If rolling carts are used to transport your wares to and from the kiln, make sure there is smooth surfaced path to avoid bumpy rides to the kiln.
- Allow for room nearby for storing things like kiln shelves, cones, kiln parts — anything regularly used with the kiln.
Space Considerations
You can use the same calculation we used above for calculating the space needed for additional items that you will need for your studio.
- Potter’s Wheel (don’t forget room for the stool)
- Wedging Table
- Sink (with clay trap to avoid clogs)
- Work Table
- Slab Roller
- Drying Rack
- Clay Reclaiming Station
- Photo Station
- Storage Rack, Cabinet or Closet
- Clay
- Glaze
- Raw Materials
- Tools
- Molds
- Respirator
Aesthetics, Functionality and Safety
Hopefully you be spending a lot of time in your studio so make sure you create an environment that is pleasant and safe.
Lighting
Good lighting is not only important to see what you are doing, it can also set a mood that inspires creativity. Natural light is great when you can get it but of course is only available during daylight hours. Directional spots with separate switch controls allow flexibility and a world of optional lighting scenarios.
Music, Wi-Fi, Refrigerator…
Who doesn’t listen to music in the studio? You also may want an occasional snack, or stream a how to video on your iPad to learn a new technique. Be sure you have plenty of outlets for these items when planning your studio.
Floor Covering
We all know studios are going to get dirty and also have the potential to get wet. Choose a floor covering that is waterproof, smooth and easy to vacuum or sweep. Vinyl or polished concrete are great options.
Dust Removal
Breathing clay and glaze particles all day is not good for your long-term health. Having an overhead fan will help limit the amount of particles floating around in your studio. You may also want to invest in an air purifier as well.
Gloves, Respirators and Sensors
Always have non-flammable gloves available when you need to handle peep plugs or lid handles on a hot kiln. Respirators are recommended for many processes such as spraying glazes or grinding pots. Make sure you have a good one handy so you are never tempted to press on without one.
Kilns are very safe to operate in your home when installed and operated correctly. It is still recommended to install a smoke detector just as you would in any other room of your home.
For a more complete guide to all the details associated with locating, installing and maintaining kilns download the Kiln Management Guide.


Leave a Reply
Want to join the discussion?Feel free to contribute!