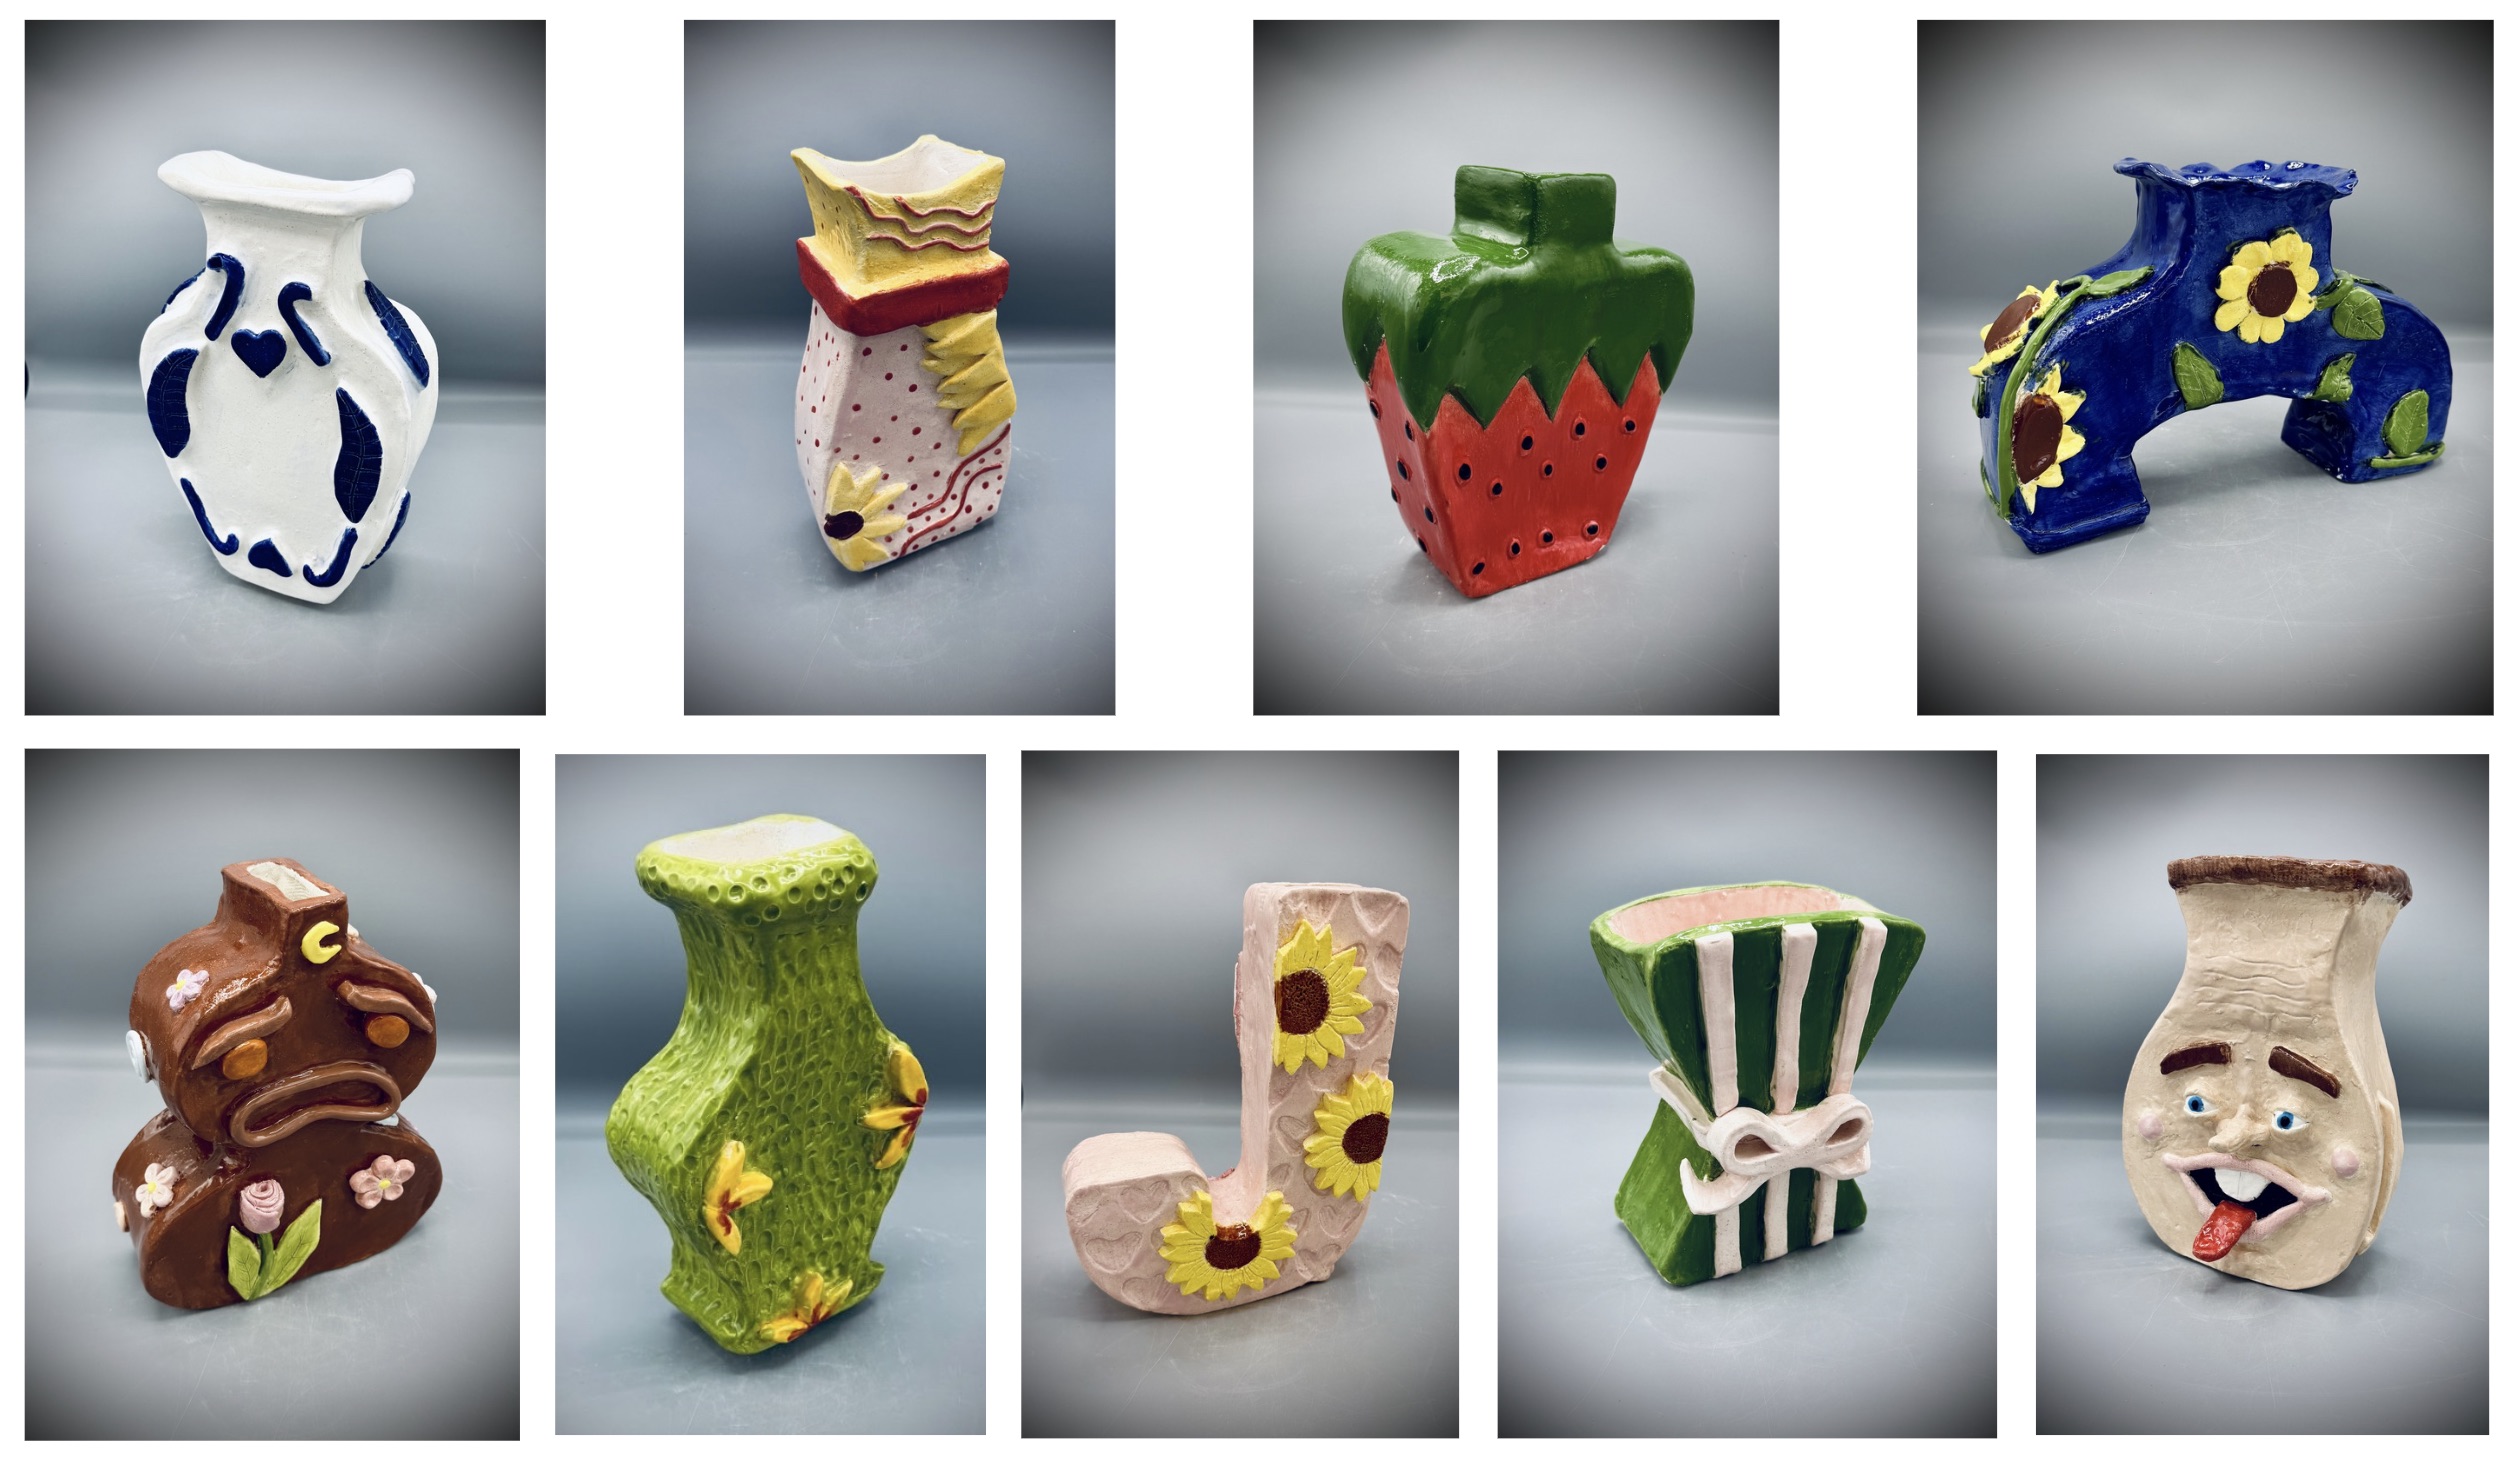
The 4-Sided Story: Appliqué Slab Vase
Meet The Teacher: Mike O'Neill
I’ve been teaching art since 2010, and after a decade at the university level, I transitioned to high school ceramics five years ago to share my passion for clay with our talented students here at Thomas Jefferson High School in San Antonio, Texas.
Project Description
Students will design and create a four-sided ceramic vase using slab construction techniques and cover all four sides with their own creative appliqué design.
Materials
- Clay, Glaze, Slab Roller or Rolling Pins, Variety of Clay Tools for cutting, scoring, smoothing and etc.
Grade Level
High School
Difficulty
Advanced
Student Hands-On Time
4 weeks total work time. 1 week for design and paper template, 1.5 week for vase construction, 1 week for applique pieces, and .5 for glazing--based on a 90 minute A/B Block Schedule
Teacher Prep Time
2 hours (30 minutes prep at the beginning of each week for materials prep and demos)
Project Cost / Cost Per Student
8
National Core Arts Standards - Visual Arts
- Creating - Generate and conceptualize artistic ideas.
- Creating - Conceiving and developing new artistic ideas and work.
- Presenting - Develop skills for artistic presentation and exhibition.
- Responding - Evaluate and critique based on aesthetic and technical qualities.
- Connecting - Connect personal experiences with artmaking and meaning.
21st Century Skills
- Critical Thinking & Problem-Solving
- Creativity & Innovation
- Communication
- Flexibility & Adaptability
- Initiative & Self-Direction
- Social & Cross-Cultural Skills
STEAM Education
- Technology
- Engineering
- Arts
Differentiations and Accommodations
Differentiation
Advanced Learners
Accommodation
Focus on technical mastery and complex conceptual narratives.Intricate Narrative Appliqué: Instead of decorative patterns, challenge advanced students to create a four-part visual narrative where the design on each side tells a story or evolves as the viewer rotates the vase.Surface Complexity: Encourage the use of sgraffito or Mishima (inlay) techniques alongside the appliqué to create high-contrast, multi-layered textures.
Differentiation
Struggling Learners
Accommodation
Focus on structural success and reducing the cognitive load of the design process.Physical Templates: Provide pre-cut stiff paper or cardboard templates for the four sides and base. This ensures the vase is square and stable, preventing the frustration of mismatched edges.Simplified Appliqué: Offer clay cutters (cookie cutters) or simple stencils for the appliqué. Instead of designing four unique sides, suggest a "wrap-around" or repeating pattern to reduce design fatigue.Construction Aids: Use a "form-support" method, such as building the slabs around a PVC pipe or a cardboard box wrapped in newspaper, to keep the walls from collapsing during the joining process.Sensory/Fine Motor Accommodations: For students with motor challenges, allow the use of textured rollers to create designs directly on the slabs before a
Learning Objectives: Knowledge
Students should master both the technical "how-to" of slab construction techniques and the conceptual "why, " showing they can translate a 2D personal narrative into a professional, well-crafted 3D ceramic vessel. Ultimately, students will be able to synthesize these skills to create a cohesive 360° composition.
Learning Objectives: Skills
By the end of this project, students will have mastered the technical precision required to roll uniform slabs and execute mitered corner joins for a structurally sound four-sided form. They will demonstrate a deep understanding of moisture management and the "4 S’s" (Score, Slip, Stick, Smooth) to ensure both the vessel and its decorative appliqué remain intact through the firing process.
Learning Objectives: Attitudes/Values
Students will cultivate a deep sense of patience and persistence, recognizing that the technical demands of slab construction and moisture management require a slow, intentional pace. They will develop a commitment to craftsmanship, valuing the refinement of seams and details as a reflection of their artistic integrity and pride in their work. Furthermore, this project encourages creative risk-taking and an openness to critique, as students must navigate the challenges of 3D design and use peer feedback to improve their vision. Finally, they will uphold the value of studio stewardship, maintaining a respectful and collaborative environment within the ceramics lab.
Formative Assessment
Template & Sketch Check: Before touching clay, students present their paper templates and a four-sided design sketch. This allows you to verify that their measurements align and their appliqué concepts are feasible for the slab surface."The Stress Test" Progress Critique: Once the four walls are joined but still leather-hard, perform a quick "seam check." Students must demonstrate that their mitered corners are reinforced with internal coils and that their joins are "light-tight" (no visible gaps).Peer "Glow and Grow" Gallery Walk: Halfway through the appliqué process, students rotate to a neighbor’s station to leave one "Glow" (a strength in their relief work) and one "Grow" (a suggestion for improvement, such as smoothing a rough edge or adding more depth).Moisture Management Logs: A simple daily check-in where students rate the hydration level of their clay. This teaches them to evaluate whether they need more water or more airflow to keep their project at the optimal stage for adding appliqué.Technical "Exit Tickets": Quick, one-question prompts at the end of class—such as "What is the purpose of a 45-degree bevel?"—to gauge their understanding of the vocabulary and mechanics of slab construction.
Summative Assessment
Technical Proficiency Rubric: A formal grading scale assessing the structural integrity of the vase. Key criteria include the strength of the mitered joins, the permanence of the appliqué attachments (no "pop-offs" after firing), uniform wall thickness, and the absence of cracks or warping.360° Design Portfolio: Students submit a final artist statement alongside photos of all four sides of the vase. They must explain how their appliqué designs create a unified narrative or aesthetic theme that flows around the corners of the vessel.Final Critique Presentation: A "Gallery Talk" where students present their finished, glazed piece to the class. They are evaluated on their ability to use art vocabulary to describe their process and how they successfully met the project’s creative "problems."Self-Reflection: A written component where students compare their initial sketches to the final product, identifying specific problem-solving moments and how they would adapt their technique for future slab-based projects.Glaze & Surface Finish: An assessment of the final surface quality, looking for intentional color choices that enhance the relief and texture of the appliqué rather than obscuring it.
Reflection and Discussion
1- "Think back to when your slabs were still wet. What was the biggest 'engineering' challenge you faced while keeping those four walls upright, and how did you adjust your technique to fix it?"
2- "If this vase were to go through a 'stress test,' which part of your appliqué would be the most vulnerable? What did you do during the scoring and slipping phase to ensure it stays attached permanently?"
3-"Pick a corner of your vase. How did you design your appliqué to lead the viewer’s eye from one flat plane to the next? Does the story continue, or does it change as we turn the vessel?"
4-"How does the height of your relief (the thickness of the appliqué) change how we see the design? Where do the shadows help define your shapes, and where do they get lost?"
5-"Look at a peer’s work. Can you find a shape or texture in their appliqué that repeats across all four sides? How does that repetition create a sense of 'unity' for the whole piece?"
6-"Ask your neighbor: 'What was the specific inspiration for the largest piece of appliqué on your vase?' Does knowing the inspiration change how you view the craftsmanship?"
Lesson Activities
Ideation
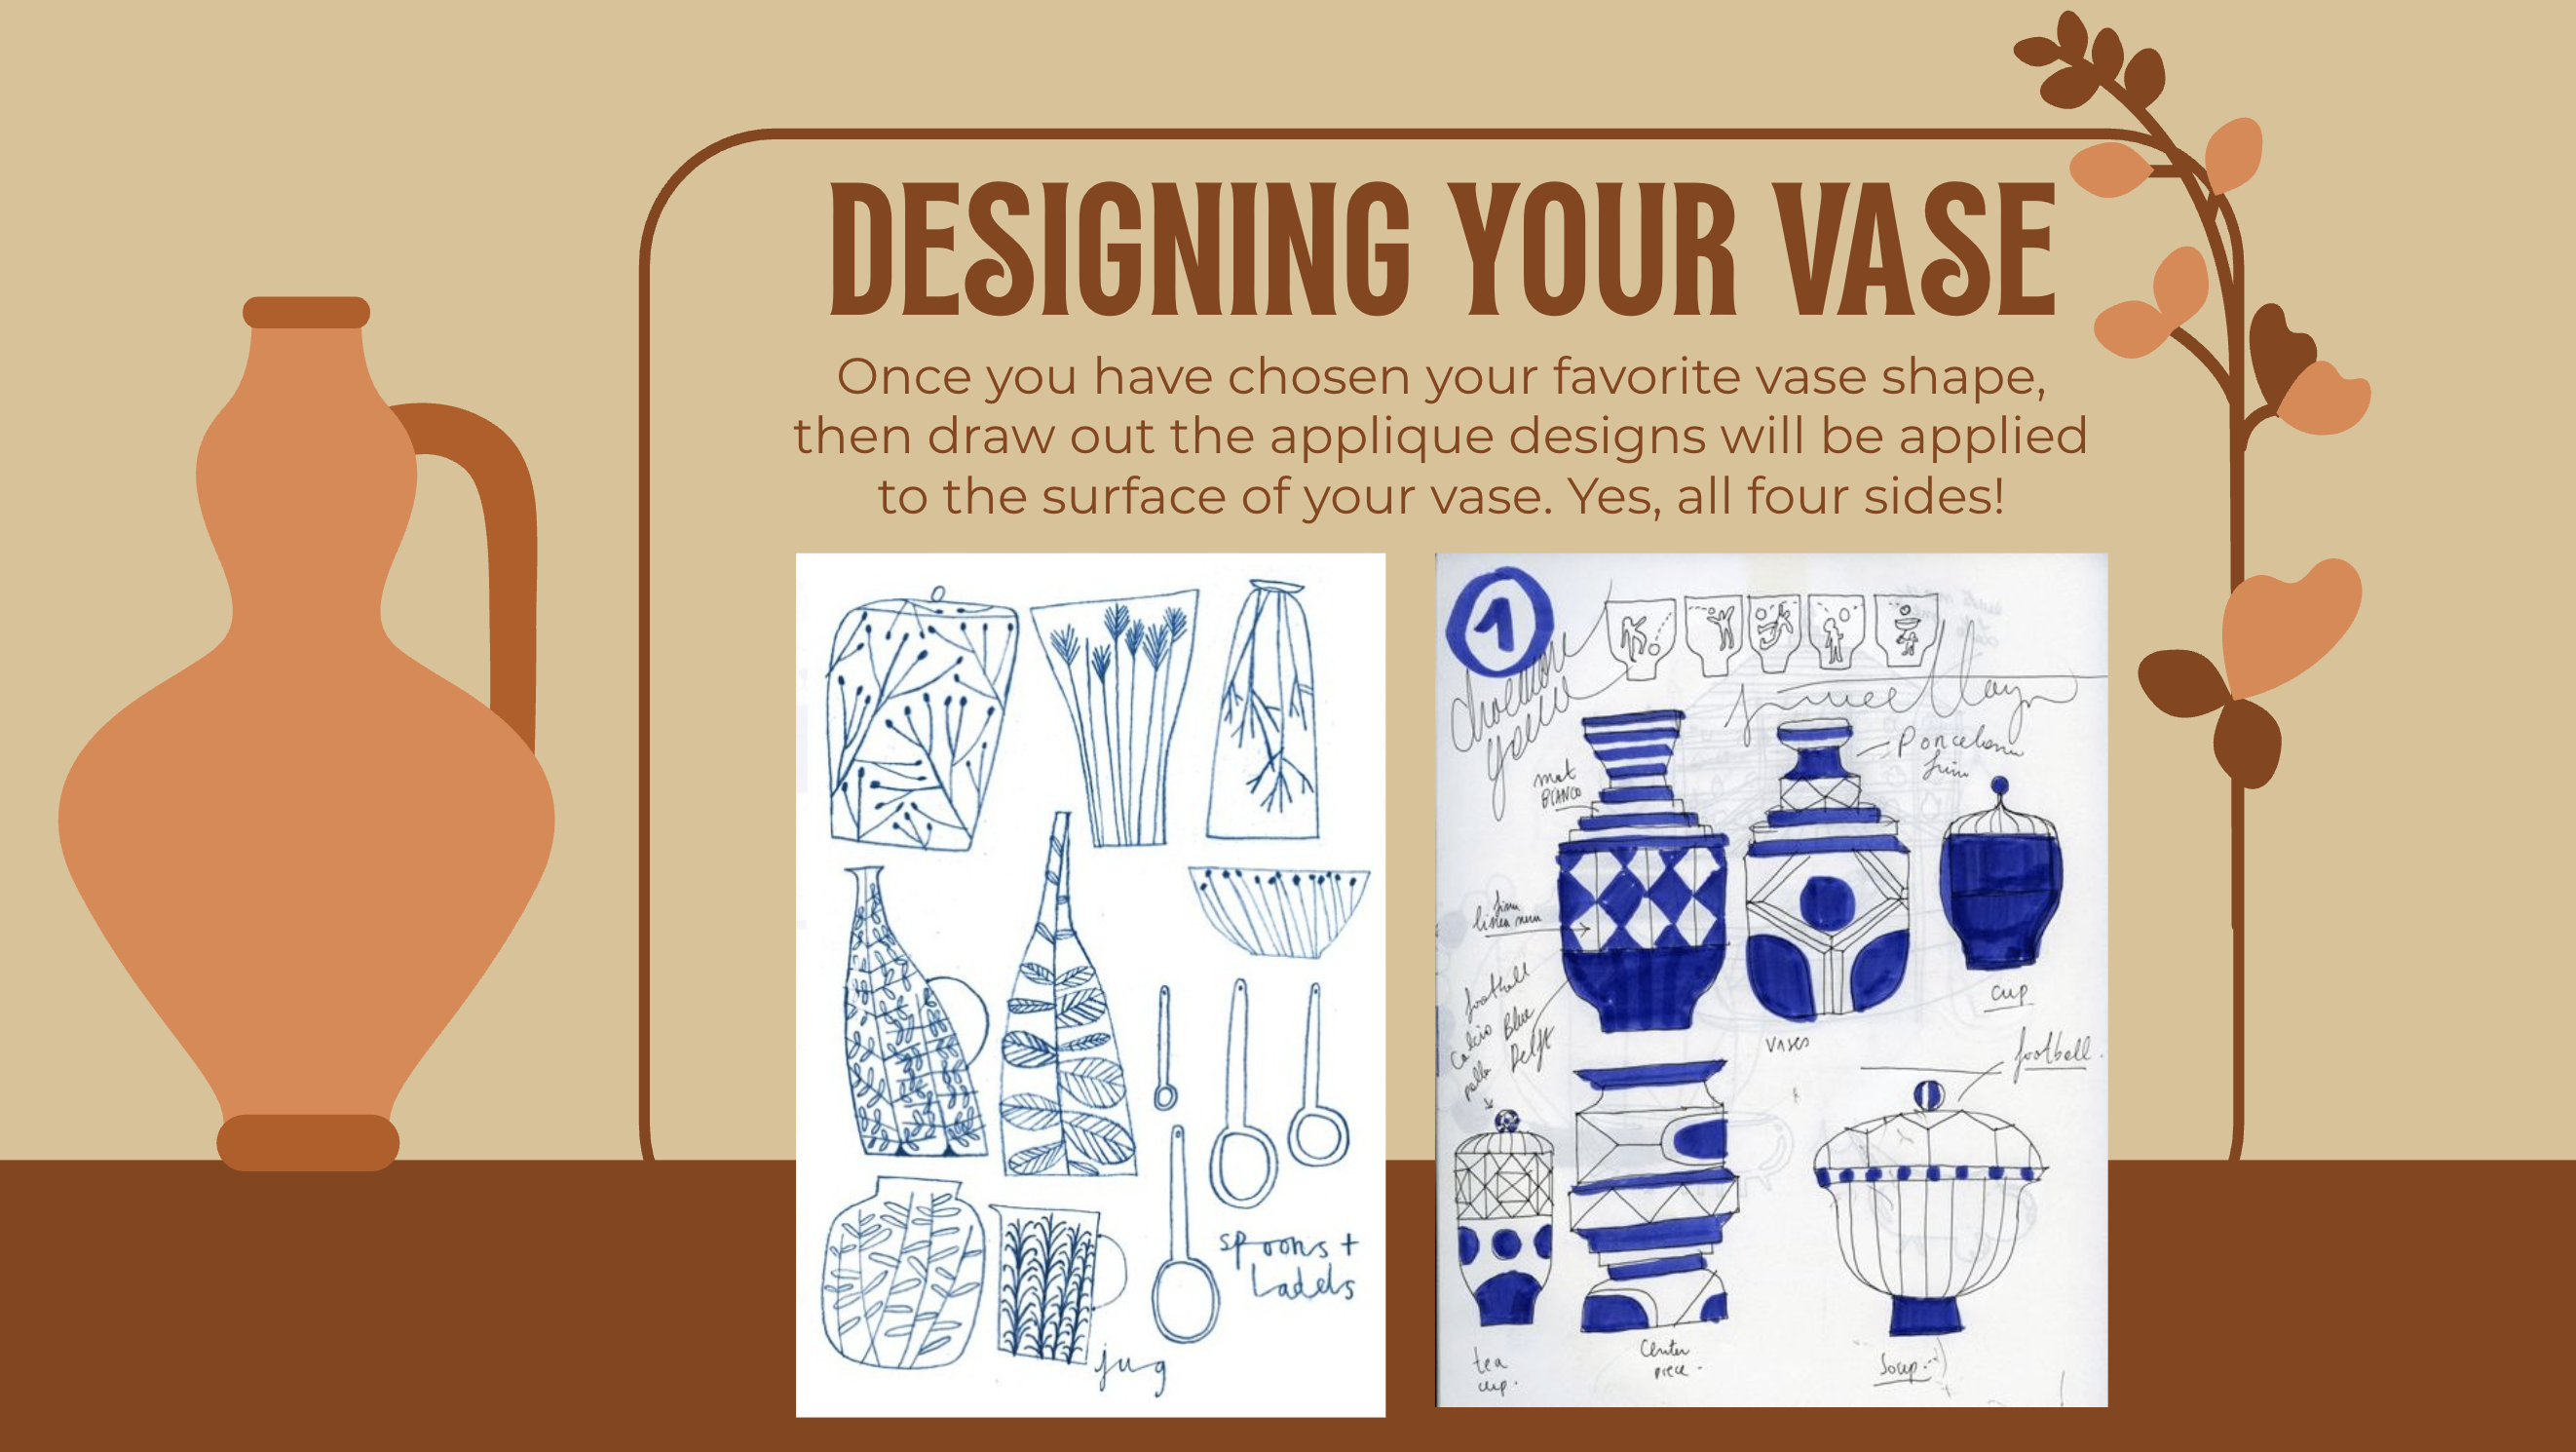
Brainstorm and research: draw out a plan for what you would like to build in your sketchbook--come up with 5 different silhouettes and draw out the applique designs that will be applied to the surface of your vase. Select your favorite design.
Templates
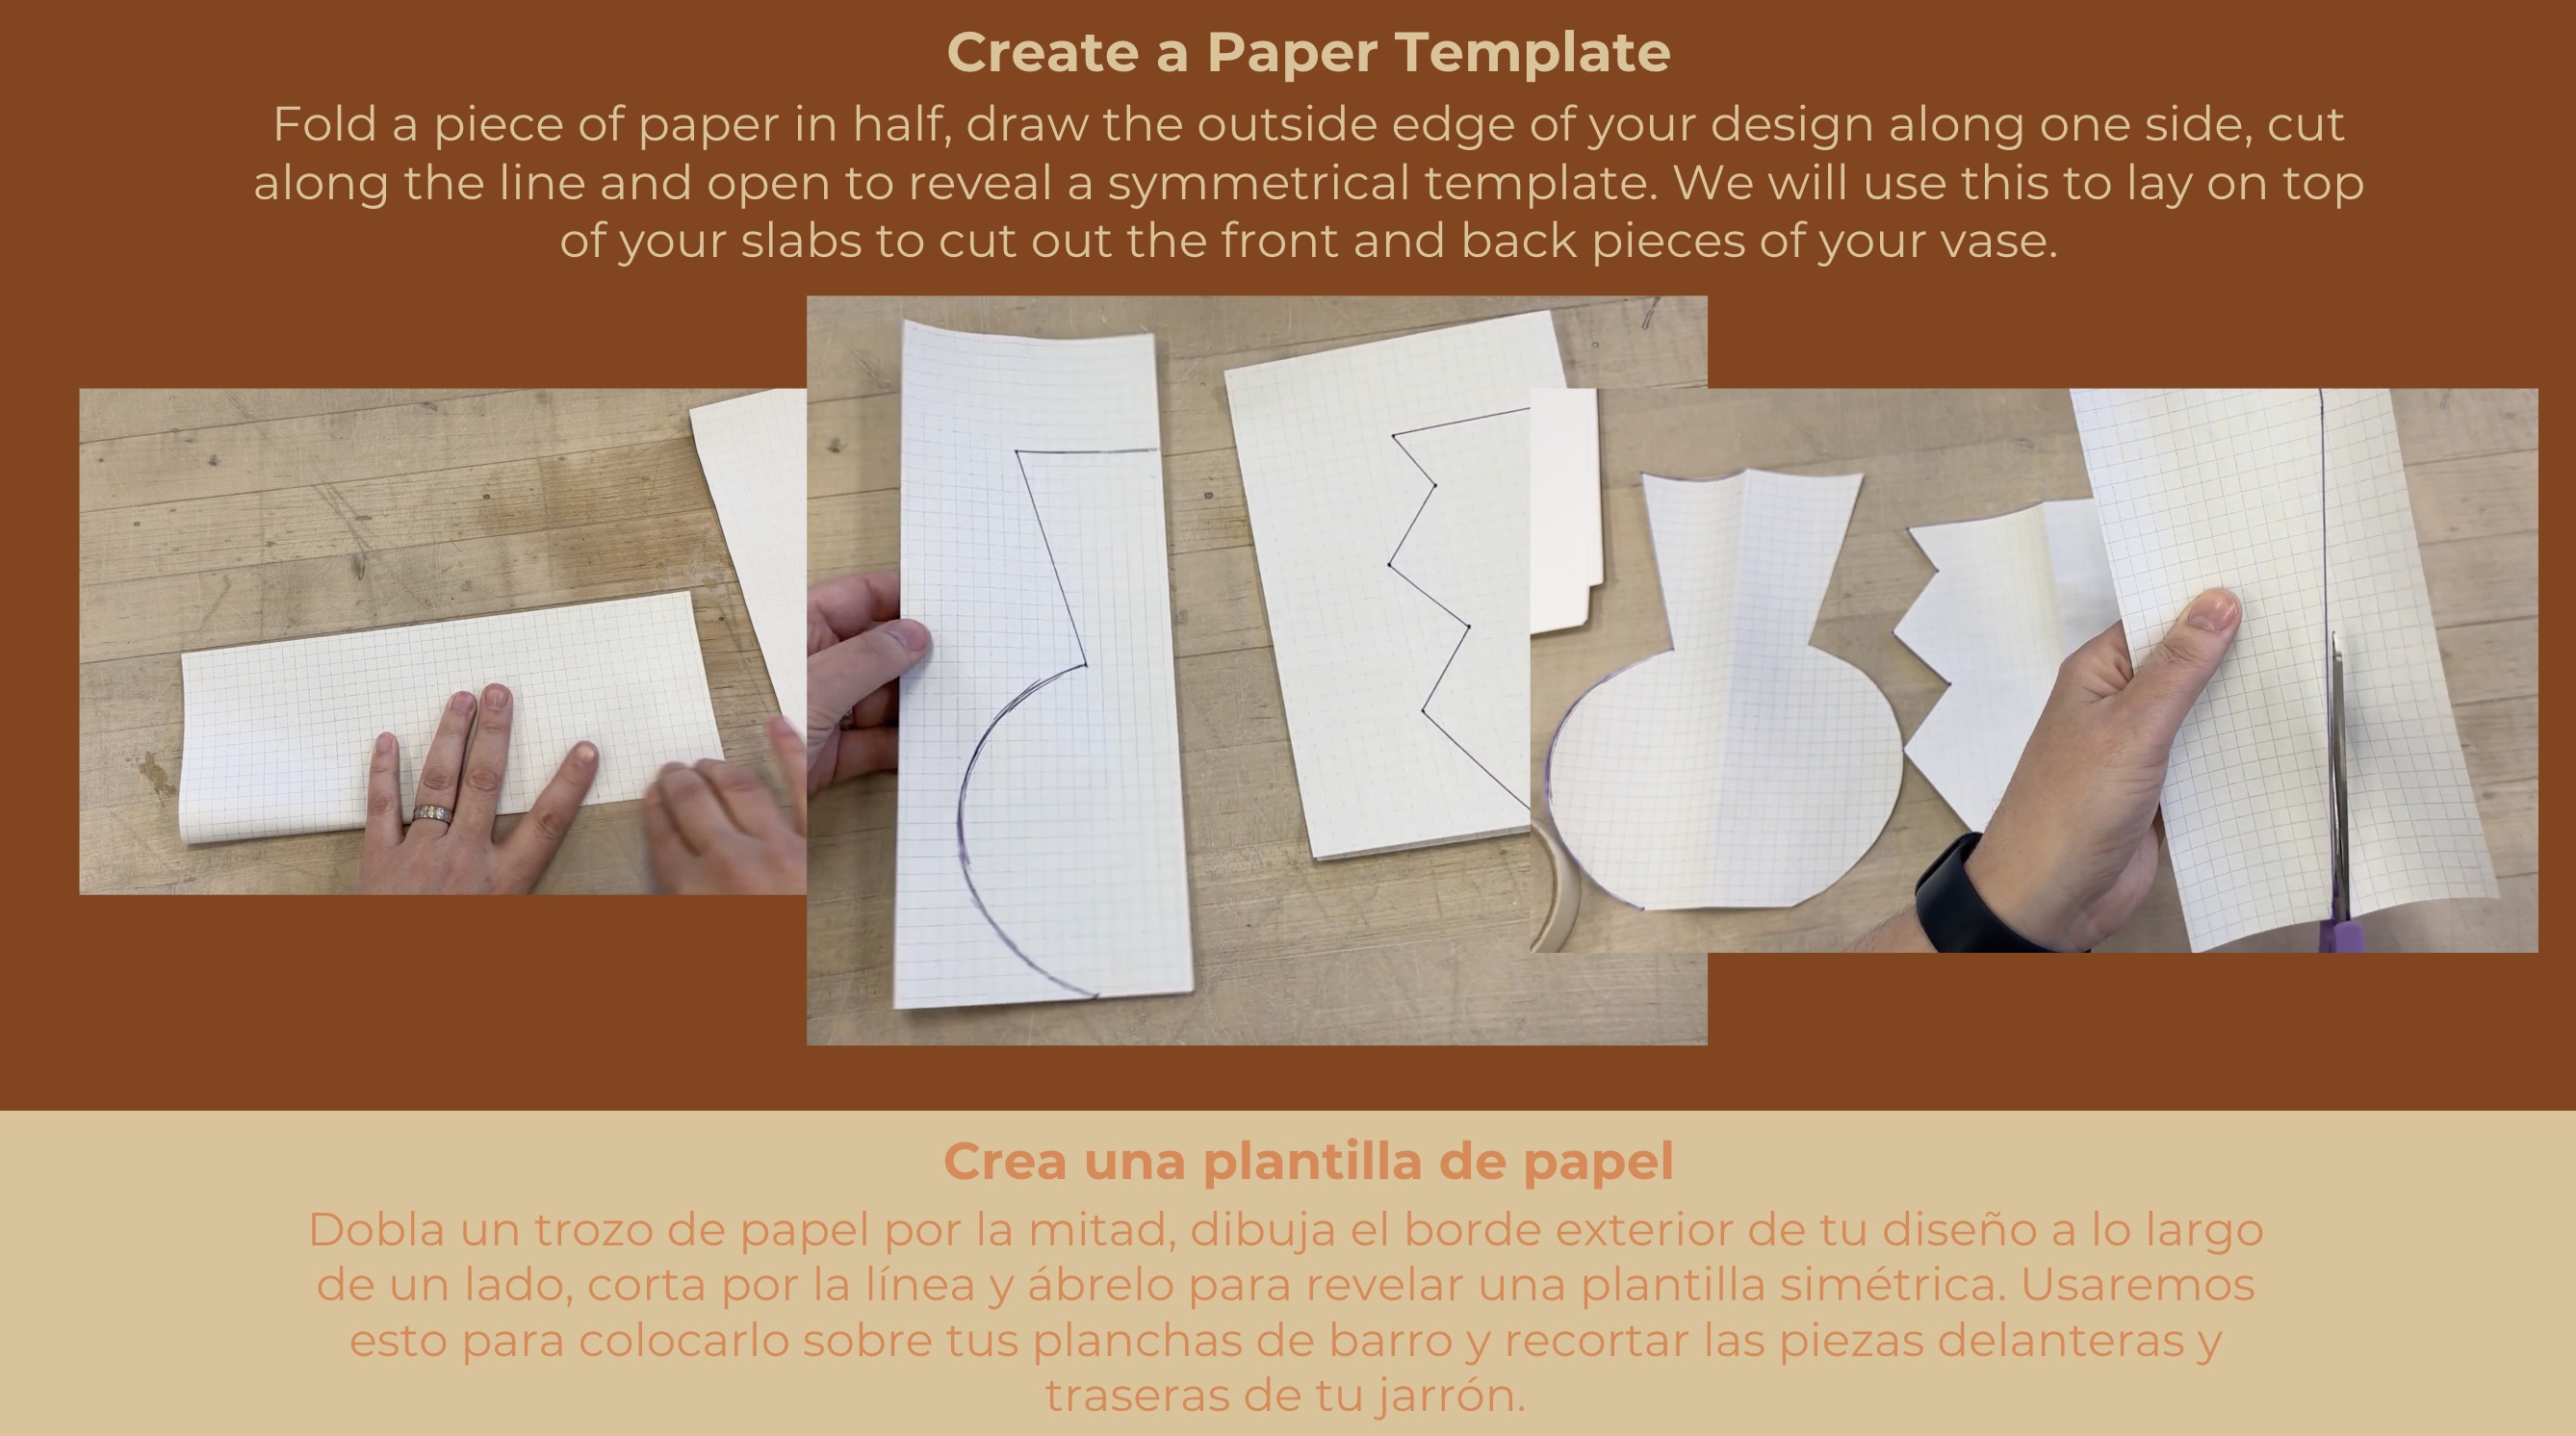
Create a paper template by folding a piece of paper in half, draw the outside edge of your design along one side. Cut along the line and open to reveal a symmetrical template. We will use this to lay on top of your slabs to cut out the front and back pieces of your vase.
Slab Construction
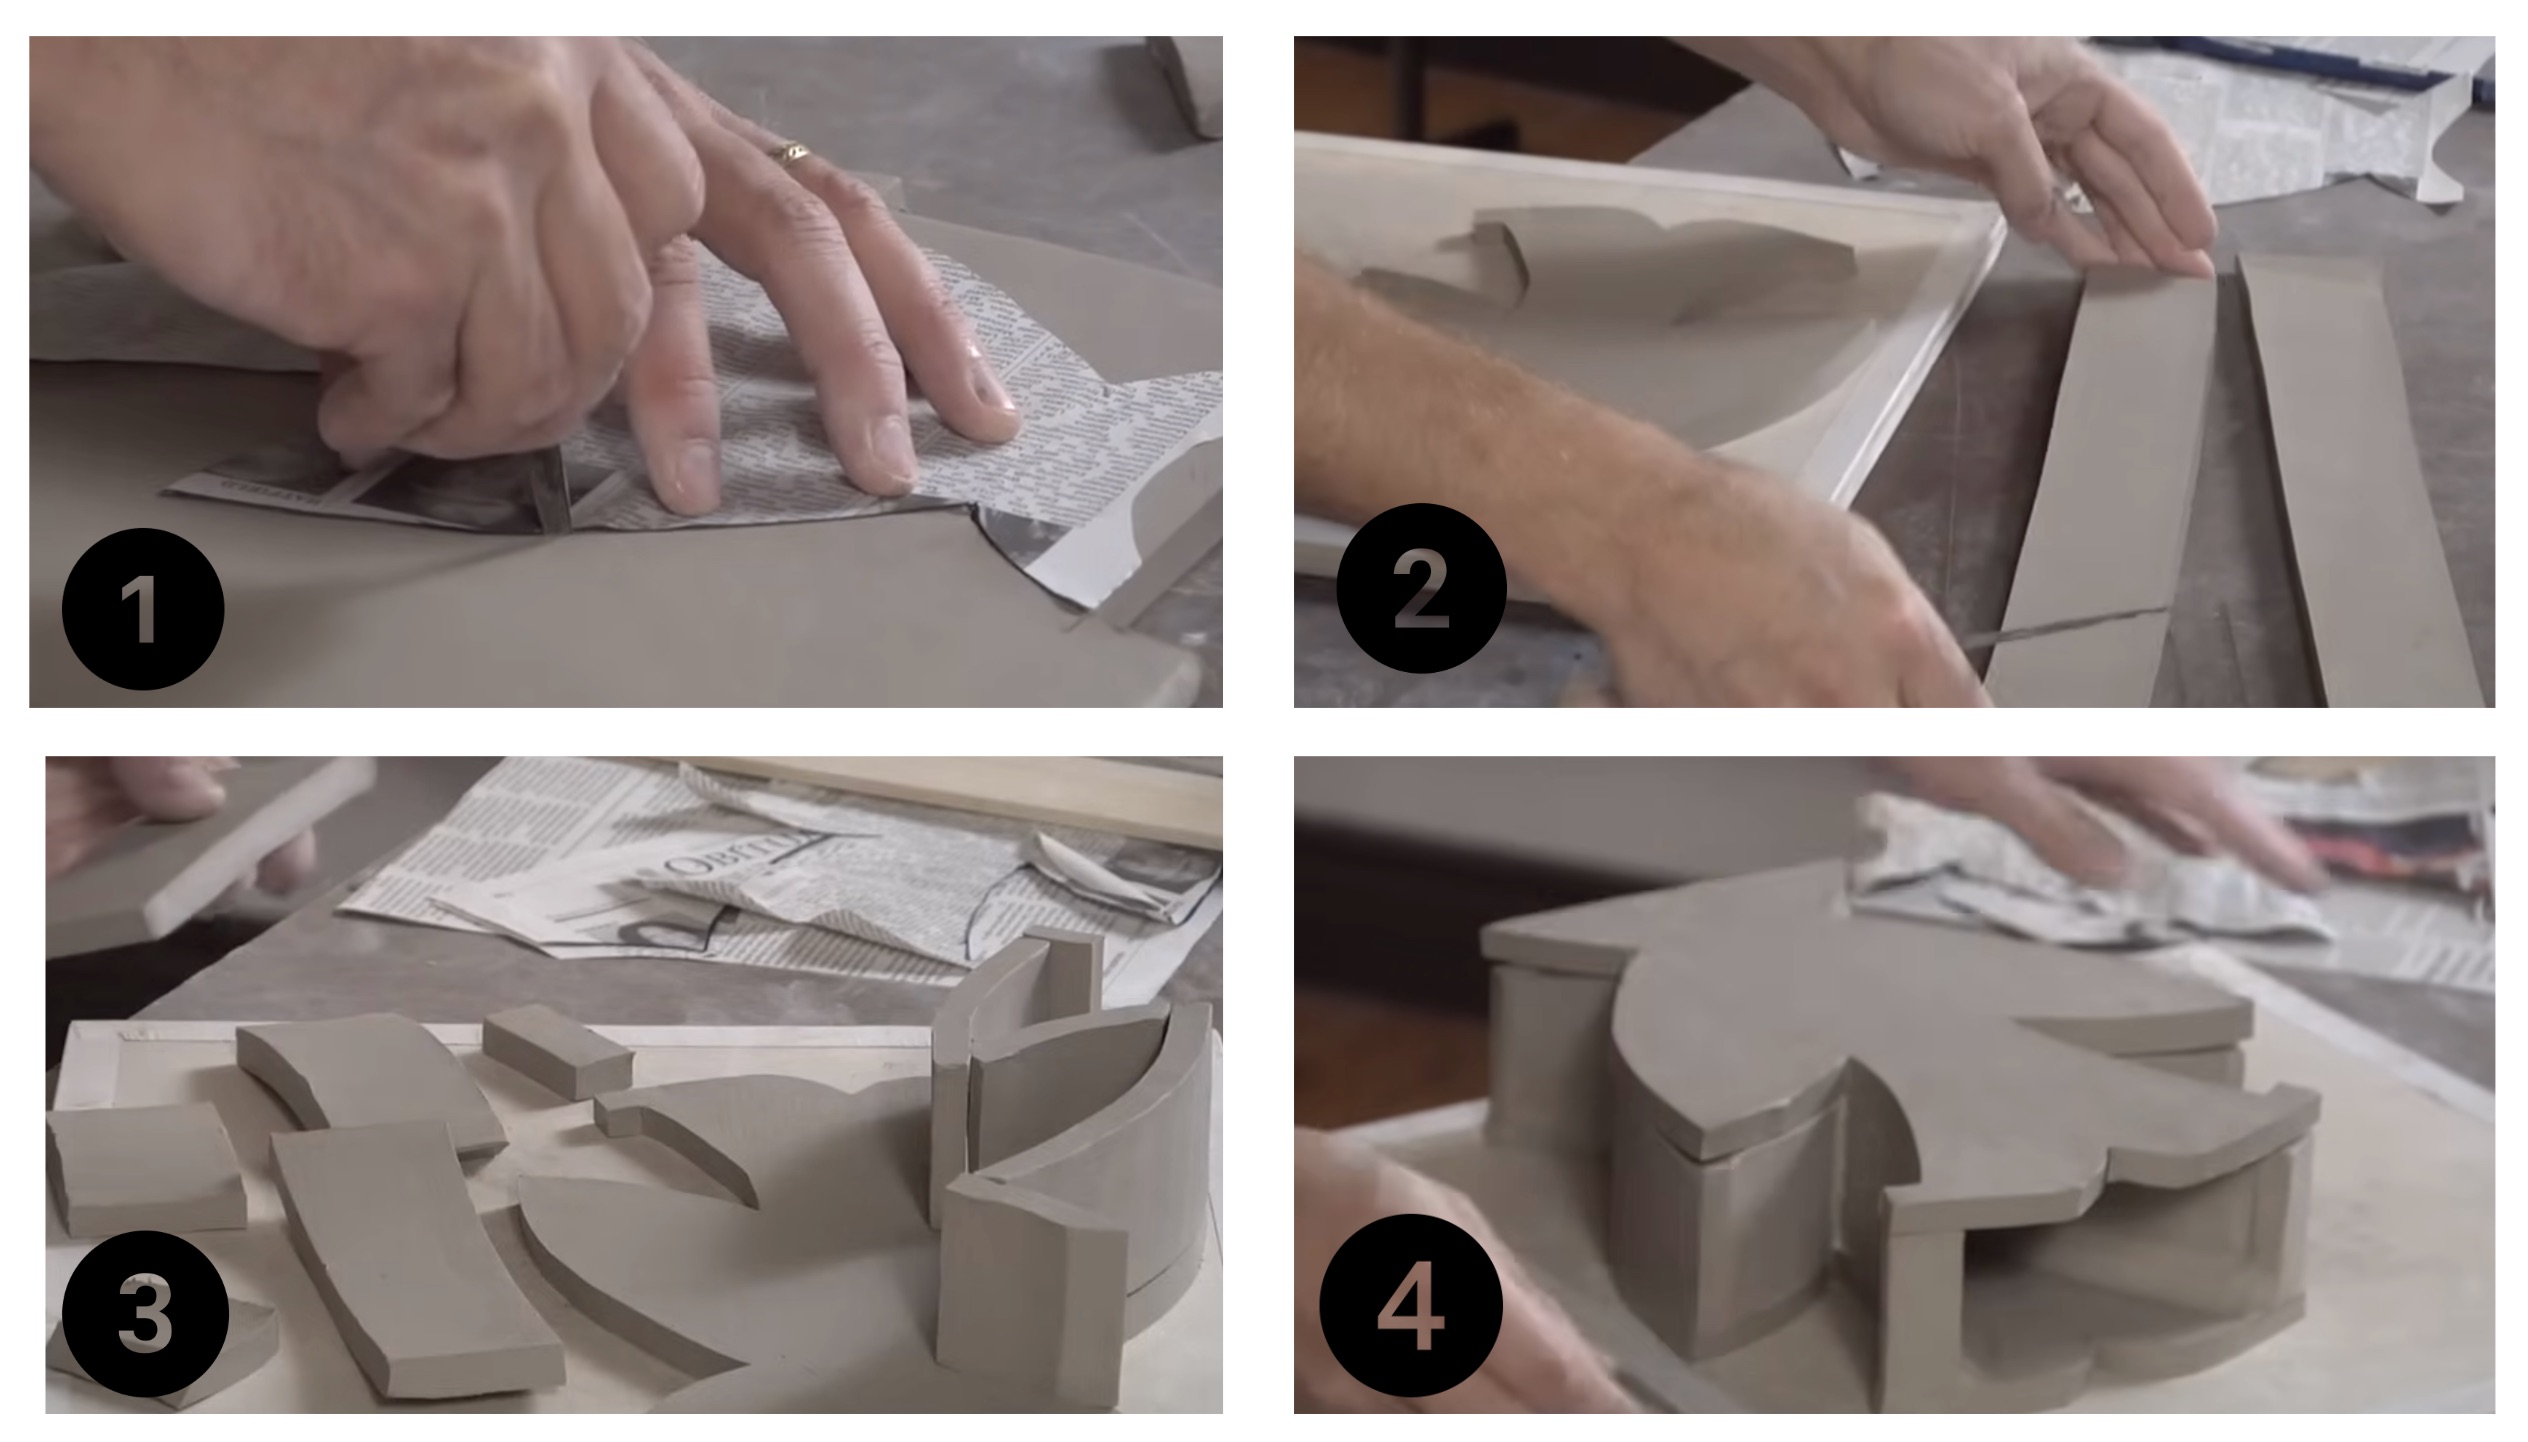
Roll out slabs using the slab roller, or work in sections if using a rolling pin. Place the paper template on top of the clay and draw along the lines. Remove the paper and cut the first piece. Use the same template to cut out the same shape. Use a thick 2-3 inch wide strip to cut two side pieces and one for the bottom of the vase. Once leather hard, score, slip, stick and smooth the slab and clean all sides with a sponge.
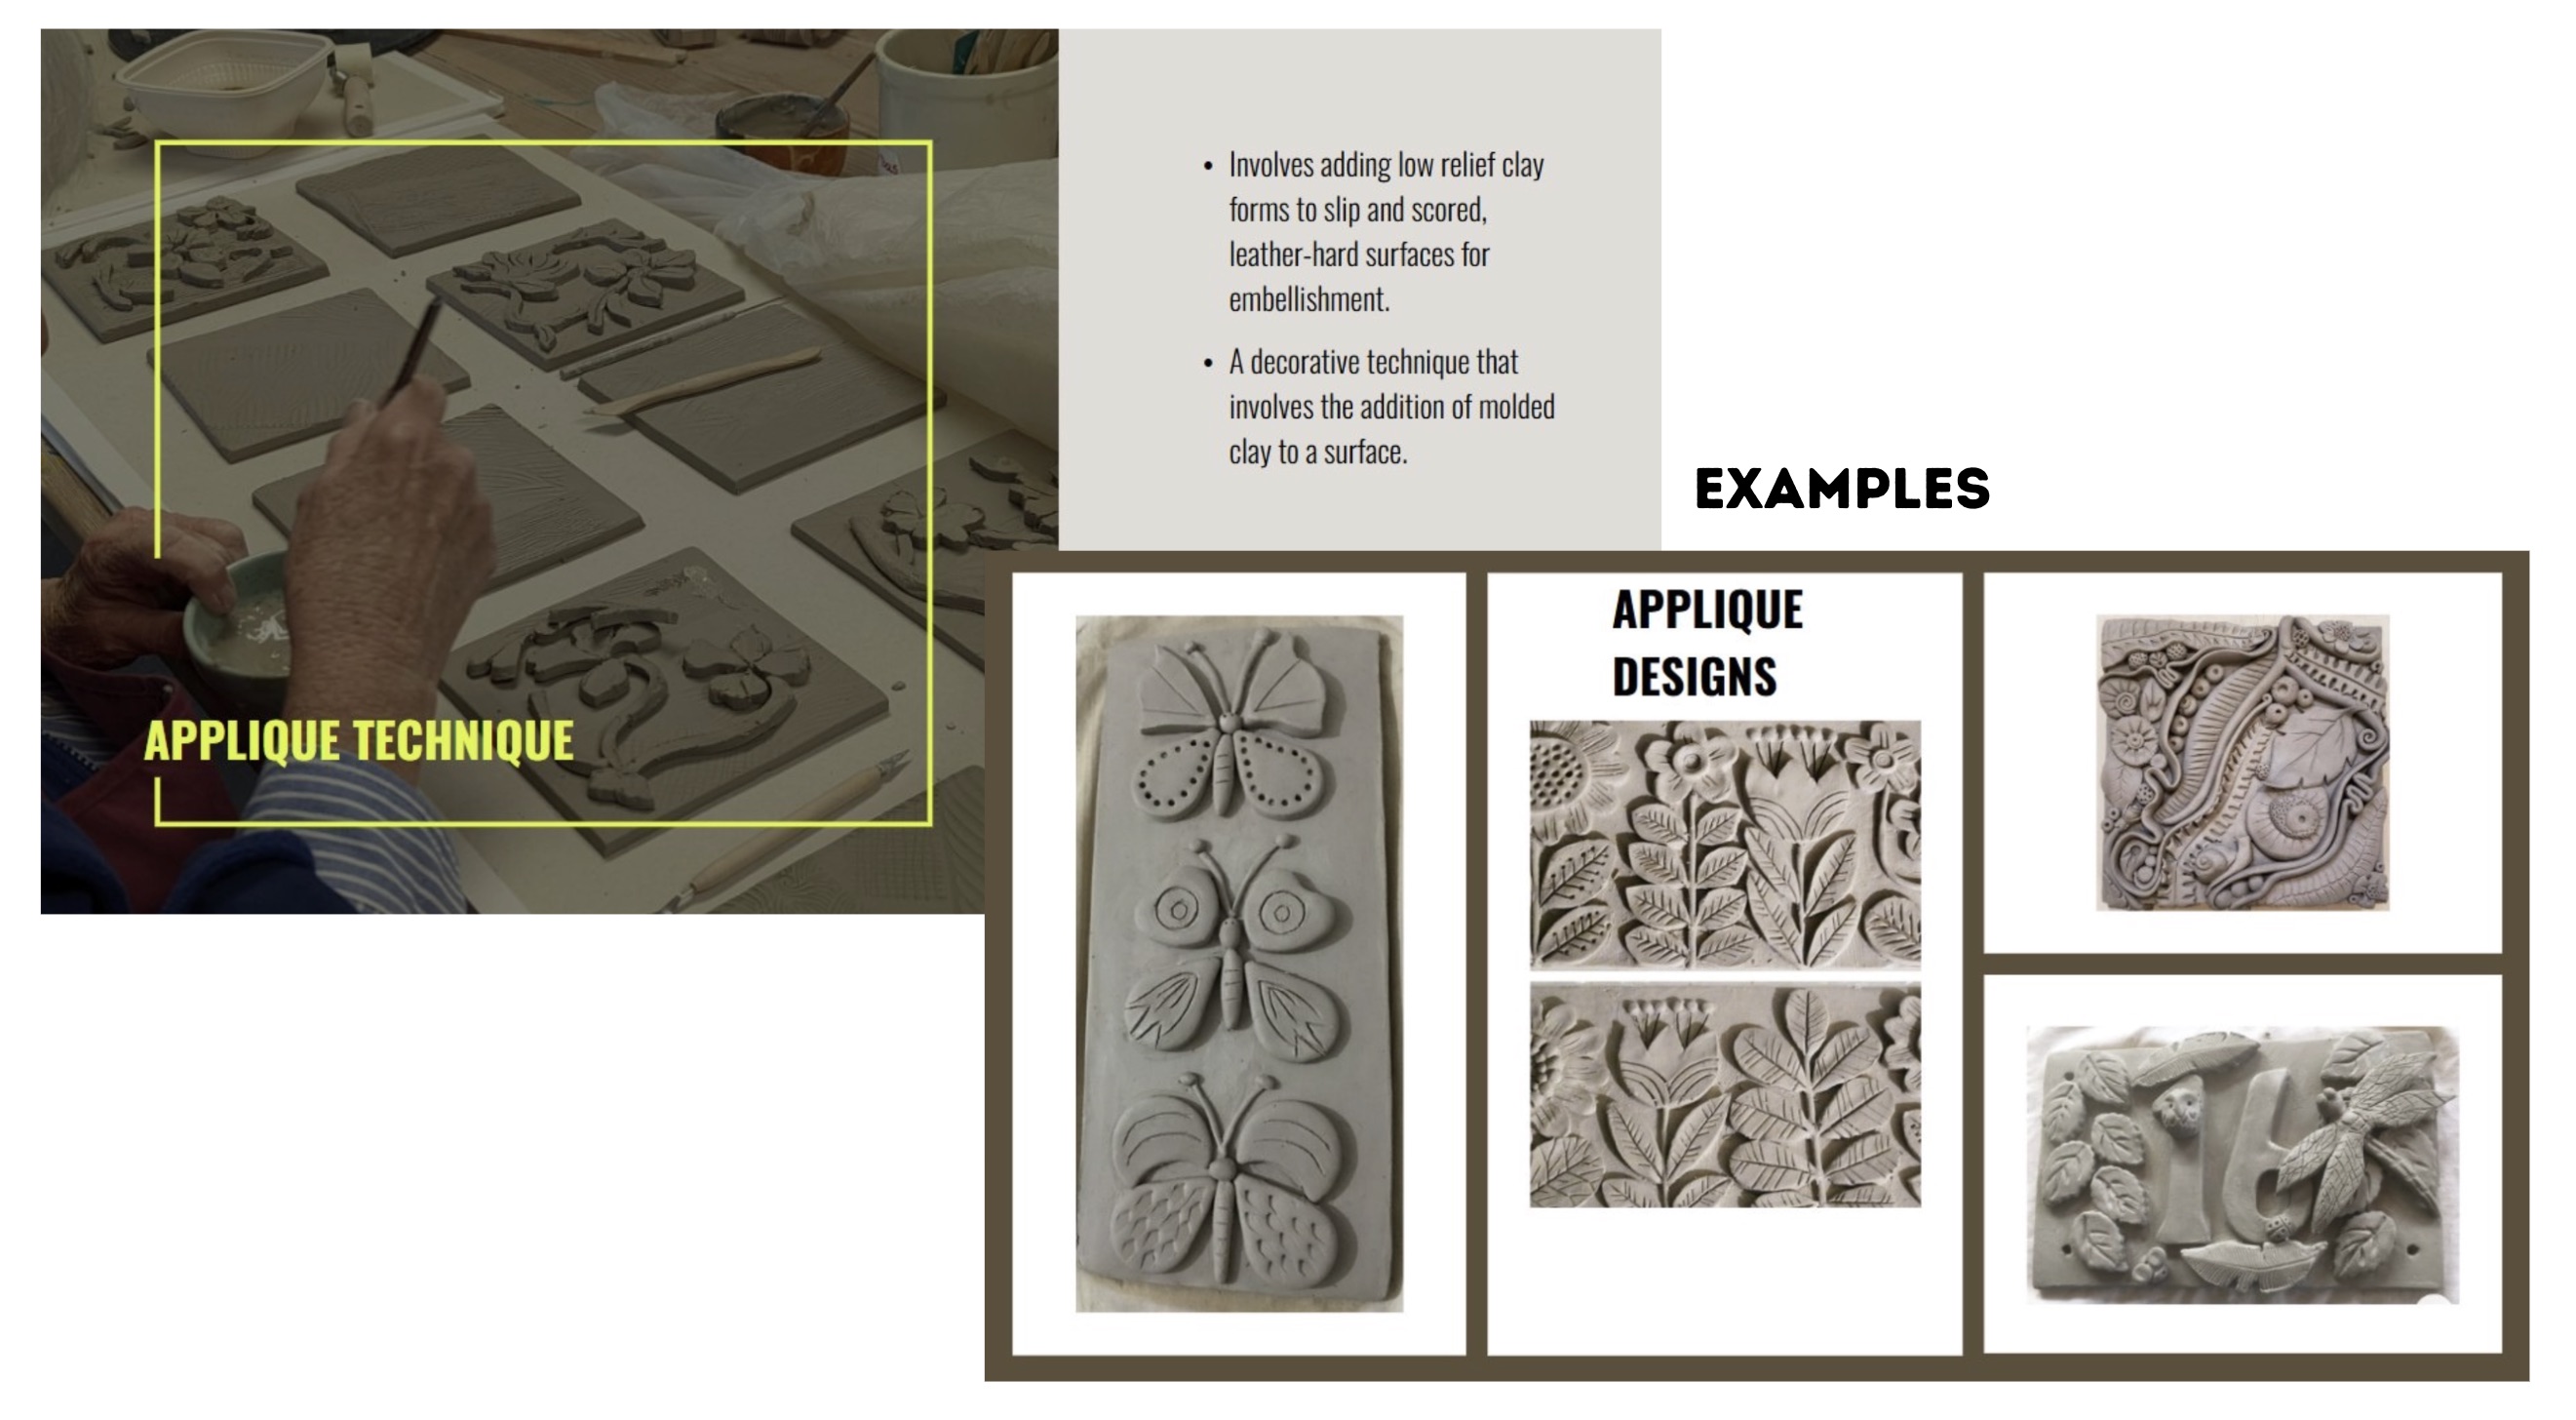
Applique and Additional Detailing
Cut out your pieces that will be added to the surface of your vase. Make sure to score, slip, stick and smooth every piece that you attach. Use a sponge to smooth and clean up the surface once you have finished. Add any texture or additional details. After drying and bisque firing, glaze the surface for final firing.
Step-by-Step Instructions
Step 1
Brainstorm and research: draw out a plan for what you would like to build in your sketchbook--come up with 5 different silhouettes and draw out the applique designs that will be applied to the surface of your vase. Select your favorite design.
Step 2
Create a paper template by folding a piece of paper in half, draw the outside edge of your design along one side. Cut along the line and open to reveal a symmetrical template. We will use this to lay on top of your slabs to cut out the front and back pieces of your vase.
Step 3
Roll out slabs using the slab roller, or work in sections if using a rolling pin. Place the paper template on top of the clay and draw along the lines. Remove the paper and cut the first piece. Use the same template to cut out the same shape. Use a thick 2-3 inch wide strip to cut two side pieces and one for the bottom of the vase. Once leather hard, score, slip, stick and smooth the slab and clean all sides with a sponge.
Step 4
Cut out your pieces that will be added to the surface of your vase. Make sure to score, slip, stick and smooth every piece that you attach. Use a sponge to smooth and clean up the surface once you have finished. Add any texture or additional details. After drying and bisque firing, glaze the surface for final firing.

