The Advantages of Using Smaller Kilns in Production
As a manufacturer of quality electric kilns, we have an obvious bias on the issue of
production kilns. Many ceramic studios have traditionally favored large shuttle or front loading
kilns because of their greater capacities and supposed economies of scale. Depending
on the nature of your production work, we believe there is an excellent case for numerous
smaller electric kilns, especially when one considers their flexibility, limited risk, faster
turnaround, ease and cost of repair, and greater control. Here are fifteen benefits:
FLEXIBILITY
- Firing smaller batches. Having the option to run small batches is very handy for testing,touch-ups, order add-ons, or just small jobs like trim. These firings are not economically feasible in a larger kiln.
- Firing diverse batches. Often you will find it necessary to fire glazes with different firing temperatures, or two glazes that tend to migrate. With smaller kilns, you can fire in two separate kilns and still have all the work ready on time.
- Ease of scheduling. With multiple kilns, you gain so much more freedom of scheduling.You can load them all at once, as you would a larger kiln, and fire them all at the same time, or you can stagger the loading, unloading and firing to fit your schedule and manpower.
LIMITED RISK
- Less risk with smaller loads. Every now and them a firing error or kiln malfunction does happen. Wouldn’t it be nice if you lost only one small load instead of an entire large load?
- Downtime loss minimized. Downtime for general maintenance and repair is part of operating any kiln. But if you have ten small kilns equal in capacity of one large one, when one is down you lose 10% of your capacity, not 100%. According to Murphy’s Law, a kiln will only break down when your reputation is on the line.
FASTER TURNAROUND
- Faster firing cycles. Smaller kilns have the ability to heat up and cool down faster than large kilns. The ability to turn a kiln within a 24 hour period can sometimes double your production level.
- No waiting to fill kiln. With a larger kiln, you can often find yourself waiting to fire the kiln because you do not have a full load. You can usually fill a small kiln, and if it’s really important you can afford to fire a partial load so you and your customer both win.
- Affordable equipment and installation. The cost difference between a Skutt production kiln and a large shuttle or front loading kiln is enormous.
- Availability. Larger kilns sometimes take up to six months to order, manufacture and receive, but Skutt kilns are available within a few weeks from the manufacturer, or often immediately from distributor inventory.
- Easy to expand capacity. Need more firing capacity? Simply add another kiln. Want of bid on a big project. Go ahead. You can quickly increase your firing capacity with more kilns.
- More space flexibility. Place your kilns where you can fit them-in a line along a wall, in different rooms- you do not need to plan your studio around one large kiln.
EASE AND COST OF REPAIR
- Easy to work on. Skutt kilns are specifically designed to allow the handy user to replace elements and firebricks. Skutt can walk you through most repairs and will ship parts within 24 hours.
CONTROL
- Firing ventilation control. The Skutt EnviroVent provides automatic kiln ventilation, which eliminates the need for lid propping and allows loads of mixed glaze colors. In addition, all fumes are exhausted from your work room.
- Temperature uniformity. Skutt’s multi-side design and balanced placement of elements helps eliminate the hot and cold spots so common is square kilns.
- Precise heat control. The heating or cooling rate is often vital to development of a piece. The smaller Firing chamber, combined with Skutt KilnMaster electronic controls, give much finer control than is possible wit a large kiln.

Preparing Your Kiln
It is always good to do a few things to ensure a successful year of firing.
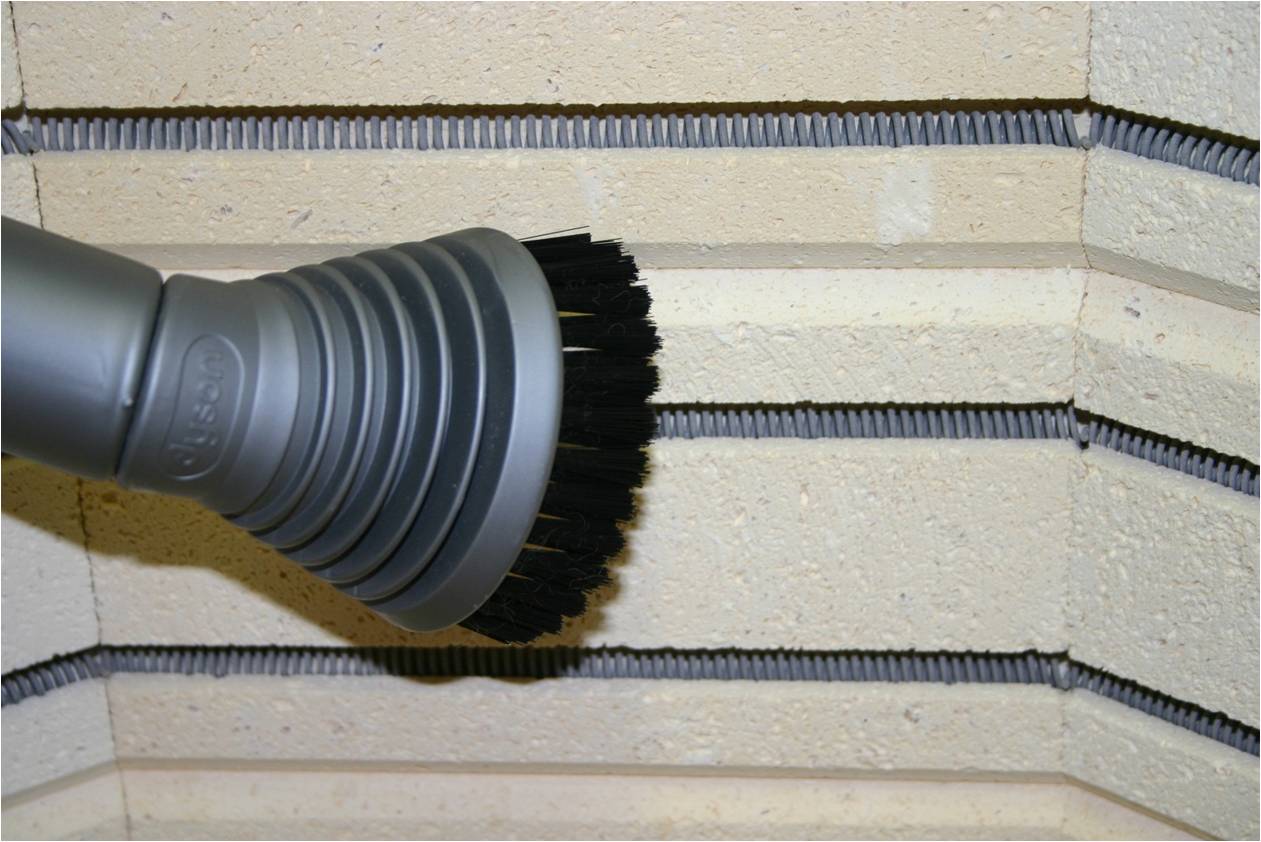
Vacuum Out The Kiln
Throughout a year of firing your kiln gets loaded with brick dust and bits of clay and glaze. All this debris sitting on your elements can cause them to burn out early and cost you money you could have saved with just a little housekeeping.
Quick Safety Inspection
It’s always a good idea to take a little walk around the kiln and look for obvious safety hazards like loose screws, flammable material around the kiln, power cords touching the kiln and damaged or missing hardware.
If you move into a new studio you will want to make sure that there is no sprinkler right above the kiln. If there is, you will want to notify your landlord to verify that it was installed properly with the knowledge that a kiln would be firing directly under it. Sprinkler heads can be fitted with high temperature fuses for these types of installations. If they are not fitted with the correct fuse, you could set them off.
Test Fire The Kiln
Wouldn’t it be great to find out if something was wrong with the kiln BEFORE it was too late to do something about it? Load the kiln with shelves just like you were loading it with ware, but without the ware. Place an 04 Self Supporting Witness Cone (available at any ceramic supply store) on each shelf 2 inches from the kiln wall. Be sure to place one next to the thermocouple also 2″ from the thermocouple and kiln wall.
Turn on your downdraft vent if you have one and make sure any additional room vent you have is operating. Program a Medium Speed 04 ConeFire program, press review to make sure you entered the program correctly and Press Start. Listen to the control box. You should here the relays clicking on and off and see the temperature on the display begin to rise. If you hear any strange noises or smell smoke, press stop and call a technician. (Note: Brand new kilns or kilns with freshly replaced elements will smoke a little from residual oil on the elements. This is normal and the smoke should clear after a few minutes).
After the kiln is done firing the display will flash CPLT (complete), alternately with the current temperature of the kiln, and the amount of time the kiln took to fire. Write this time down. It should be fairly close to 7.5 hours. If it is taking 8.5 hours or longer, you may need to call a technician to diagnose potential problems. If you come back to the kiln and there is an error message, write down the message and contact your technician.
Once the kiln has cooled to room temperature open the lid, remove your shelves, and inspect your cones. They should all be bent anywhere from 20 degrees to the tip just hanging above the shelf. If the cone next to the thermocouple is touching the shelf, it is a good indication that you need to change your thermocouple. If a cone does not bend at all , it may indicate the element or relay in that section is beginning to wear.
Loading the Kiln
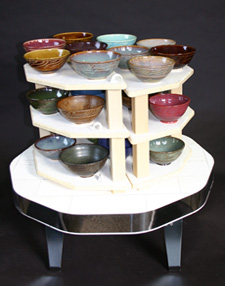
How you load your kiln can play a big part in the success of the firing. We have a great video which describes in detail all the things you need to consider when loading your kiln. Watch the video and let us know if you have any questions. Here is a list of some of the basics:
- Never load wet ware.
- Maintain proper clearances: 2″ from the lid, 1 inch from the kiln walls, at least 1″ from the bottom, and 2″ from the thermocouple.
- Spread the mass uniformly throughout the kiln.
- If certain areas of the kiln tend to fire cooler, load them less densely on future firings.
- Make sure you always have at least one element radiating between the shelves.
- When using half-shelves, leave a 1/4″ gap between them if they are side by side and stagger them whenever possible (see image).
- Use Self-Supporting Pyrometric Cones to monitor the results of the firing.
Programming ConeFire Mode
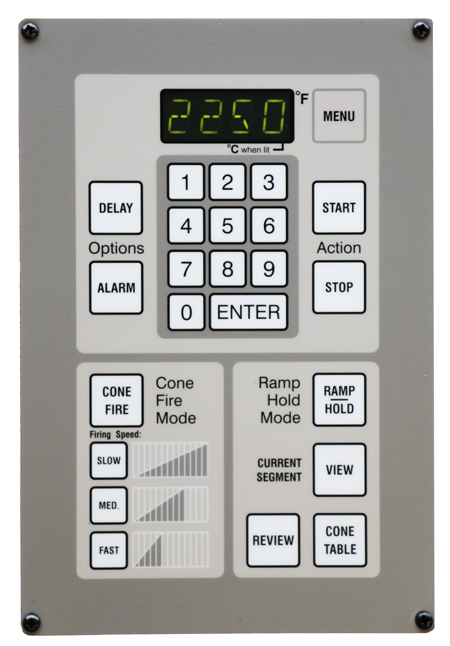
Your controller has two firing modes, ConeFire and Ramp/Hold. ConeFire is by far the easiest and most common firing mode used in Ceramics. Ramp/Hold is used primarily to fire specialty glazes or to fire non-ceramic pieces like glass or metal clay. Programming a kiln may seem intimidating, but once you do it a few times you will find that it is really quite easy.
We put together a video which takes you step by step through programming your kiln. If after watching the video you still have questions feel free to call us and we would be happy to walk you through your first firing.
Unloading the Kiln
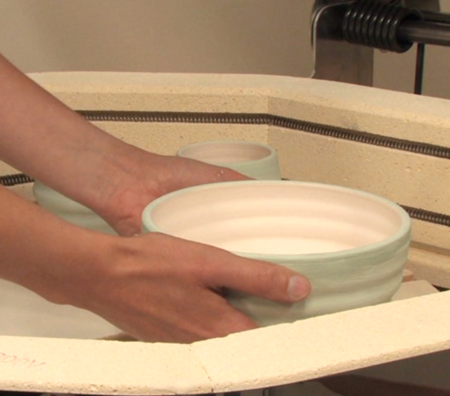
The number one rule in unloading your kiln is BE PATIENT. No matter how long you have been doing ceramics, opening the kiln after a glaze firing is always exciting. Too often people will get a little impatient and try to open it too soon. Wait until the kiln has cooled below 125°F before opening your lid. If you open it too soon, the glaze could craze and will no longer be food safe since bacteria can grow in the small cracks.
As you unload the kiln, make notes in your firing log regarding how the cones looked, how the kiln was loaded, how the ware looked and how long the firing took. This will help you make adjustments on your next firing.

Programming Ramp/Hold Mode
Your controller has two firing modes, ConeFire and Ramp/Hold. ConeFire is by far the easiest and most common firing mode used in Ceramics. Ramp/Hold is used primarily to fire specialty glazes or to fire non-ceramic pieces like glass or metal clay. Programming a kiln may seem intimidating, but once you do it a few times you will find that it is really quite easy.
We put together a video which takes you step by step through programming your kiln. If after watching the video you still have questions feel free to call us and we would be happy to walk you through your first firing.
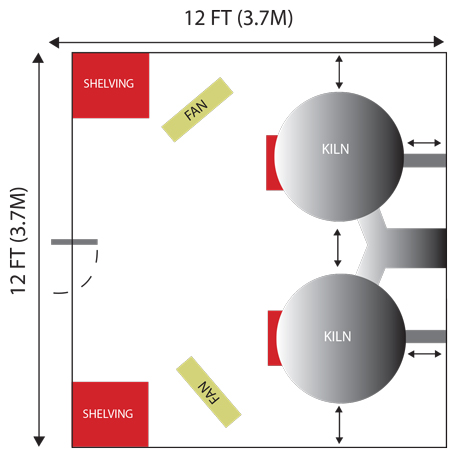
Safety
Kilns are used safely in 10’s of thousands of homes and schools all over the world everyday. With a little bit of common sense and good understanding of your kiln you can easily avoid any problems. Be sure to read your manual cover to cover before operating your kiln and pay special attention to the section in the beginning on safety. Click the links to access a copy of the manual and be sure to also watch the video on setting up your kiln room to create a safe and efficient studio.

