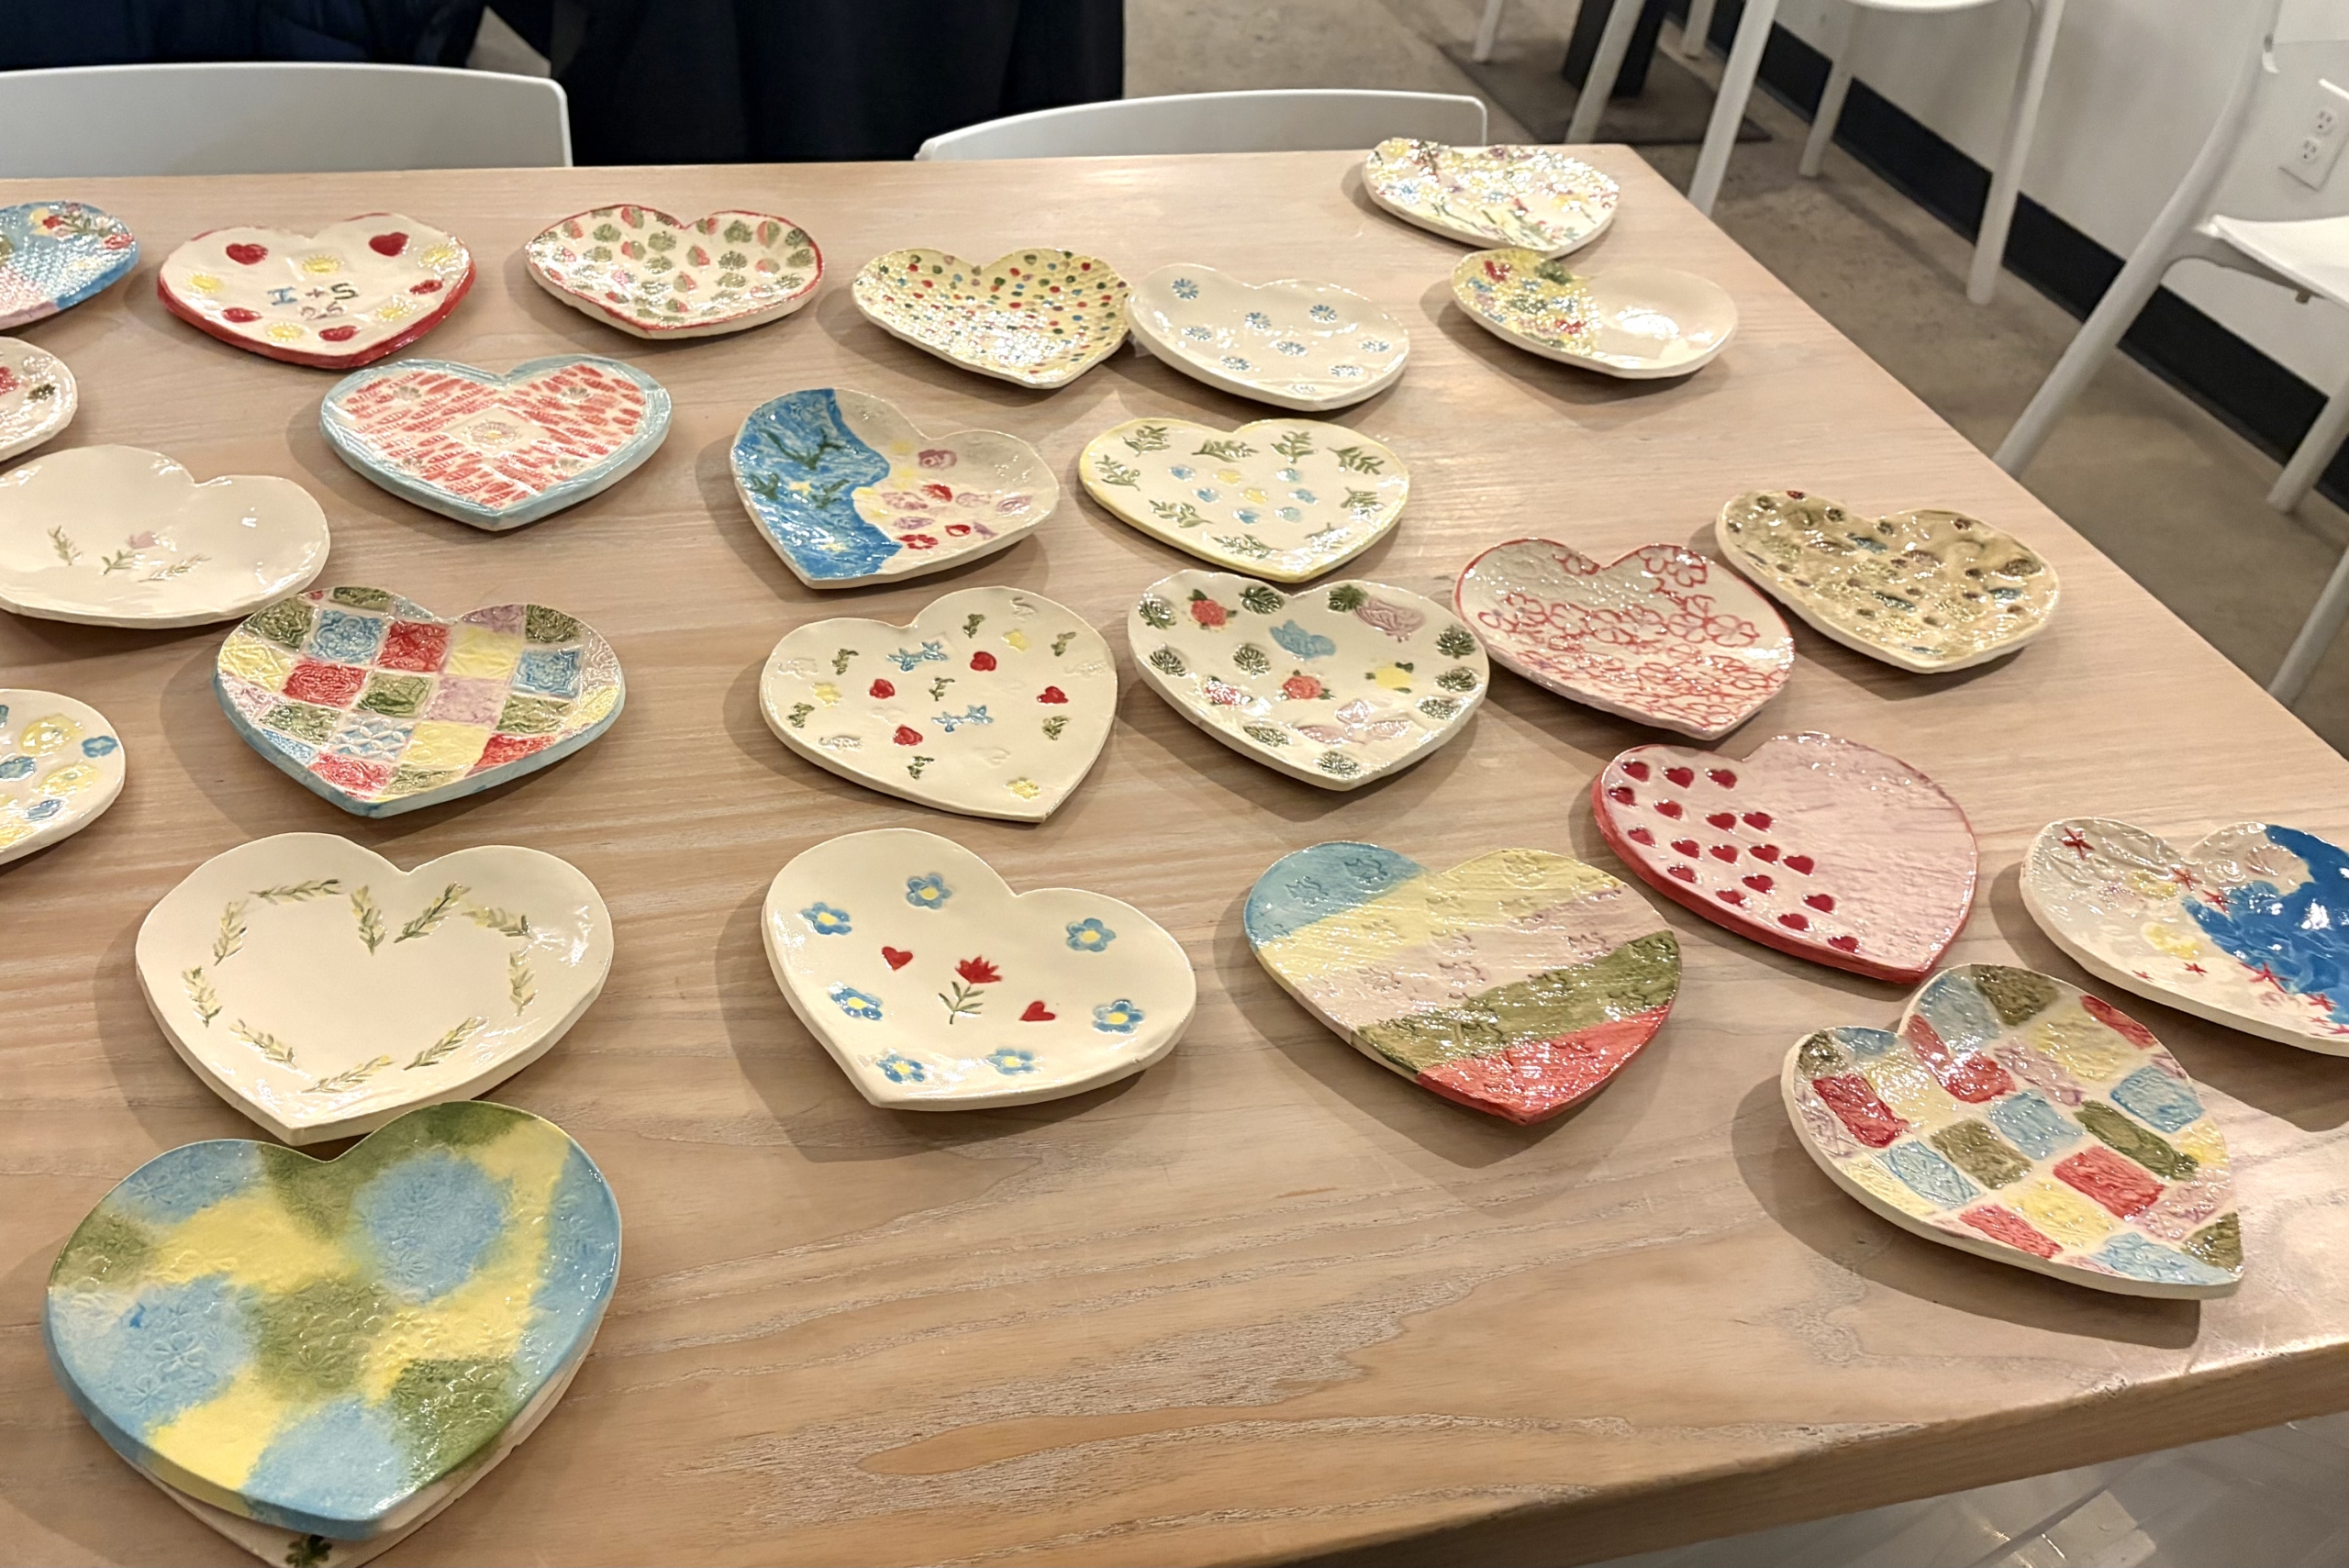
Decorative hearts
Meet The Teacher: Elysa Spetgang
I’m a passionate educator who believes learning should be engaging, supportive, and meaningful for every student. I enjoy creating a classroom where curiosity, creativity, and respect help everyone grow together. My goal is to help students build confidence, think critically, and discover their potential.
Project Description
Students designed and created their own heart-shaped ceramic dishes using clay. They explored texture by stamping patterns and adding carved designs, then painted their pieces with colorful glazes. This project helps students practice creativity, craftsmanship, and basic ceramic techniques. 🎨🫶
Materials
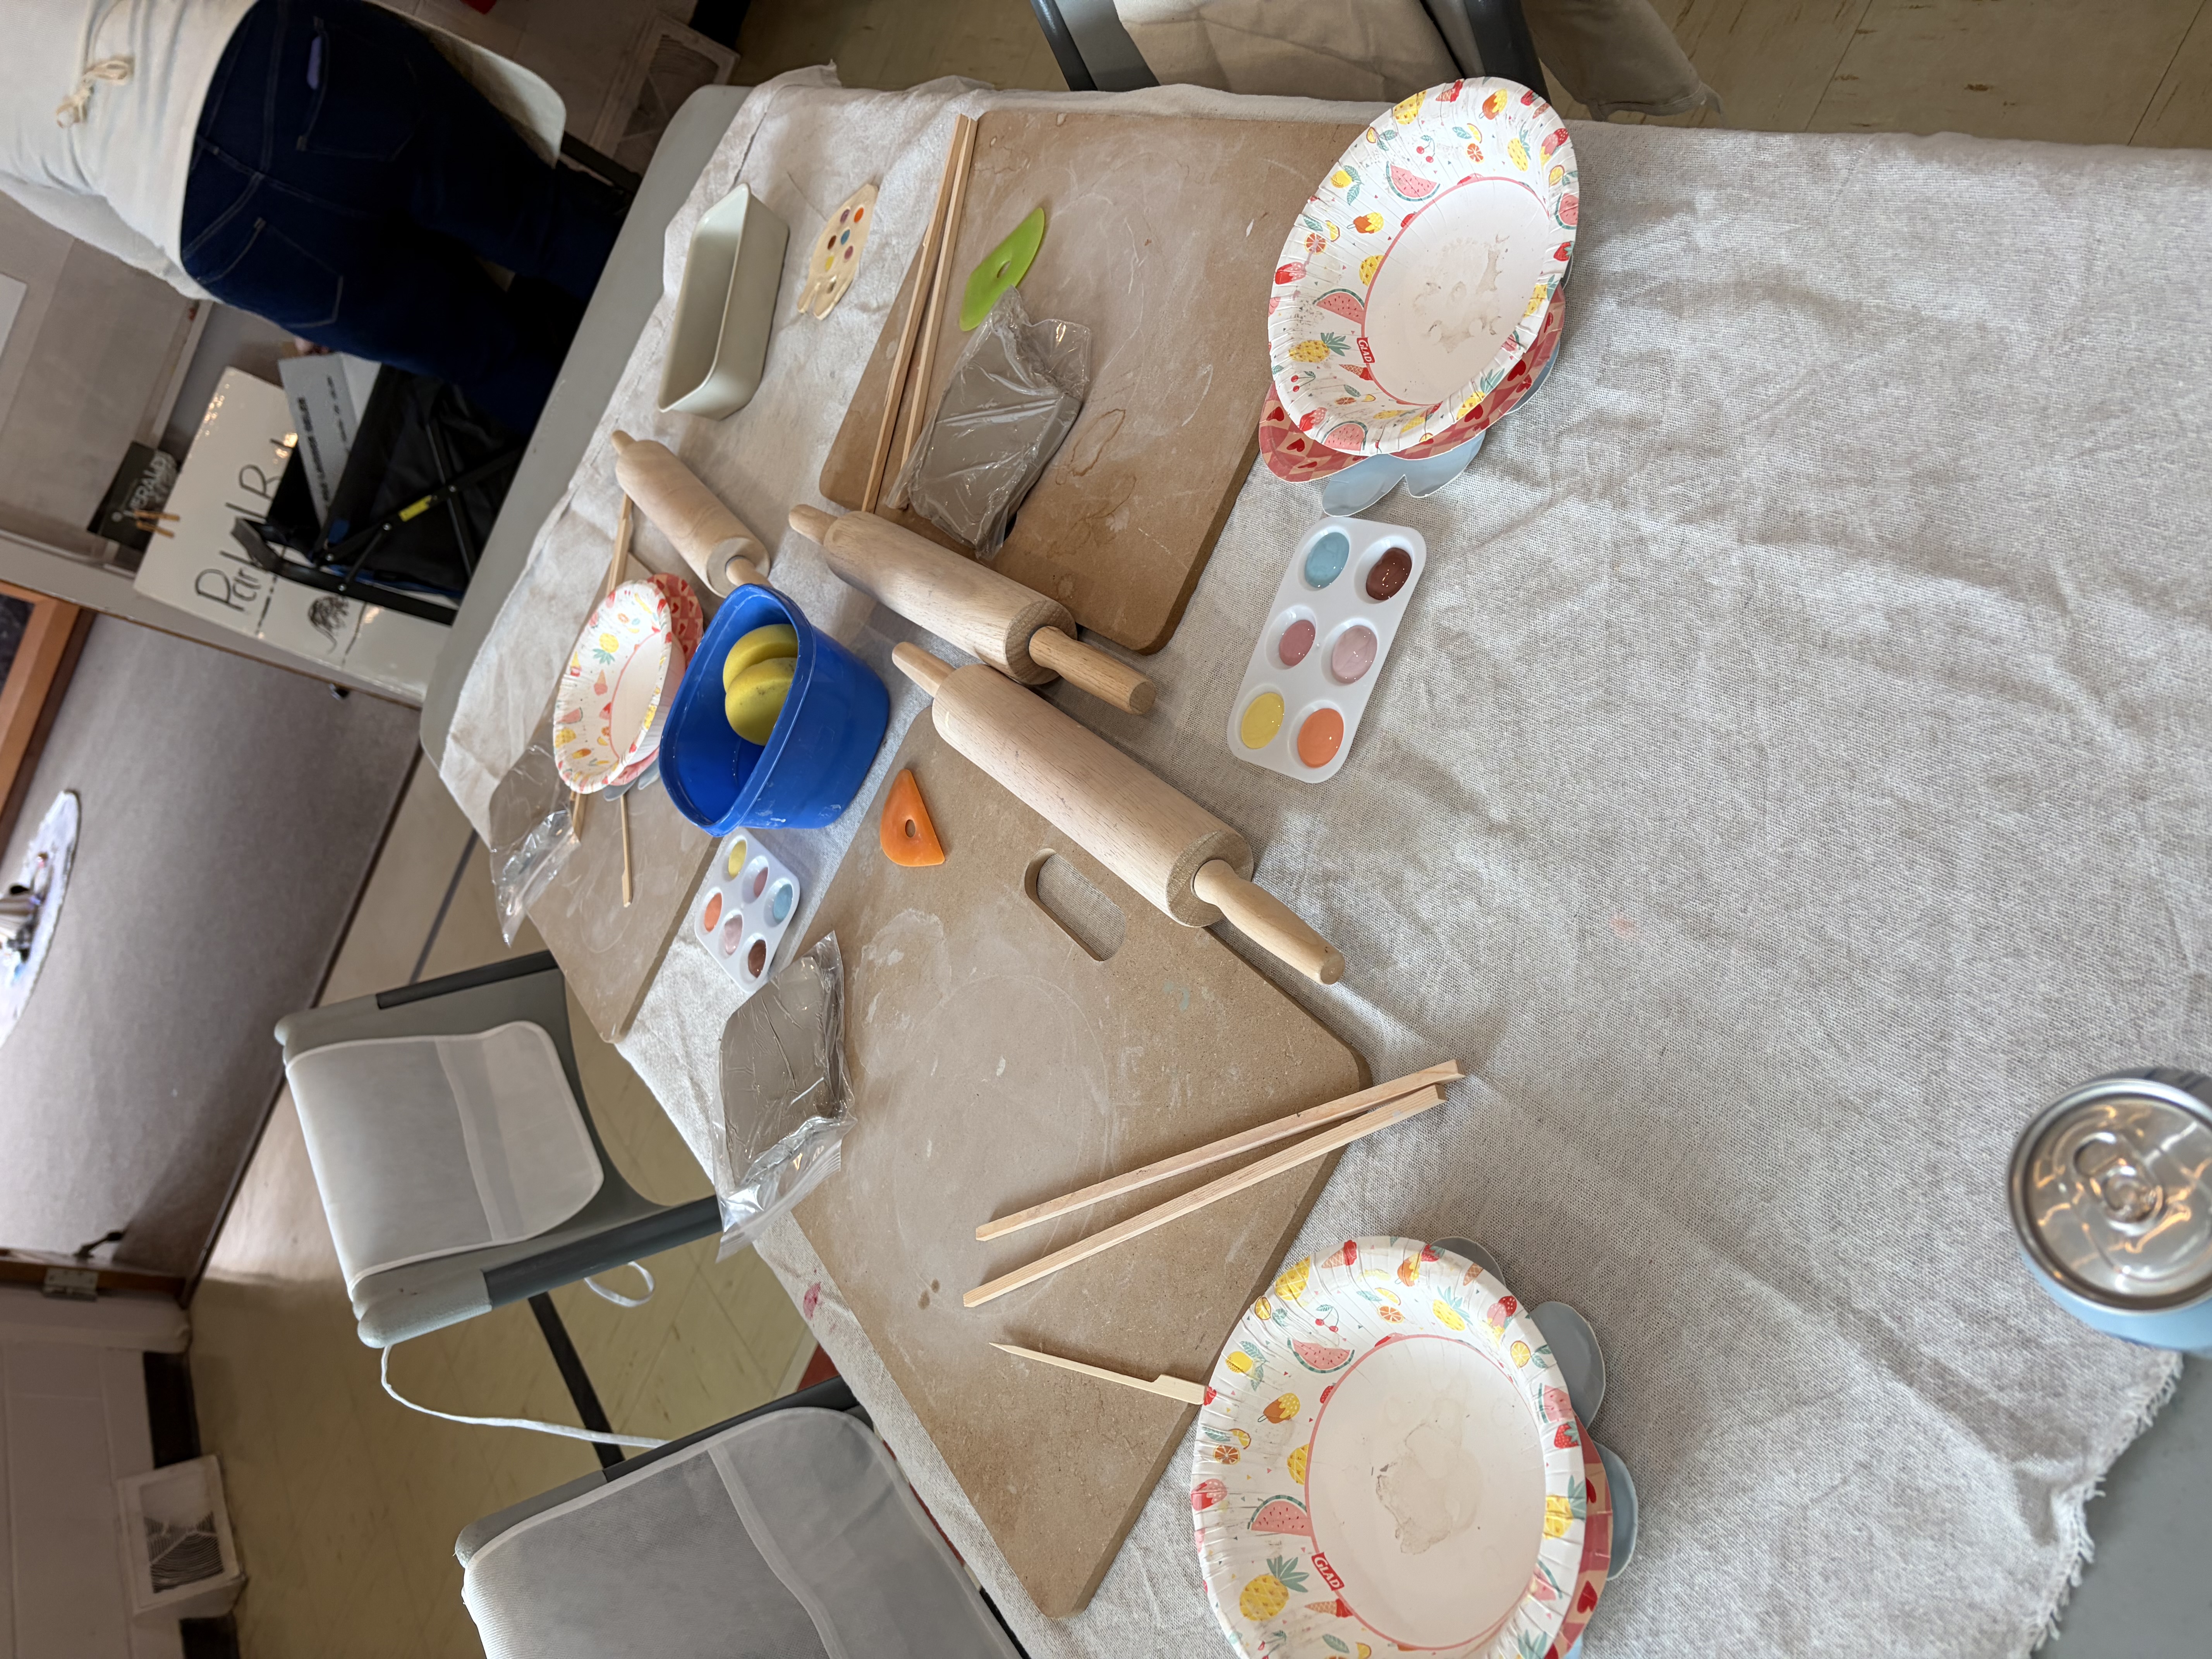
- Clay
- Wonder glaze
- Wareboard
- Paper heart plate
- Pin tool
- Clear glaze
- Wire tool
- Wooden rolling pin
Grade Level
Elementary School
Difficulty
Easy
Student Hands-On Time
45-60
Teacher Prep Time
10
Project Cost / Cost Per Student
20
National Core Arts Standards - Visual Arts
- Creating - Generate and conceptualize artistic ideas.
- Creating - Organize and develop artistic work.
- Creating - Conceiving and developing new artistic ideas and work.
- Presenting - Select, analyze, and interpret works for presentation.
- Presenting - Develop skills for artistic presentation and exhibition.
- Responding - Perceive and analyze artistic work.
- Responding - Interpret intent and meaning in artwork.
- Responding - Evaluate and critique based on aesthetic and technical qualities.
- Connecting - Relate artistic ideas to historical, cultural, and social contexts.
- Connecting - Connect personal experiences with artmaking and meaning.
21st Century Skills
- Critical Thinking & Problem-Solving
- Creativity & Innovation
- Communication
- Collaboration
- Flexibility & Adaptability
- Initiative & Self-Direction
- Social & Cross-Cultural Skills
- Leadership & Responsibility
STEAM Education
- Arts
Differentiations and Accommodations
Differentiation
IEP
Accommodation
An IEP accommodation for this lesson could include providing extra time to complete the ceramic dish and offering step-by-step visual instructions or demonstrations. Students may also receive additional support with tools or simplified design options to help them successfully shape and decorate their clay piece. This ensures all students can participate and express their creativity at their own pace.
Learning Objectives: Knowledge
By the end of the lesson, students should understand the basic properties of clay and how it can be shaped and textured. They should know how to use simple ceramic techniques such as stamping, carving, and glazing to create decorative designs. Students should also understand how patterns and color can be used to enhance a functional ceramic piece. 🎨
Learning Objectives: Skills
By the end of the lesson, students will be able to shape and form clay into a functional dish, use tools to stamp or carve designs, and apply glaze carefully to decorate their work. They will also practice planning a pattern, controlling fine motor movements, and following steps in the ceramic-making process.
Learning Objectives: Attitudes/Values
By the end of the lesson, students will develop patience, creativity, and care for their work throughout the ceramic-making process. They will learn to appreciate their own artistic expression while respecting and valuing the unique designs created by their classmates. Students will also practice responsibility by using tools and materials safely and thoughtfully.
Formative Assessment
The teacher will observe students as they work with clay and tools, providing guidance and feedback to help improve their techniques and designs. Students will also be encouraged to reflect on their work, make adjustments, and share ideas with classmates. This ongoing feedback supports skill development and creative problem-solving throughout the project.
Summative Assessment
At the end of the project, students’ finished ceramic dishes will be evaluated based on their effort, creativity, use of texture or pattern, and ability to follow the ceramic-making process. Students may also reflect on their work by sharing what they learned and describing the choices they made in their design. This helps assess both their artistic understanding and their engagement in the project.
Reflection and Discussion
What textures or patterns did you choose for your dish, and why?
What part of the clay process was the easiest or most challenging for you?
How did adding color or glaze change the look of your piece?
What did you learn about working with clay that you might use in a future project?
Lesson Activities
Heart shaped trinket plate
Get creative with any age group for this hands on heart shaped trinket dish pottery workshop!
Step-by-Step Instructions
Step 1
Set up work stations for all the students!

Step 2
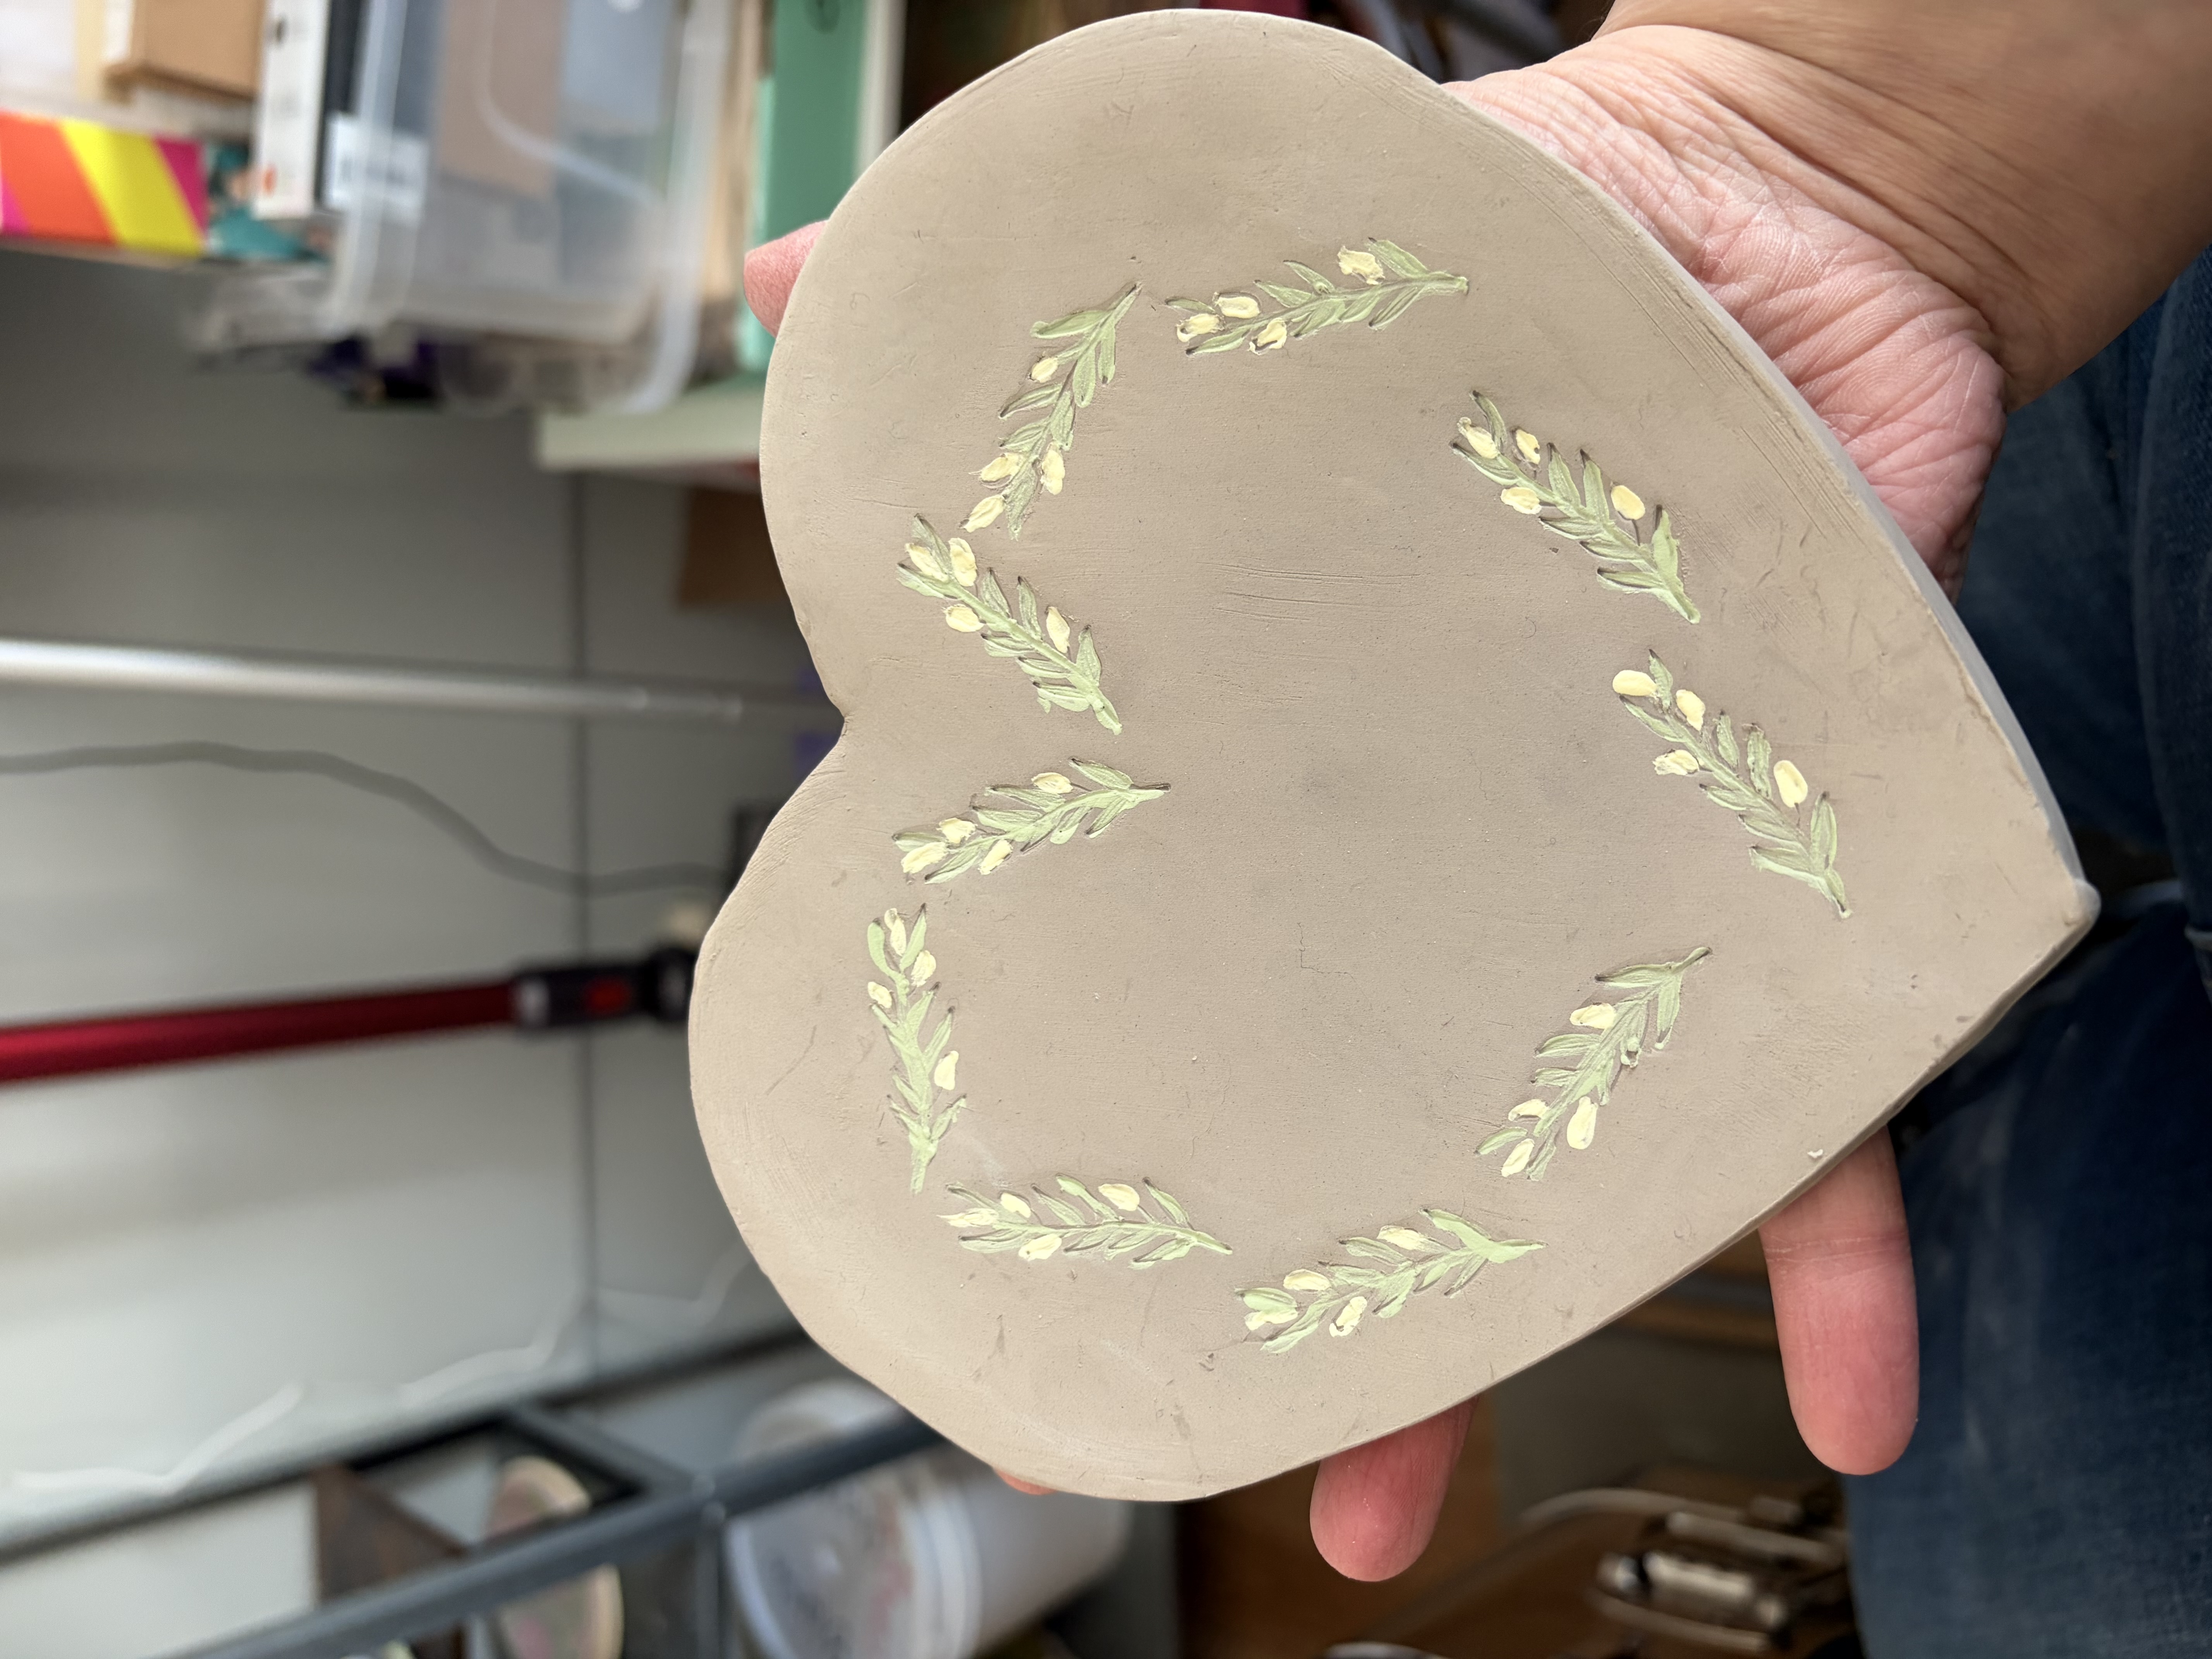
Roll out a slab and then trace the paper plate upside down with your pin tool
Step 3
Add any stamps, embossed textures and then paint with the wonder glaze!

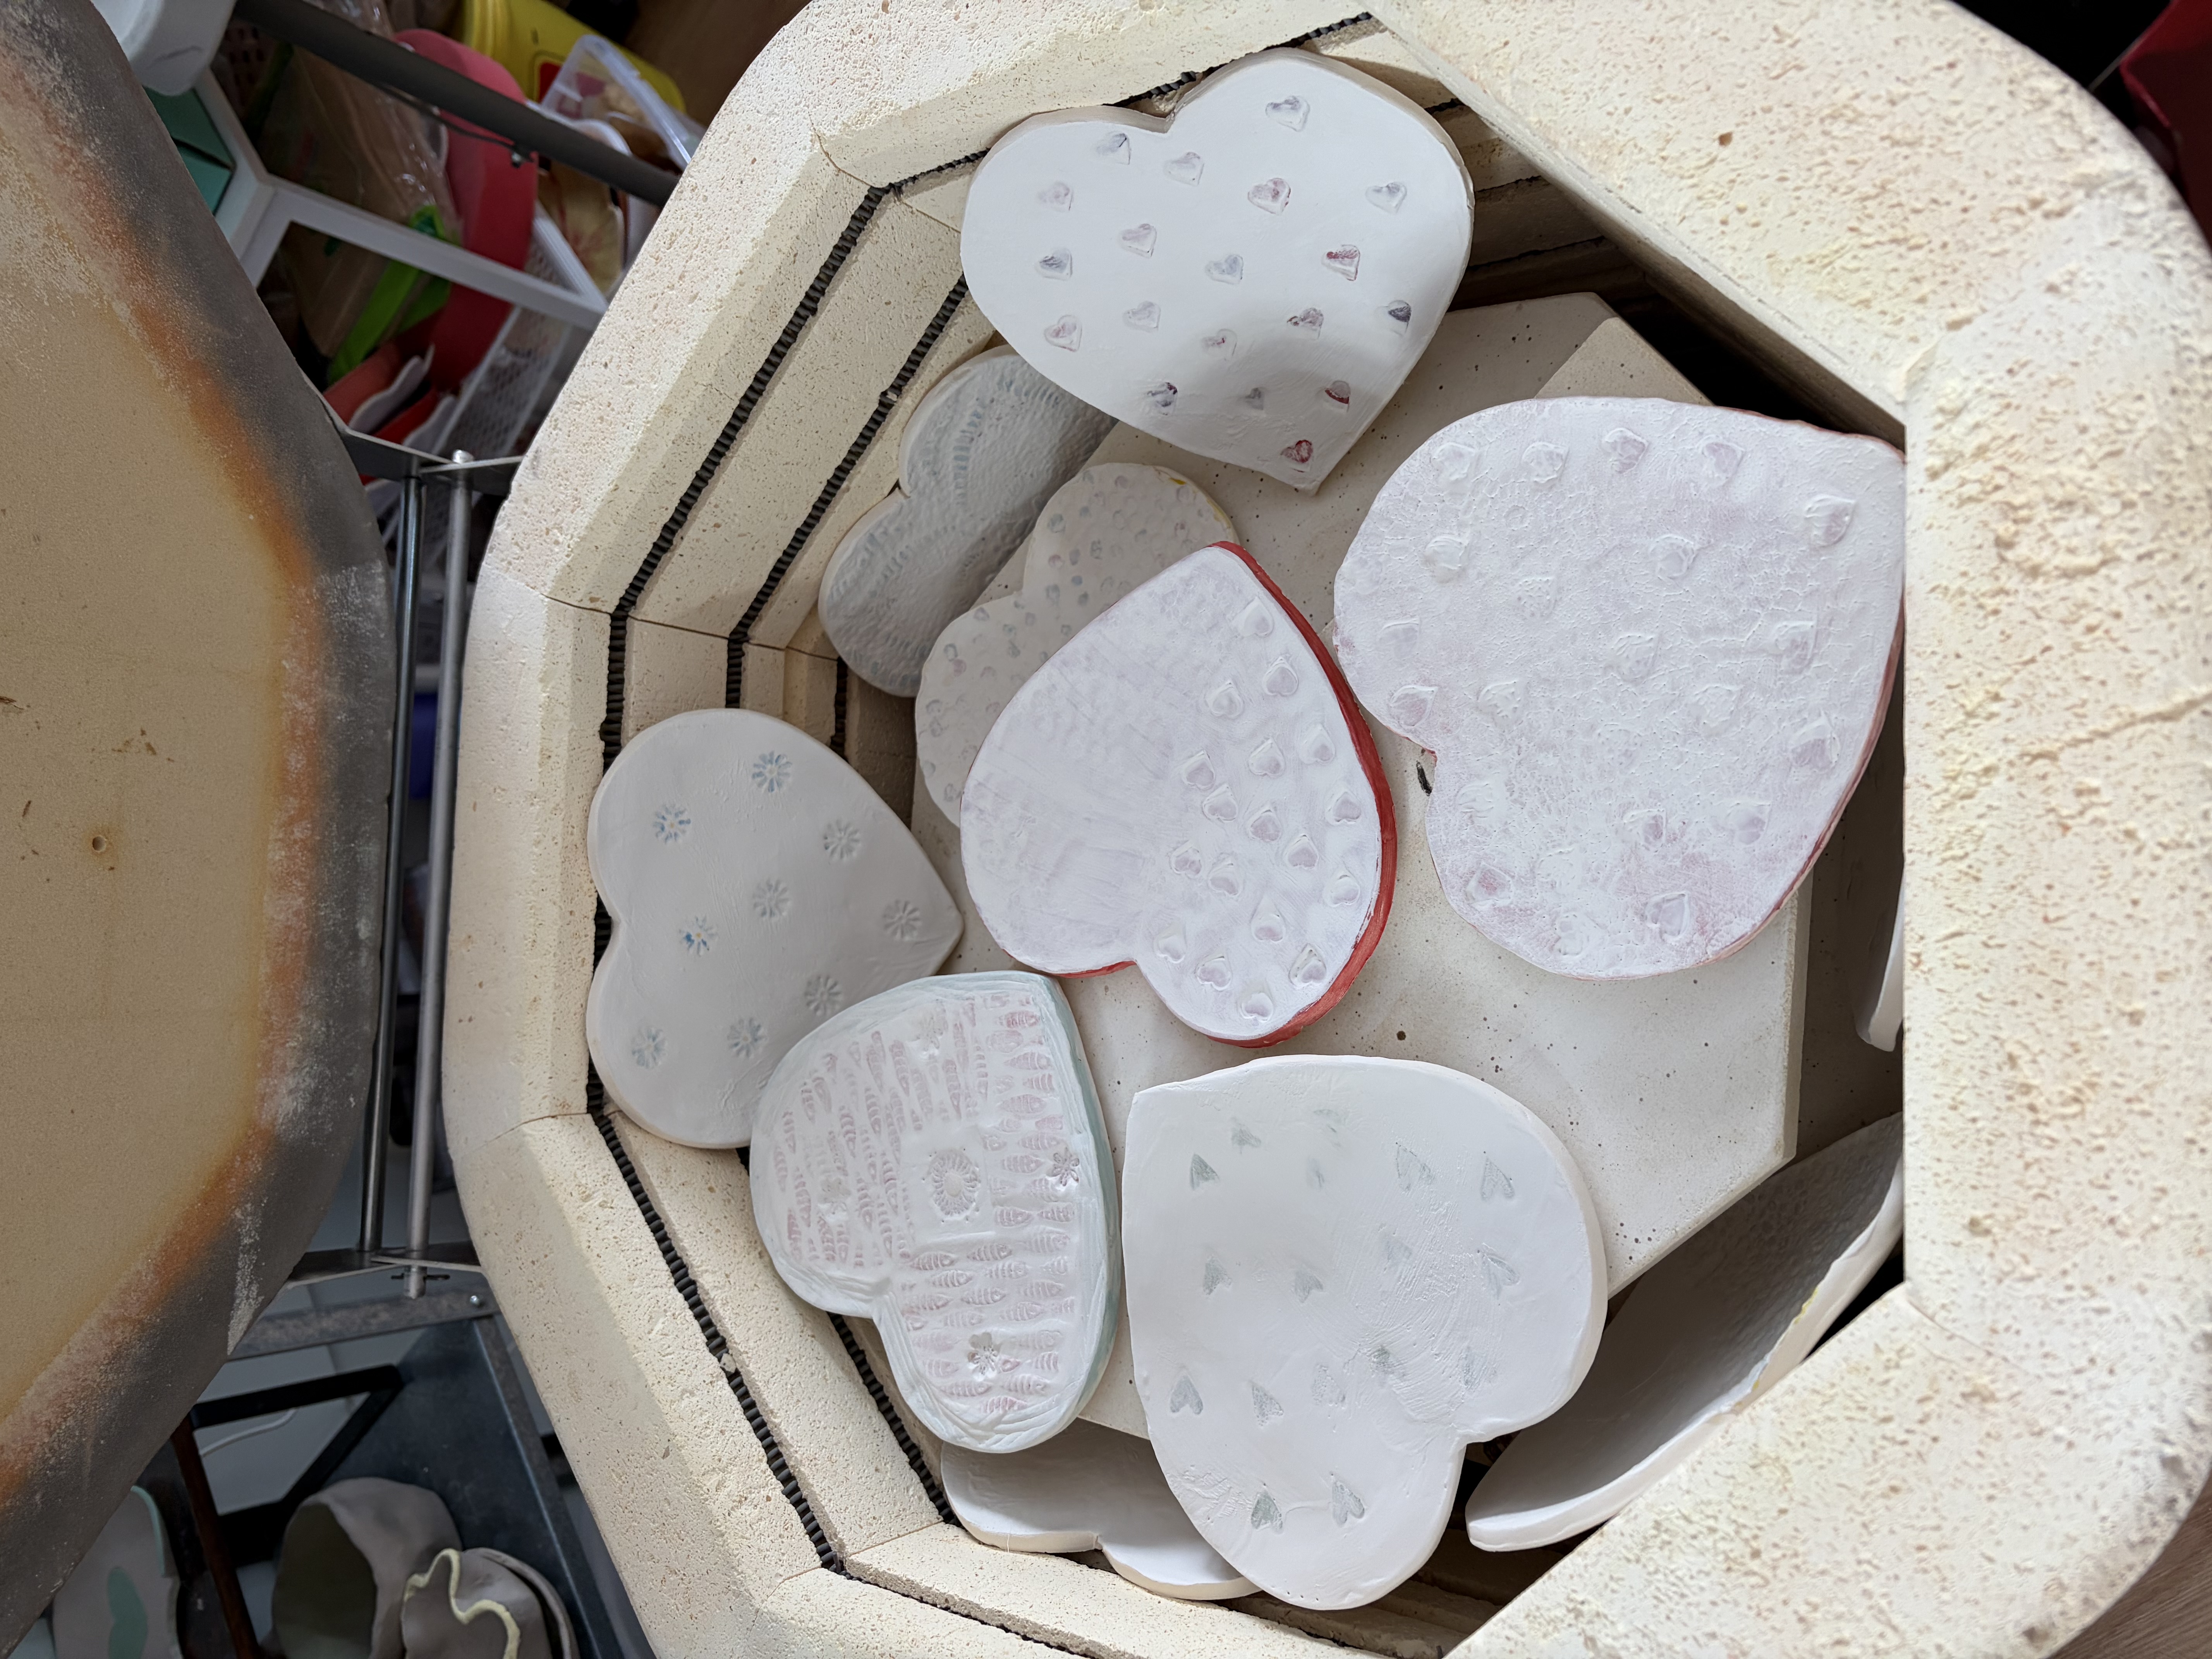
Step 4
Let the hearts fully dry and then load them into your Skutt kiln for a bisque fire!
Step 5
Then paint a layer of clear glaze onto the top surface of the hearts to ensure they are food safe, oven and microwave safe so your students will be able to use these for many years to come!

Step 6
Once the glaze fire is complete, your students can see all the wonderful details they added!!! 💗

