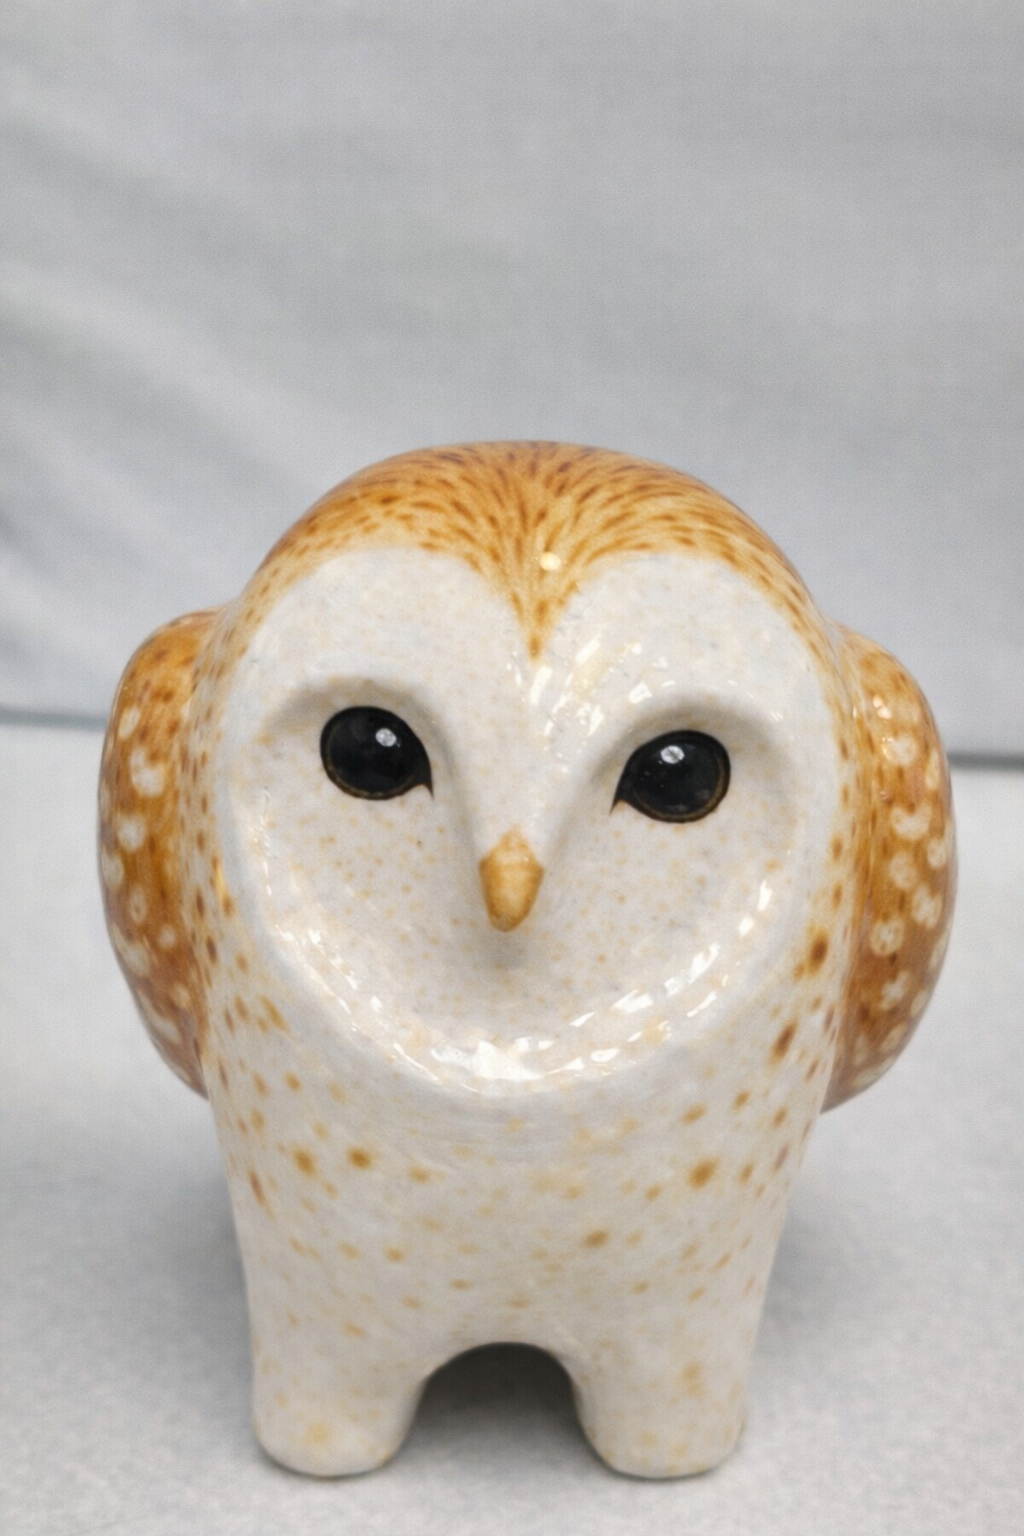
Class Whistle: Bird Ocarina
Meet The Teacher: Grace Gihm
Hello! My name is Grace, and I am a high school teacher at Semiahmoo Secondary School in BC, Canada. I have been really fortunate to be working with children and youth for the last 18 years teaching art. Growing up I always loved school and learning something new, and choosing to be an art teacher was a best decision I have ever made.
Project Description
Students create a small clay ocarina by forming a hollow chamber from two pinch pots and shaping it into a bird-inspired form. They construct a windway using a wooden craft stick and cut a sound window so air can vibrate and produce sound. Finally, students test and tune their instrument by adjusting holes and refining the airflow.
Materials
- Low-fire clay (Cone 06–04), 1/2–1lb
- Basic clay tools (needle tool, modeling tools, sponge) and wooden craft stick
- Slip
- Small drill tool or carving tools
- Underglazes or glazes
Grade Level
High School
Difficulty
Intermediate
Student Hands-On Time
3-4 hours
Teacher Prep Time
1 hour
Project Cost / Cost Per Student
4.00
National Core Arts Standards - Visual Arts
- Creating - Generate and conceptualize artistic ideas.
- Creating - Organize and develop artistic work.
- Creating - Conceiving and developing new artistic ideas and work.
- Presenting - Select, analyze, and interpret works for presentation.
- Responding - Perceive and analyze artistic work.
- Responding - Interpret intent and meaning in artwork.
- Connecting - Relate artistic ideas to historical, cultural, and social contexts.
21st Century Skills
- Critical Thinking & Problem-Solving
- Creativity & Innovation
- Flexibility & Adaptability
- Initiative & Self-Direction
- Productivity & Accountability
STEAM Education
- Science
- Arts
Differentiations and Accommodations
Differentiation
IEP
Accommodation
Provide step-by-step visual diagrams and teacher demonstrations. Allow additional time for students who require slower pacing. Adapt based on individual learning plan.
Differentiation
Advanced Learners
Accommodation
Encourage students to design multi-hole ocarinas capable of playing simple melodies or experiment with different sculptural forms.
Differentiation
Struggling Learners
Accommodation
Provide partially completed clay forms or guided assistance during the windway construction stage. Give extra time to work on the shape of the sound window and airway.
Learning Objectives: Knowledge
Students will understand how a vessel flute (ocarina) produces sound through airflow, a windway channel, and a sharp edge called the labium. They will learn the importance of a sealed air chamber and how finger holes affect pitch. Students will also understand the relationship between form, structure, and function in ceramic instrument design. Learning Objectives: Skills
Learning Objectives: Skills
Students will develop hand-building techniques such as pinch forming, scoring and slipping, and joining clay forms. They will learn how to construct a functional airflow system using a craft stick to create a windway and carve a sound window. Students will also practice problem-solving and fine adjustments while testing and tuning their instrument.
Learning Objectives: Attitudes/Values
Students develop patience and persistence through experimentation and refinement. They learn to value craftsmanship and careful construction when creating functional ceramic objects. The project also encourages curiosity about the intersection of art, design, and science.
Formative Assessment
Ongoing evaluation during the learning process to guide improvementThe teacher observes students during construction and provides feedback on sealing the chamber, shaping the windway, and refining the sound window. Students test their instruments and make adjustments based on teacher guidance and peer discussion.
Summative Assessment
Final evaluations that occur at the end of a lesson or unitStudents are evaluated on craftsmanship, successful airflow design, and the functionality of their instrument. The final piece should demonstrate a sealed chamber, correctly constructed windway, and a working sound produced when blown.
Reflection and Discussion
Prompts for meaningful group conversation • What part of the ocarina construction was most challenging? • How does airflow create sound inside the instrument? • How did adjusting the holes or sound window affect pitch and tone?
Lesson Activities
Introduction to Ocarinas
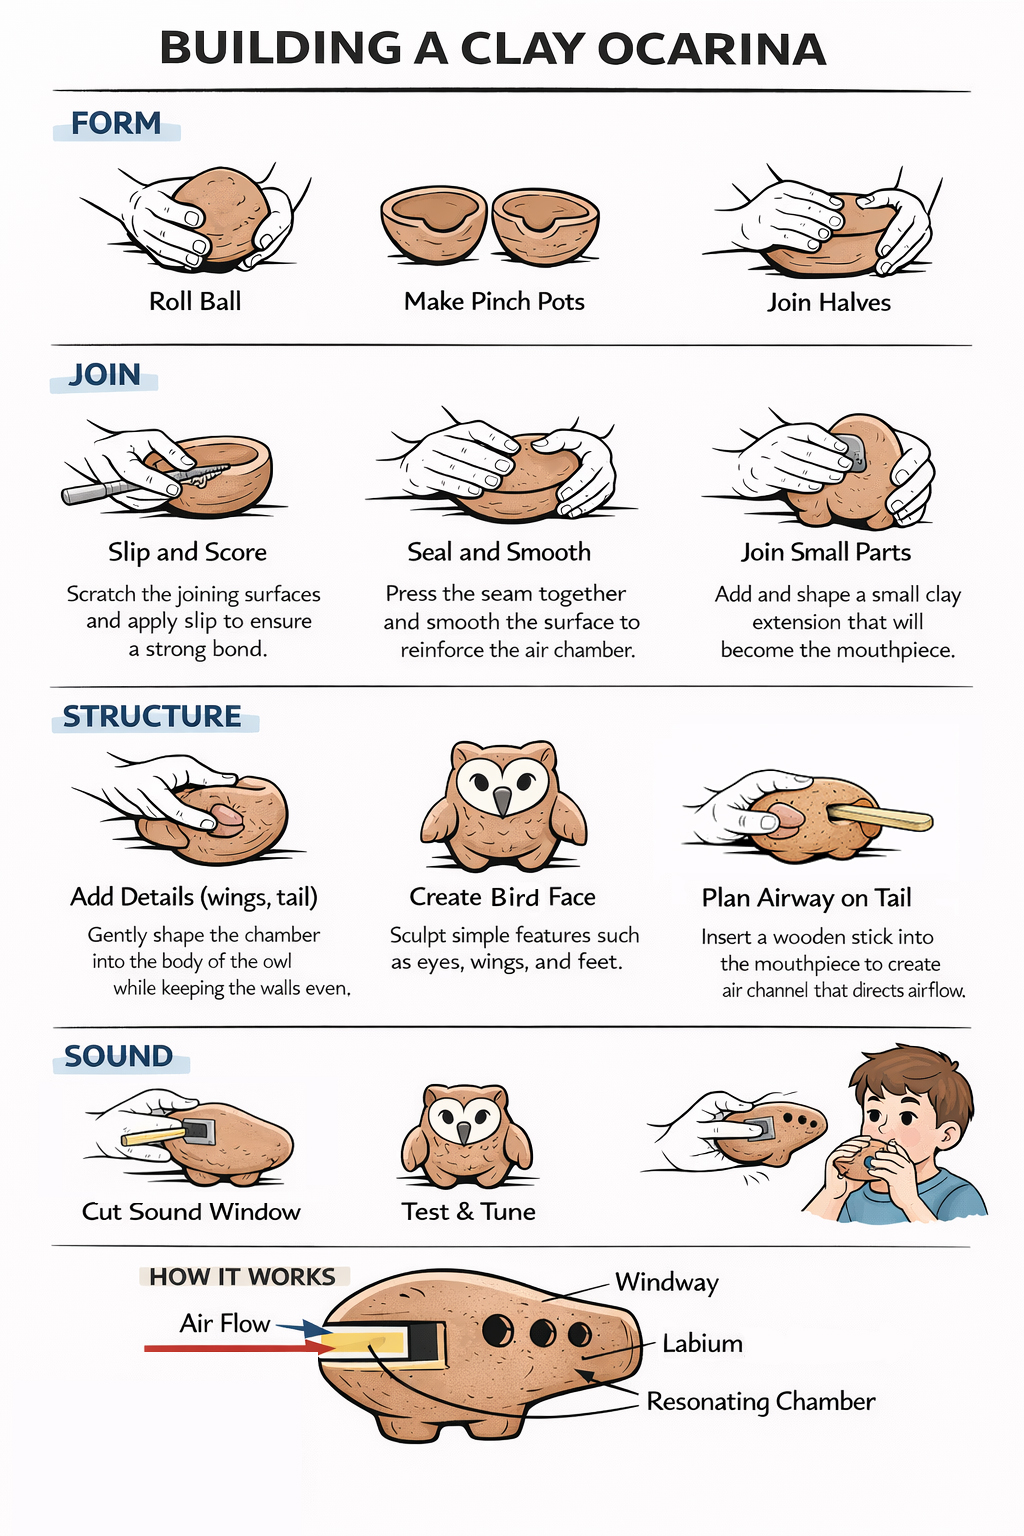
Teacher introduces the ocarina as a vessel flute and demonstrates examples. Students examine diagrams showing the windway, sound window, and resonating chamber. A short demonstration shows how airflow produces sound.
Building the Air Chamber
Students create two pinch pots and join them to form a sealed hollow chamber. They refine the form and shape the body of the owl. Add a tail to the body, which works as the windway.
Creating the Windway and Sound Window
Students insert a wooden craft stick into the clay body to create a windway channel. The teacher demonstrates how to align the windway with the future sound window. Students also carve a rectangular sound window and refine the labium edge to produce sound.
Testing and Tuning
Students remove the wooden stick, and test their ocarina and adjust holes or airflow as needed. Check the shape of the sound window and inside the chamber to fine tune and for the whistle to work. Finger holes can be added to change pitch.
Surface Decoration
Students refine sculpture details such as wings, tail, and facial features. Optional underglaze decoration may be added.
Step-by-Step Instructions
Step 1
Roll a smooth ball of clay: Sketch out your design idea and gather all the supplies. Then begin by wedging the clay briefly to remove air bubbles and improve workability. Roll the clay into a smooth ball roughly the size of a small orange. This will become the starting form for the ocarina’s air chamber. Make two balls for the next step.
Step 2
Create two pinch pots: Press your thumbs into the clay and gently pinch outward to form two evenly shaped bowls. The walls should remain consistent in thickness so the chamber will resonate evenly. These two forms will later be joined to create the hollow body of the instrument. Use a needle tool or scoring tool to scratch the rims of both pinch pots. Apply slip to the scored surfaces to create a strong bond.
Step 3
Join the two halves to create a sealed hollow chamber for body of the bird: Press the two pinch pots together carefully, aligning the edges evenly. Compress and smooth the seam to seal the chamber completely. A well-sealed chamber is essential for producing sound. Gently shape the joined form into the rounded body of a bird while keeping the chamber intact.
Step 4
Add sculptural details such as wings, tail, and face: Attach small pieces of clay to create the bird's wings, tail, eyes, and facial features. Score and slip any added pieces to ensure they adhere securely. Keep decorative elements lightweight so they dry evenly.
Step 5
Insert a wooden craft stick to create the windway: Carefully insert a wooden craft stick into the tail or mouthpiece area to form the windway channel. This narrow passage directs air toward the sound window. Keep the stick level and centered to ensure smooth airflow.
Step 6
Cut the sound window: Use a needle tool or carving tool to cut a small rectangular opening where the windway meets the chamber. This opening allows the air stream to interact with the sharp edge that produces sound. Work slowly to keep the edges clean. Refine the labium edge so it is crisp and straight
Step 7
Test the sound by blowing gently: Blow into the mouthpiece to test whether the ocarina produces a tone. If the sound is weak or airy, adjust the sound window or windway slightly. Testing helps students understand how airflow creates sound. Smooth the surface with damp sponge and refine any sculptural details. Ensure all seams and edges are secure before the piece dries. Once dry, the ocarina can be bisque fired and optionally glazed.

