
Ceramics 101
WHAT IS CERAMICS?
By definition, ceramics is the creation of functional and/or beautiful forms through the manipulation of clay minerals, which are set into rigid form with the application of various heating processes. Most people on the planet are familiar with clay in one form or another, but before beginning to work with clay, it helps to have a basic understanding of its properties, the types of clay available, and basic forming techniques.
You can also find more detailed and in-depth information on ceramics and other processes in the ‘I AM A‘ pages of this web site.
CLAY AND CLAY BODIES
Clay is the product of the breakdown of the earth’s rocky surface (primarily feldspar rock) through the actions of wind, water and temperature. These small particles are typically washed down from their formation sites in the mountains and are deposited in lakes, rivers and streams, collecting into deposits known as clay. This process is an ongoing geological system and continues to this day, which is why clay is found in vast quantities all over the planet.
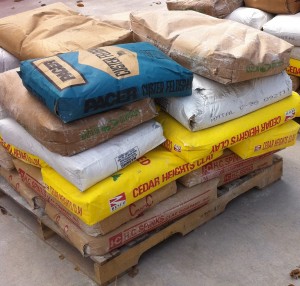
Clay Bodies are blends of clay minerals and elements that produce specific results when manipulated and treated in various ways. These custom blends of clay minerals are the modern clay bodies and can be tailored to produce a wide range of colors, textures, strength and temperature ranges.
Most kiln distributors will also sell clay bodies. Locate a Skutt kiln distributor near you.
While there are thousands of clay bodies available for purchase, the 3 basic types are porcelain, stoneware and earthenware. The maturity temperature, workability, and color of these 3 categories can vary based on what is added. Before we look at specific clay bodies, it would be helpful to talk about the properties that define them.
Properties of clay
- Temperature: Different clay bodies “mature” at different temperatures. By “mature” we mean fired to the temperature for which they were formulated. In general terms, the higher a clay body is designed to fire, the more it will be come water resistant.
 Workability: The workability of a clay generally refers to how easy it is to shape without problems. If problems do occur, a workable clay would allow you do fix those problems and continue with out crumbling or collapsing.
- Color: The color of a clay is affected by the materials used in the blending process. For example, a clay body that has a lot of iron in it will be red like Terra cotta flower pots.
Basic Types of clay
- Porcelain: A high-firing fine-grained white clay body that mature to a durable, strong, vitreous ceramic. It is usually pure white because of its high kaolin content and lack of other ingredients like iron that can change the color and properties.
- Stoneware: A mid- or high-firing coarse-grained clay body that can be anywhere between a buff color to gray to dark brown, because of varying levels of iron and other ‘impurities’. It is incredibly durable after firing, with little water absorption (vitreous).
- Earthenware: A low-firing fine-grained clay body that is typically grey, orange, or red in color both in the raw state and after firing. This highly porous clay will remain highly absorbent even after firing and will melt at porcelain and stoneware temperatures.
FORMING
The type of forming process that you are starting will help determine the type of clay you need and the type and temperature range of firings you will be doing. There are a several basic types of clay forming techniques, but they can be combined and blended to suite your needs.
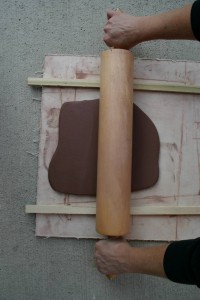
- Slab Building: A process whereby slabs of clay are rolled or pounded flat, either by hand or with a rolling device such as a slab roller or rolling pin. These flattened slabs of clay are then used to construct objects or vessels. Many slab builders embellish the slabs with surface designs or textures prior to construction because it is easier to create surfaces when flat rather than after a piece is assembled.
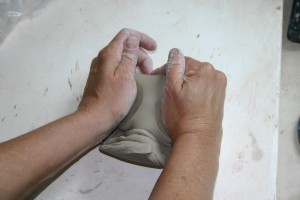
Hand-building: Hand-building is exactly what it sounds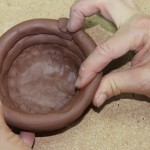 like; using your hands to form an object out of clay. It encompasses some other, more specific, forming methods as well, like coil building and slab building, and is often used in conjunction with other forming techniques. Ceramic sculpture would fall into the hand-building category since it incorporates many different techniques.
 - Coiling: This is perhaps the most simply understood technique for making clay vessels and sculptures. Coils of clay are rolled out, and are built up in a spiral fashion, with the coil being added joined to the coil below it layer after layer until the desired wall height and profile is achieved. This is a great entry-level technique, and will teach you a lot about what clay will and won’t do when wet.
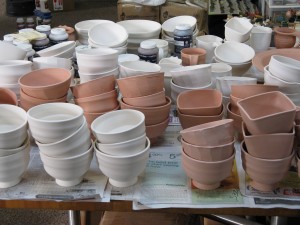
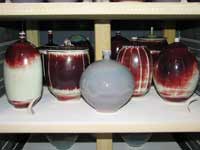
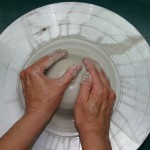 Throwing: Wheel throwing is probably what most people think of when they think of making pottery. A potter will use a manual or electric potters wheel to center a ball of spinning clay, open it into a vessel, and lift and shape the walls while the wheel is spinning, thereby producing a symmetrical vessel. These vessels can then be textured, decorated, reformed into alternative shapes, or adorned with handles for cups, spouts for tea pots or anything your imagination can conjure up.
Check out this video provided by Ceramic Arts Daily on throwing.
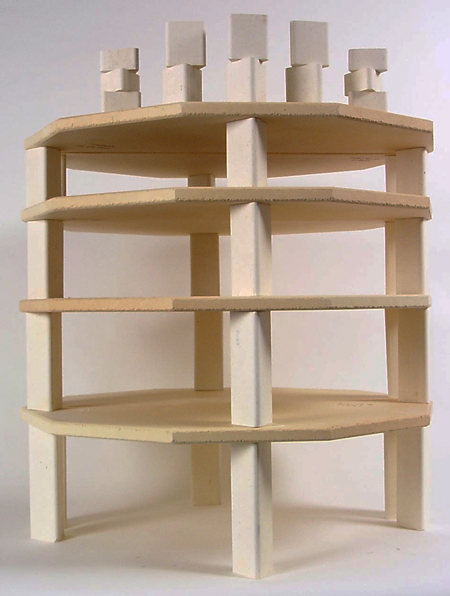
Faceted Bowl
DRYING
The most common clay defect encountered is cracking and many of these cracks come from how the water content of the clay was controlled. A simple solution to help stop drying cracks is to add more water by misting slightly, cover the work and give the clay a ‘rest’ to even out the moisture content.
Allowing the clay to slowly dry in a very even manner will help avoid the drying cracks mentioned earlier. Remember, small thin items will dry first and fast, so you may have to pay special attention to their moisture content by keeping them more tightly wrapped to give larger thicker areas time to dry.An old trick that works well is to place the dry clay against your cheek and see how it feels. The clay should feel the same temperature as the area where it has been drying, if it feels cold then there is still too much water present to safely fire the clay. Until you get a good ‘feel’ for this technique, it might help to keep an older dry item on hand that you can use to compare against.
Be patient, allowing a little more drying time now can mean fewer headaches in the future.
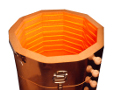
FIRING
This is the part of the process that makes many people nervous, largely due to the fact that many kilns can and do regularly reach temperatures over 2000°F.
This sounds intimidating, but consider the fact that safety is one of the larger points considered when a kiln is designed. Skutt Kilns are rigorously tested and many are UL certified to help make you feel as comfortable using them as the oven in your kitchen.
The more you learn about your kiln and what goes on inside it, the more confident you will feel.
FIRING TYPES
Bisque Firing: done between 1657°F (cone 010) and 1945°F (cone 04)
- Bisque firing is the typical and very important first step in the ceramic finishing process. During a bisque firing both physical and chemical water is driven out of the clay and organic residue burns out.
- Volatiles like carbon and sulfur combine with oxygen and escape the clay body.
- Fluxes start melting and reacting with the minerals in the clay body to turn that sticky muddy mess you started with into, well, a rock!
- This new hardened form will not dissolve when in contact with water nor crumble when handled for glazing.
Glaze Firings: done between 1828°F (cone 06) and 2345°F (cone 10)
- Glaze firings are the second and sometimes even the third step in the ceramic finishing process.
- They involve the heating and melting of glass forming materials applied to the surface of the clay in order to change them into a layer of glass.
- This type of firing is typically a faster process than that of bisque firing due to the fact we are far less concerned about the amounts of water contained in the items being fired, at least if they have been bisque fired!
- Unlike in a bisque firing, where it is some what exceptable to have items touching one another, in a glaze firing, items should never be closer than one inch from each other, unless it is your intention to glue then together.
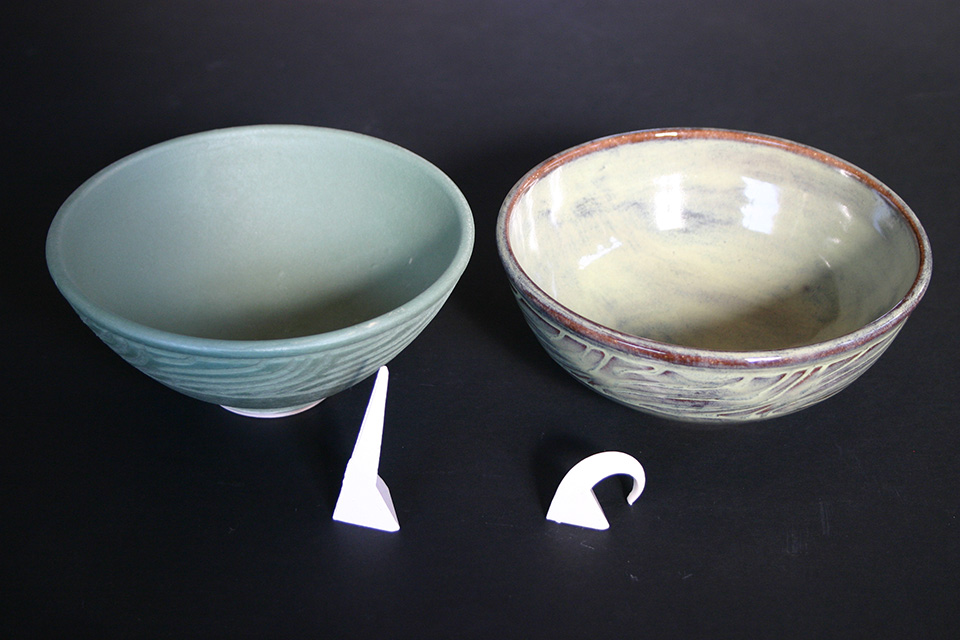
GLAZING
What Exactly is Glaze?
Ceramic glaze is basically glass melted onto a ceramic object. Because glaze needs to adhere to an often-vertical surface while not running off the piece, its component parts are ground into powder and mixed with water and binders so that it can be applied to ceramic pieces. Typical application methods include brushing, dipping, pouring, trailing, and spraying.
 The Basics of Glaze
While applying glaze to a ceramic piece is not absolutely necessary, it can enhance the fired clay piece both on an aesthetic and functional level.
Many clay bodies are not vitreous without being glazed. Glazes, by their nature, are vitreous. When glaze is fired onto a piece it seals the clay making it stain resistant and depending on the glaze, food safe.
Glaze Categories
A glaze’s surface properties can be difficult to categorize due to an infinite number of variables in their ingredients. Here are the basic names you should learn to recognize:
Transparent, Opaque, Gloss, Matte, Breaking, Flowing, and then there are the limitless color names added to these descriptive surface names.
So a very descriptive name of a glaze could be Glossy Opaque Canary Yellow cone 05. (The cone describes it’s firing range)
LOADING
Loading a kiln can be a chore, it’s true, but this one step can greatly push your finished results one way or the other, and trust us, the ‘other’ is not pretty!
One general tip that can speed the process up is to presort your items by height and shape prior to loading. Group items onto tables or if you have drying racks of various heights, group like items on the same shelf when you dry them. Kiln posts of various sizes placed on the staging tables or on the drying racks will help visually identify items by loading height.
Here are a few guides to help maximize great results:
• allow 1” of space between the shelves and the walls of the kiln
• space bottom kiln shelf minimum of 1” from floor (never put ware on the kiln floor directly)
• allow for 2” of space between the lid and the closest item on the top most shelf
• keep all items 2” away from the thermocouple so as not to give false readings to the computer
• off set your shelves in a staggered pattern to allow heat to move more freely through the kiln
• dome the load by placing taller items in the center of the kiln shelf, surrounded by progressively smaller items
• oh, you can also watch a video on loading tips
UNLOADING
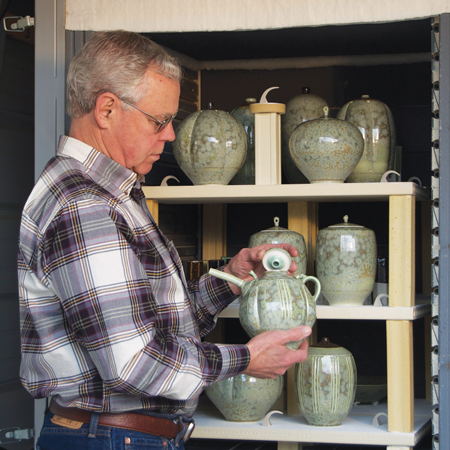
Unloading a kiln is as important as the loading and firing of the kiln. We are all like children running towards a wrapped present, anxious to see what’s inside when it comes to opening a kiln. You have to put a lot of time and effort into the items that go into the kiln and one simple act done out of excitement or impatience can cause disaster. Wait to unload you kiln until it is room temperature inside or AT LEAST cool enough to unload with your bare hands.
If you’ve made it this far, through the clay preparation, the designing and forming, the wrapping and waiting, the drying and waiting, the firing, the surface glaze designing and now the final firing…waiting just a little bit longer to let your kiln cool completely won’t hurt!
You’re ready now. Go out there and be creative, get your hands dirty, experiment and make great things!