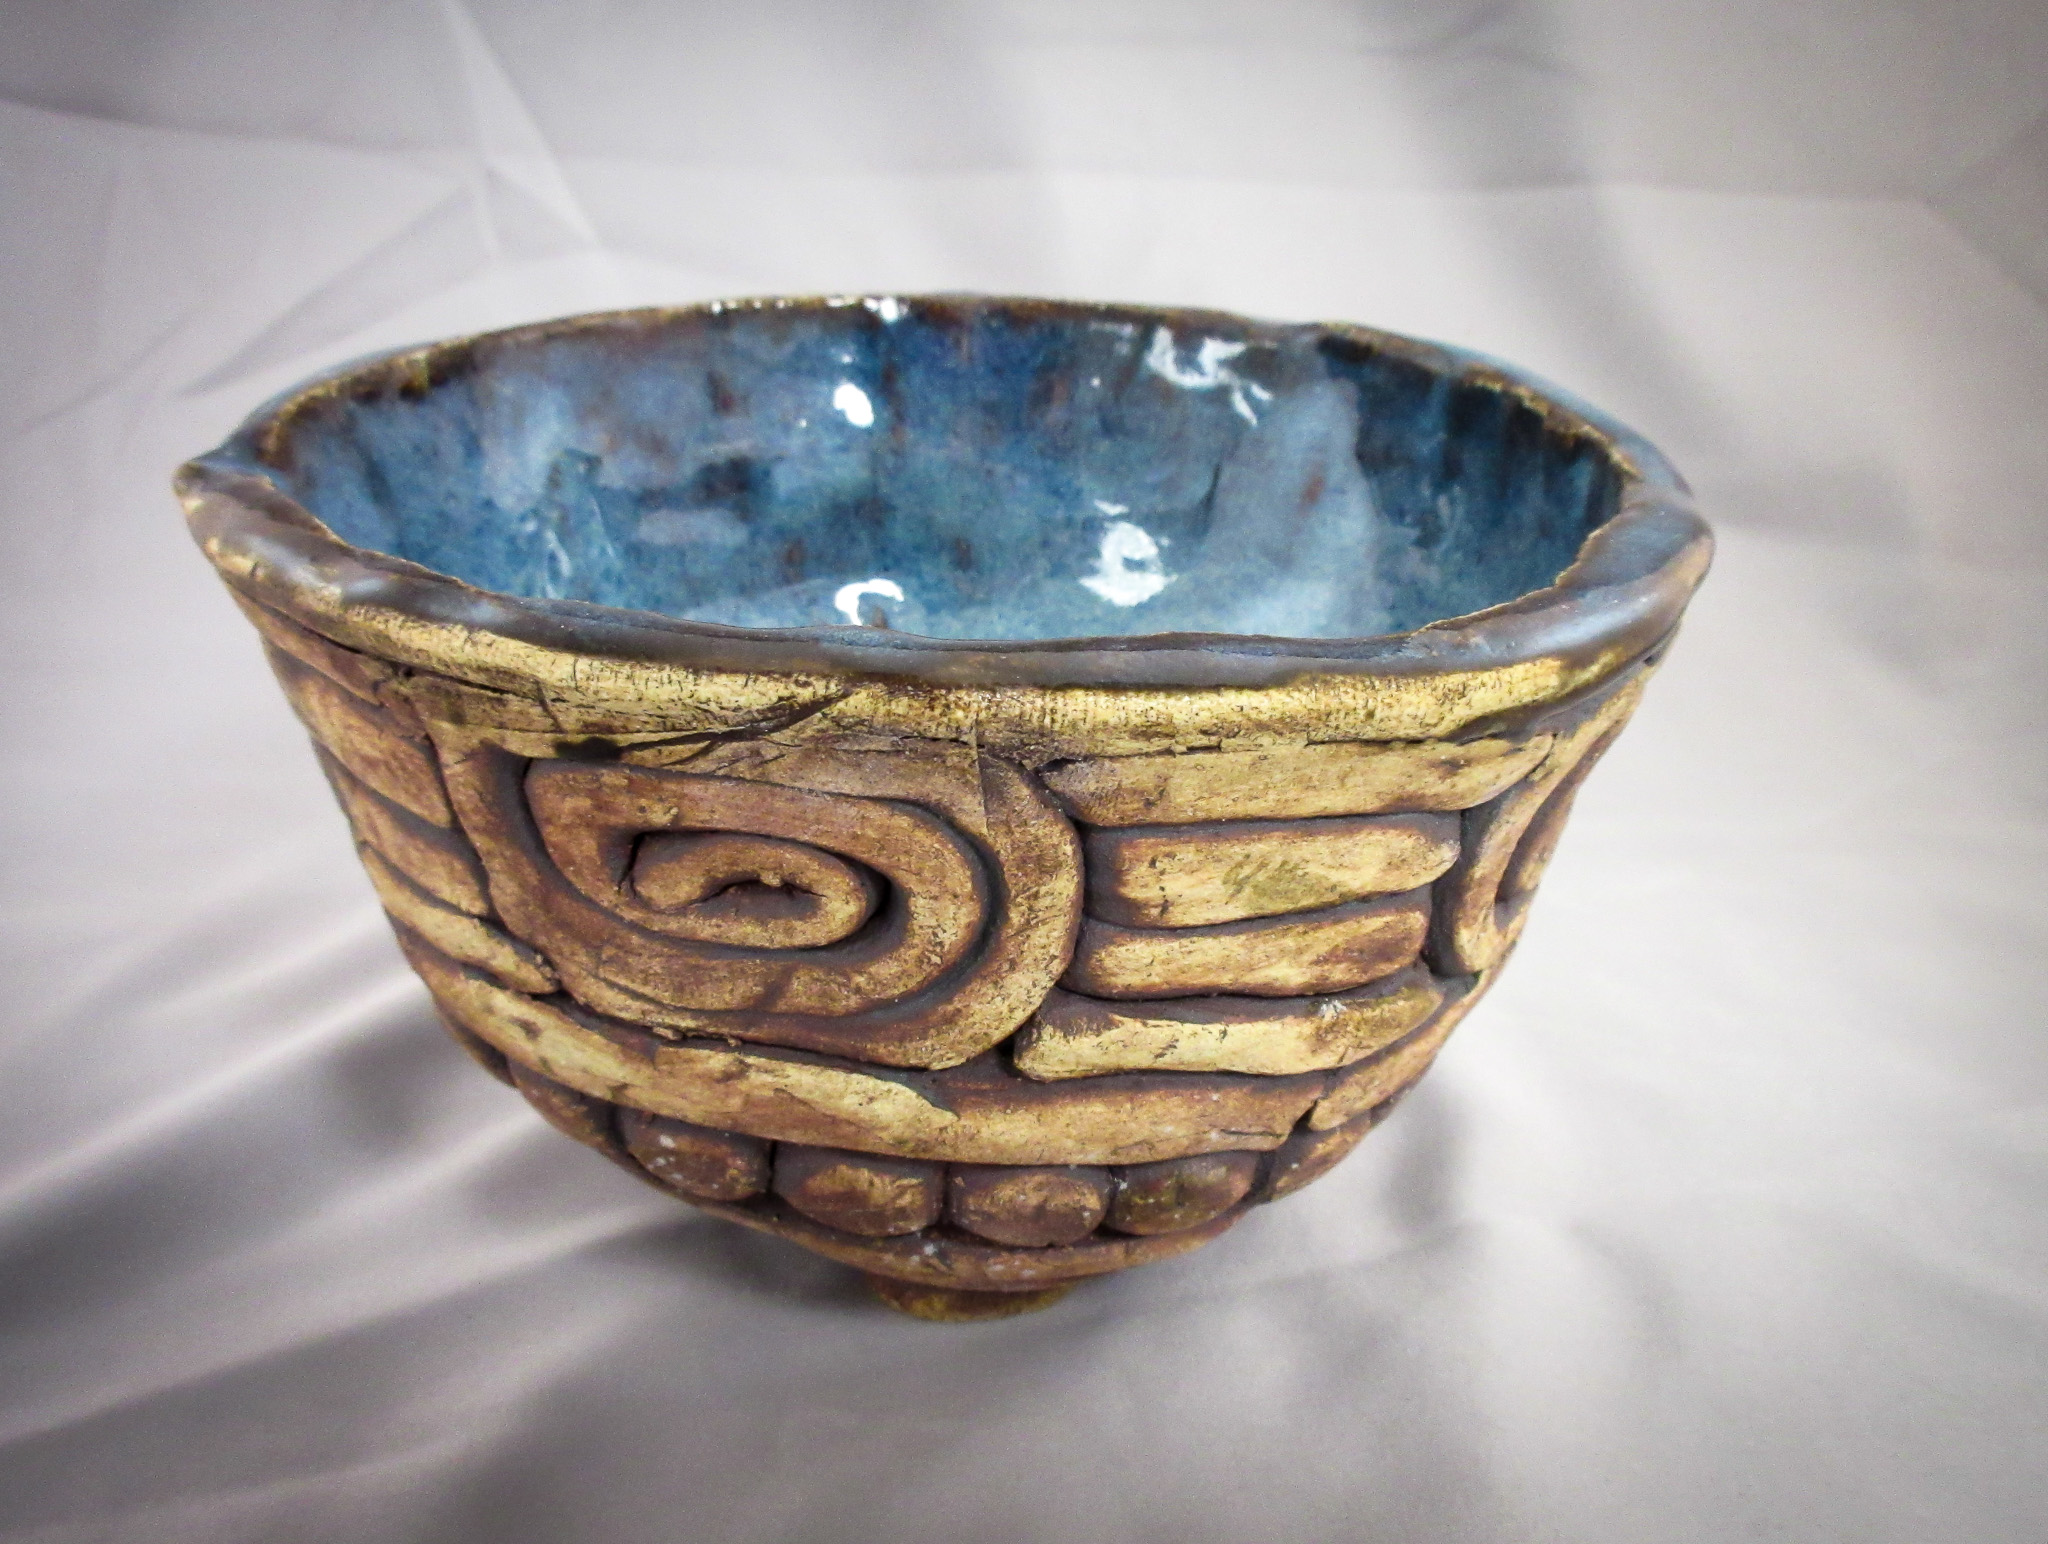
Texture coil bowl
Meet The Teacher: Frank Eager
As a ceramics teacher, I nurtured creativity and craftsmanship, guiding students to shape raw clay into meaningful art. I emphasized technique and expression, ensuring all students felt empowered to explore their potential. Beyond the classroom, I advocated for art education’s role in fostering critical thinking and hands-on learning.
Project Description
Create a unique bowl using the coil method, where texture and design take center stage. The exterior showcases a decorative coil pattern, while the inside remains smooth for a functional finish. This project blends creativity with traditional hand-building techniques for a one-of-a-kind piece.
Materials
- 3-4 pounds of clay either low or mid fire clay.
- Clear plastic bin to sore coils in while making them (must have a lid for it)
- A Bowl with a radius of 6 inches it can be smaller to limit the amount of clay and time
- Fettling knife for cutting clay
- News paper to line your bowl with on the inside so it does not stick
- A rubber rib for smooth the interior of your bowl
- Plastic Bags to wrap your project in
- Spray Bottle to keep everything moist
- Kiln to fire the pottery in
- Glazes for your bowl. Either dip or paint on. This allow the bowl to be functional. If you use paints it will not be.
- Red iron oxide for the outside of your bowl if you do a midfire.
- Plastic gloves if you use the oxide so it does not stain your hands
- Apron or smock to keep you clean
Grade Level
High School
Difficulty
Easy
Student Hands-On Time
70-90 minutes. Plan on breaking up into working periods.
Teacher Prep Time
30- 45 minutes
Project Cost / Cost Per Student
7
National Core Arts Standards - Visual Arts
- Creating - Conceiving and developing new artistic ideas and work.
- Connecting - Relate artistic ideas to historical, cultural, and social contexts.
21st Century Skills
- Critical Thinking & Problem-Solving
- Creativity & Innovation
- Communication
- Collaboration
- Flexibility & Adaptability
- Initiative & Self-Direction
- Productivity & Accountability
- Leadership & Responsibility
STEAM Education
- Science
Differentiations and Accommodations
Differentiation
IEP
Accommodation
Review with students with these accommodations. Make sure they can understand directions and the process. Have them explain the steps and process that works. Make any accommodations if needed.
Differentiation
504 Accommodations
Accommodation
Review with students with these accommodations. Make sure they can understand directions and the process. Have them explain the steps and process that works.
Differentiation
Advanced Learners
Accommodation
Think of ways to challenge them. Make a bigger bowl? Create a more elaborate pattern for the bowl?
Differentiation
Struggling Learners
Accommodation
Help students rolling coils. Demonstrate different shapes you can make the coils into. Also they may need more assistance in setting up their bowl with newspaper in it. .
Learning Objectives: Knowledge
Students will understand what it is to use a mold to create a project Students will learn about planning and spacing their ideas into a completed project.
Learning Objectives: Skills
Understand the process of making coils Proper use of a mold form for ceramics
Learning Objectives: Attitudes/Values
Learning patience How to follow directions Proper layout of ideas and design
Formative Assessment
Observe student engagement and provide ongoing feedback.
Summative Assessment
Evaluate the finished pieces based on criteria such as creativity, technique, and adherence to the project guidelines.
Reflection and Discussion
Reflect on what worked well and what could be improved for future lessons. Note any student feedback or observations that may influence future planning.
Lesson Activities
1. Introduction (5-10 minutes)
Briefly introduce the topic or technique. Show examples (either your work or images) to inspire students. Demonstrate how to Roll a Coil. You might have them practice a bit prior to making their actual ones.
2. Instruction (15-20 minutes)
Demonstrate the technique or project step-by-step. Highlight key concepts, such as proper handling of materials, safety practices, and artistic principles (e.g., balance, symmetry).
3. Hands-On Practice (30-40 minutes)
Students begin working on their projects with guidance. Provide feedback and assistance as needed. Encourage creativity and exploration within the project parameters. THis may take two class periods of hand on practice
4. Reflection and Discussion (10-15 minutes)
Students share their work and experiences. Discuss challenges encountered and how they were overcome. Reflect on how the project ties into broader artistic or cultural themes.
5. Cleanup (5-10 minutes)
Ensure all materials are properly stored or disposed of. Emphasize the importance of a clean workspace for safety and efficiency.
Step-by-Step Instructions
Step 1
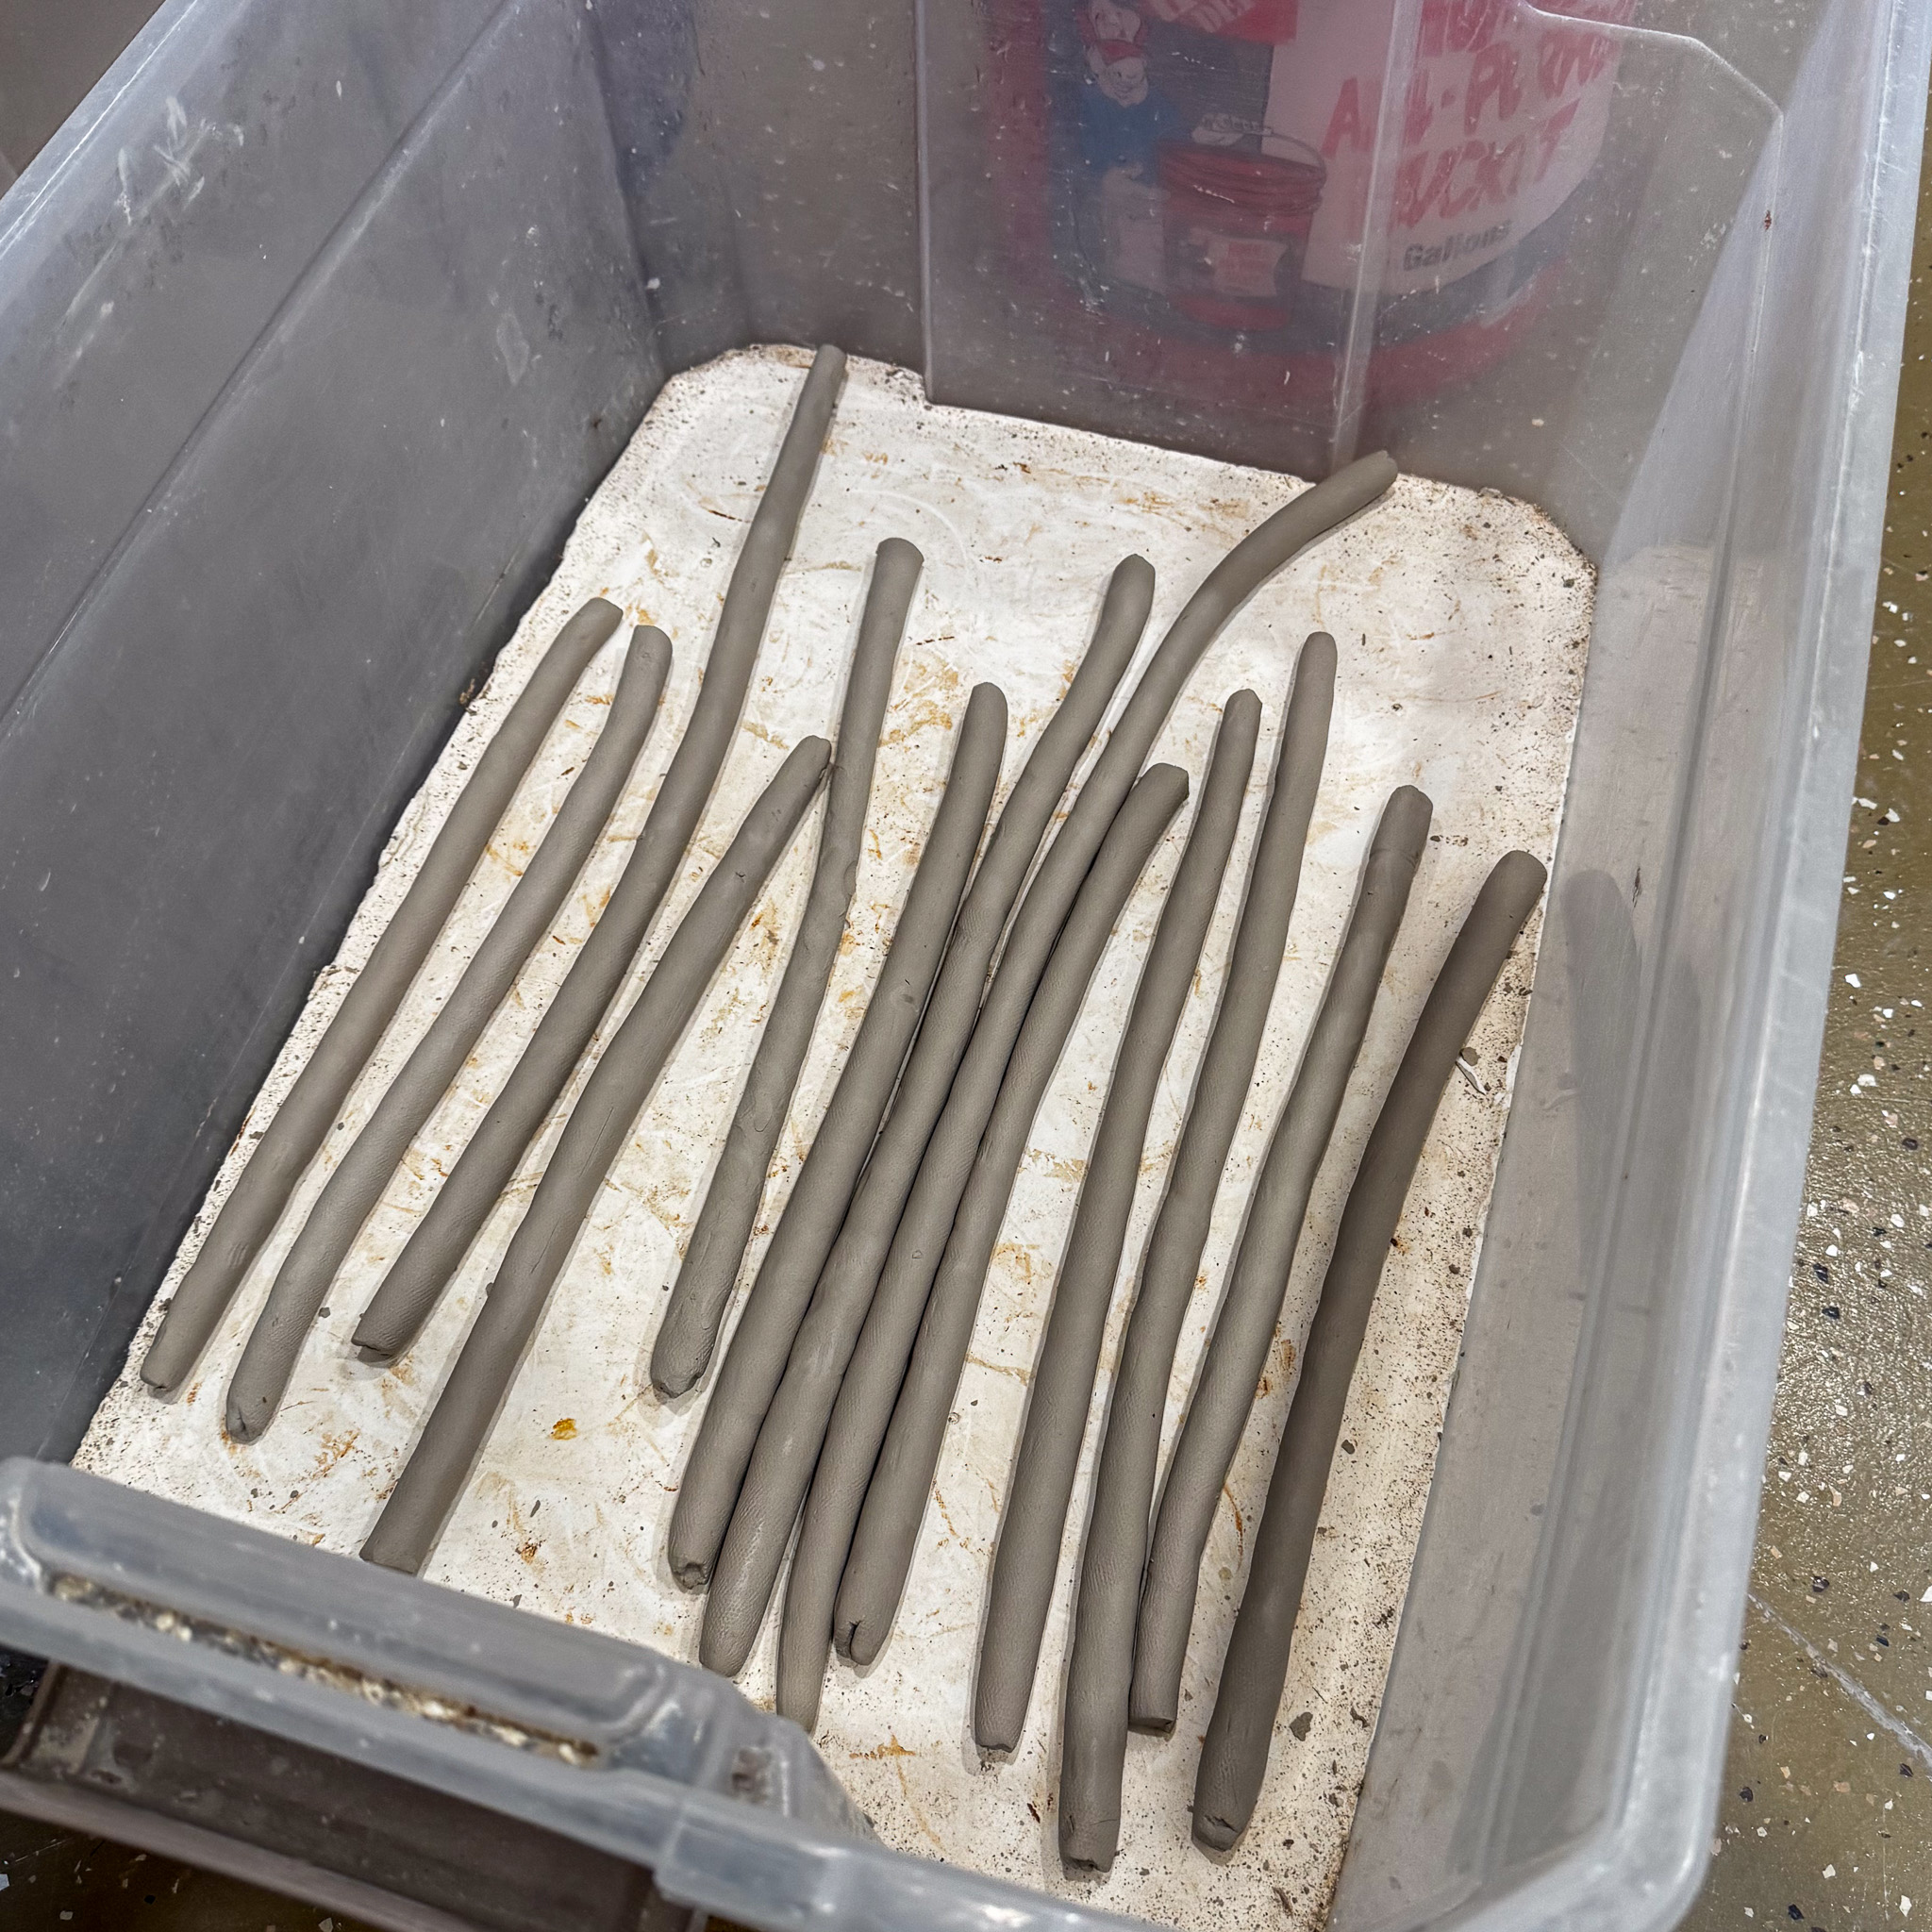
1. Roll as many coils as possible from 2 pounds of the 3 pounds of clay. Aim to keep the coil thickness about the size of your thumb—do not make them thinner (If thinner you might lose your texture on the outside of the bowl). Store your coils inside a bin to keep them moist and prevent them from drying out.
Step 2
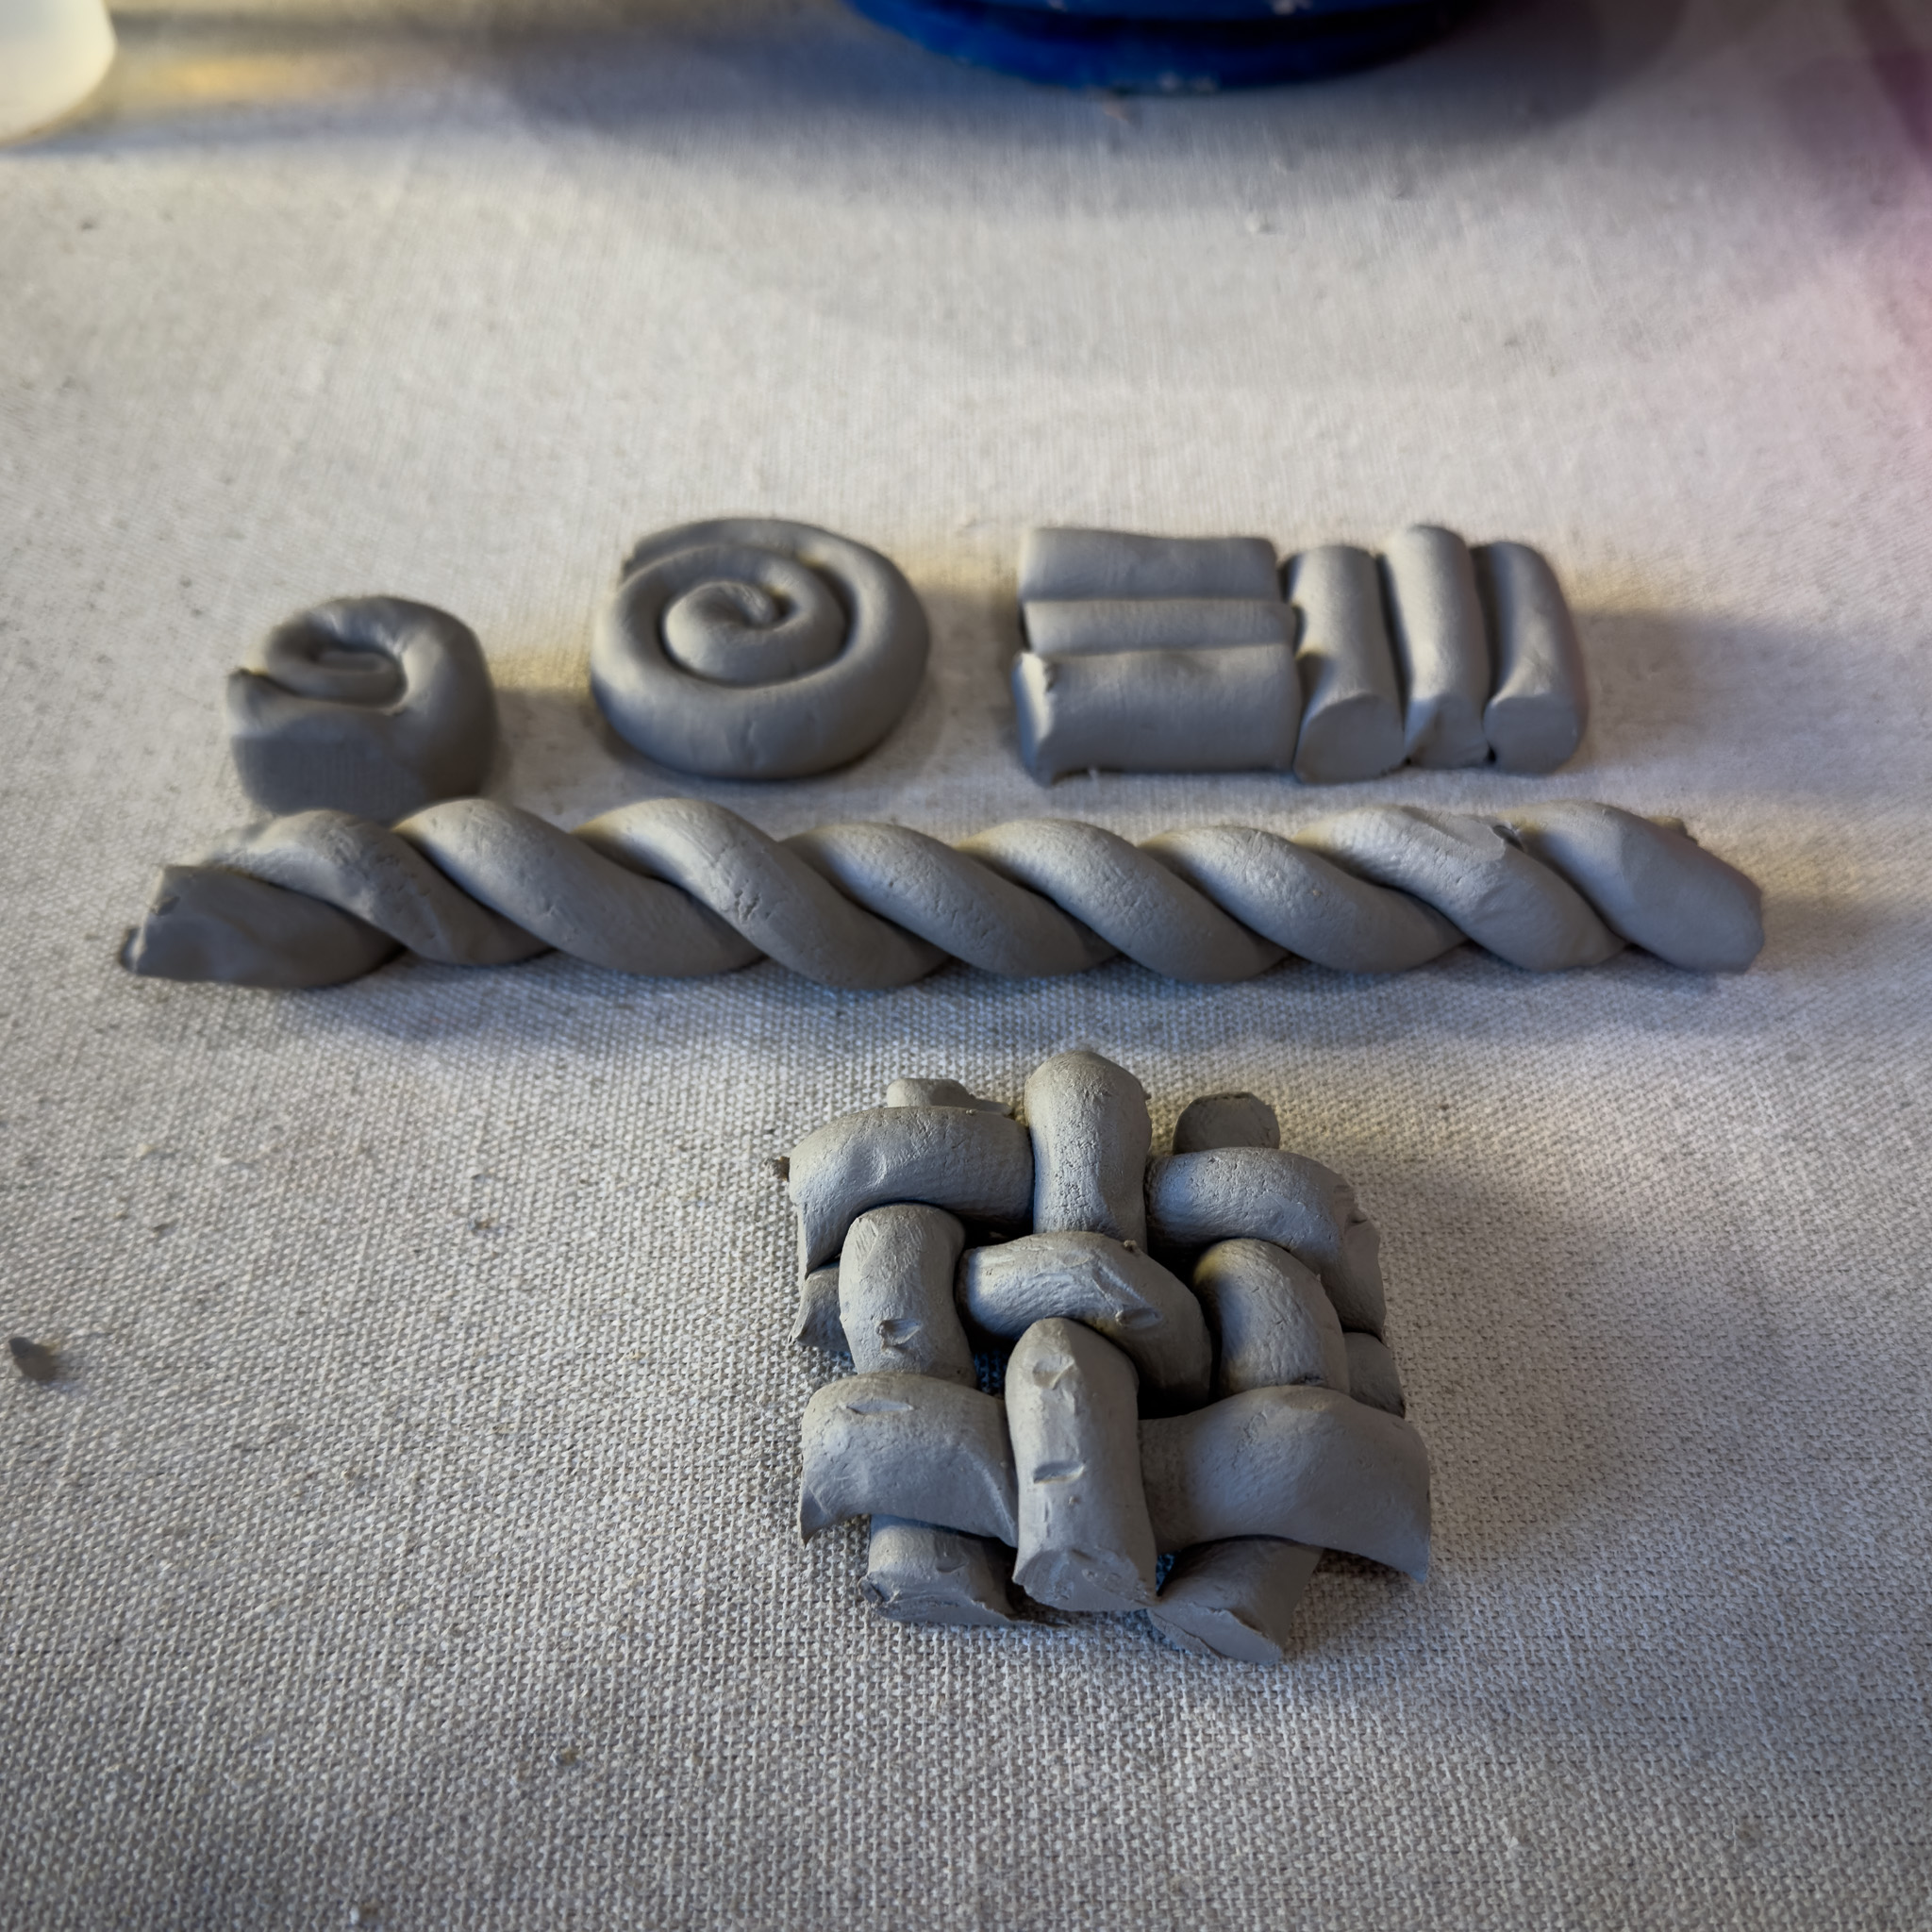
2. Once you have made all your coils, explore different shapes and patterns you can create. For example, try spiraling coils together or forming a weave pattern to add unique design elements. If needed, you may thin the coils slightly to make certain patterns work. Remember to wrap them back up in the bin or a bag so they do not dry out. Keep them moist
Step 3
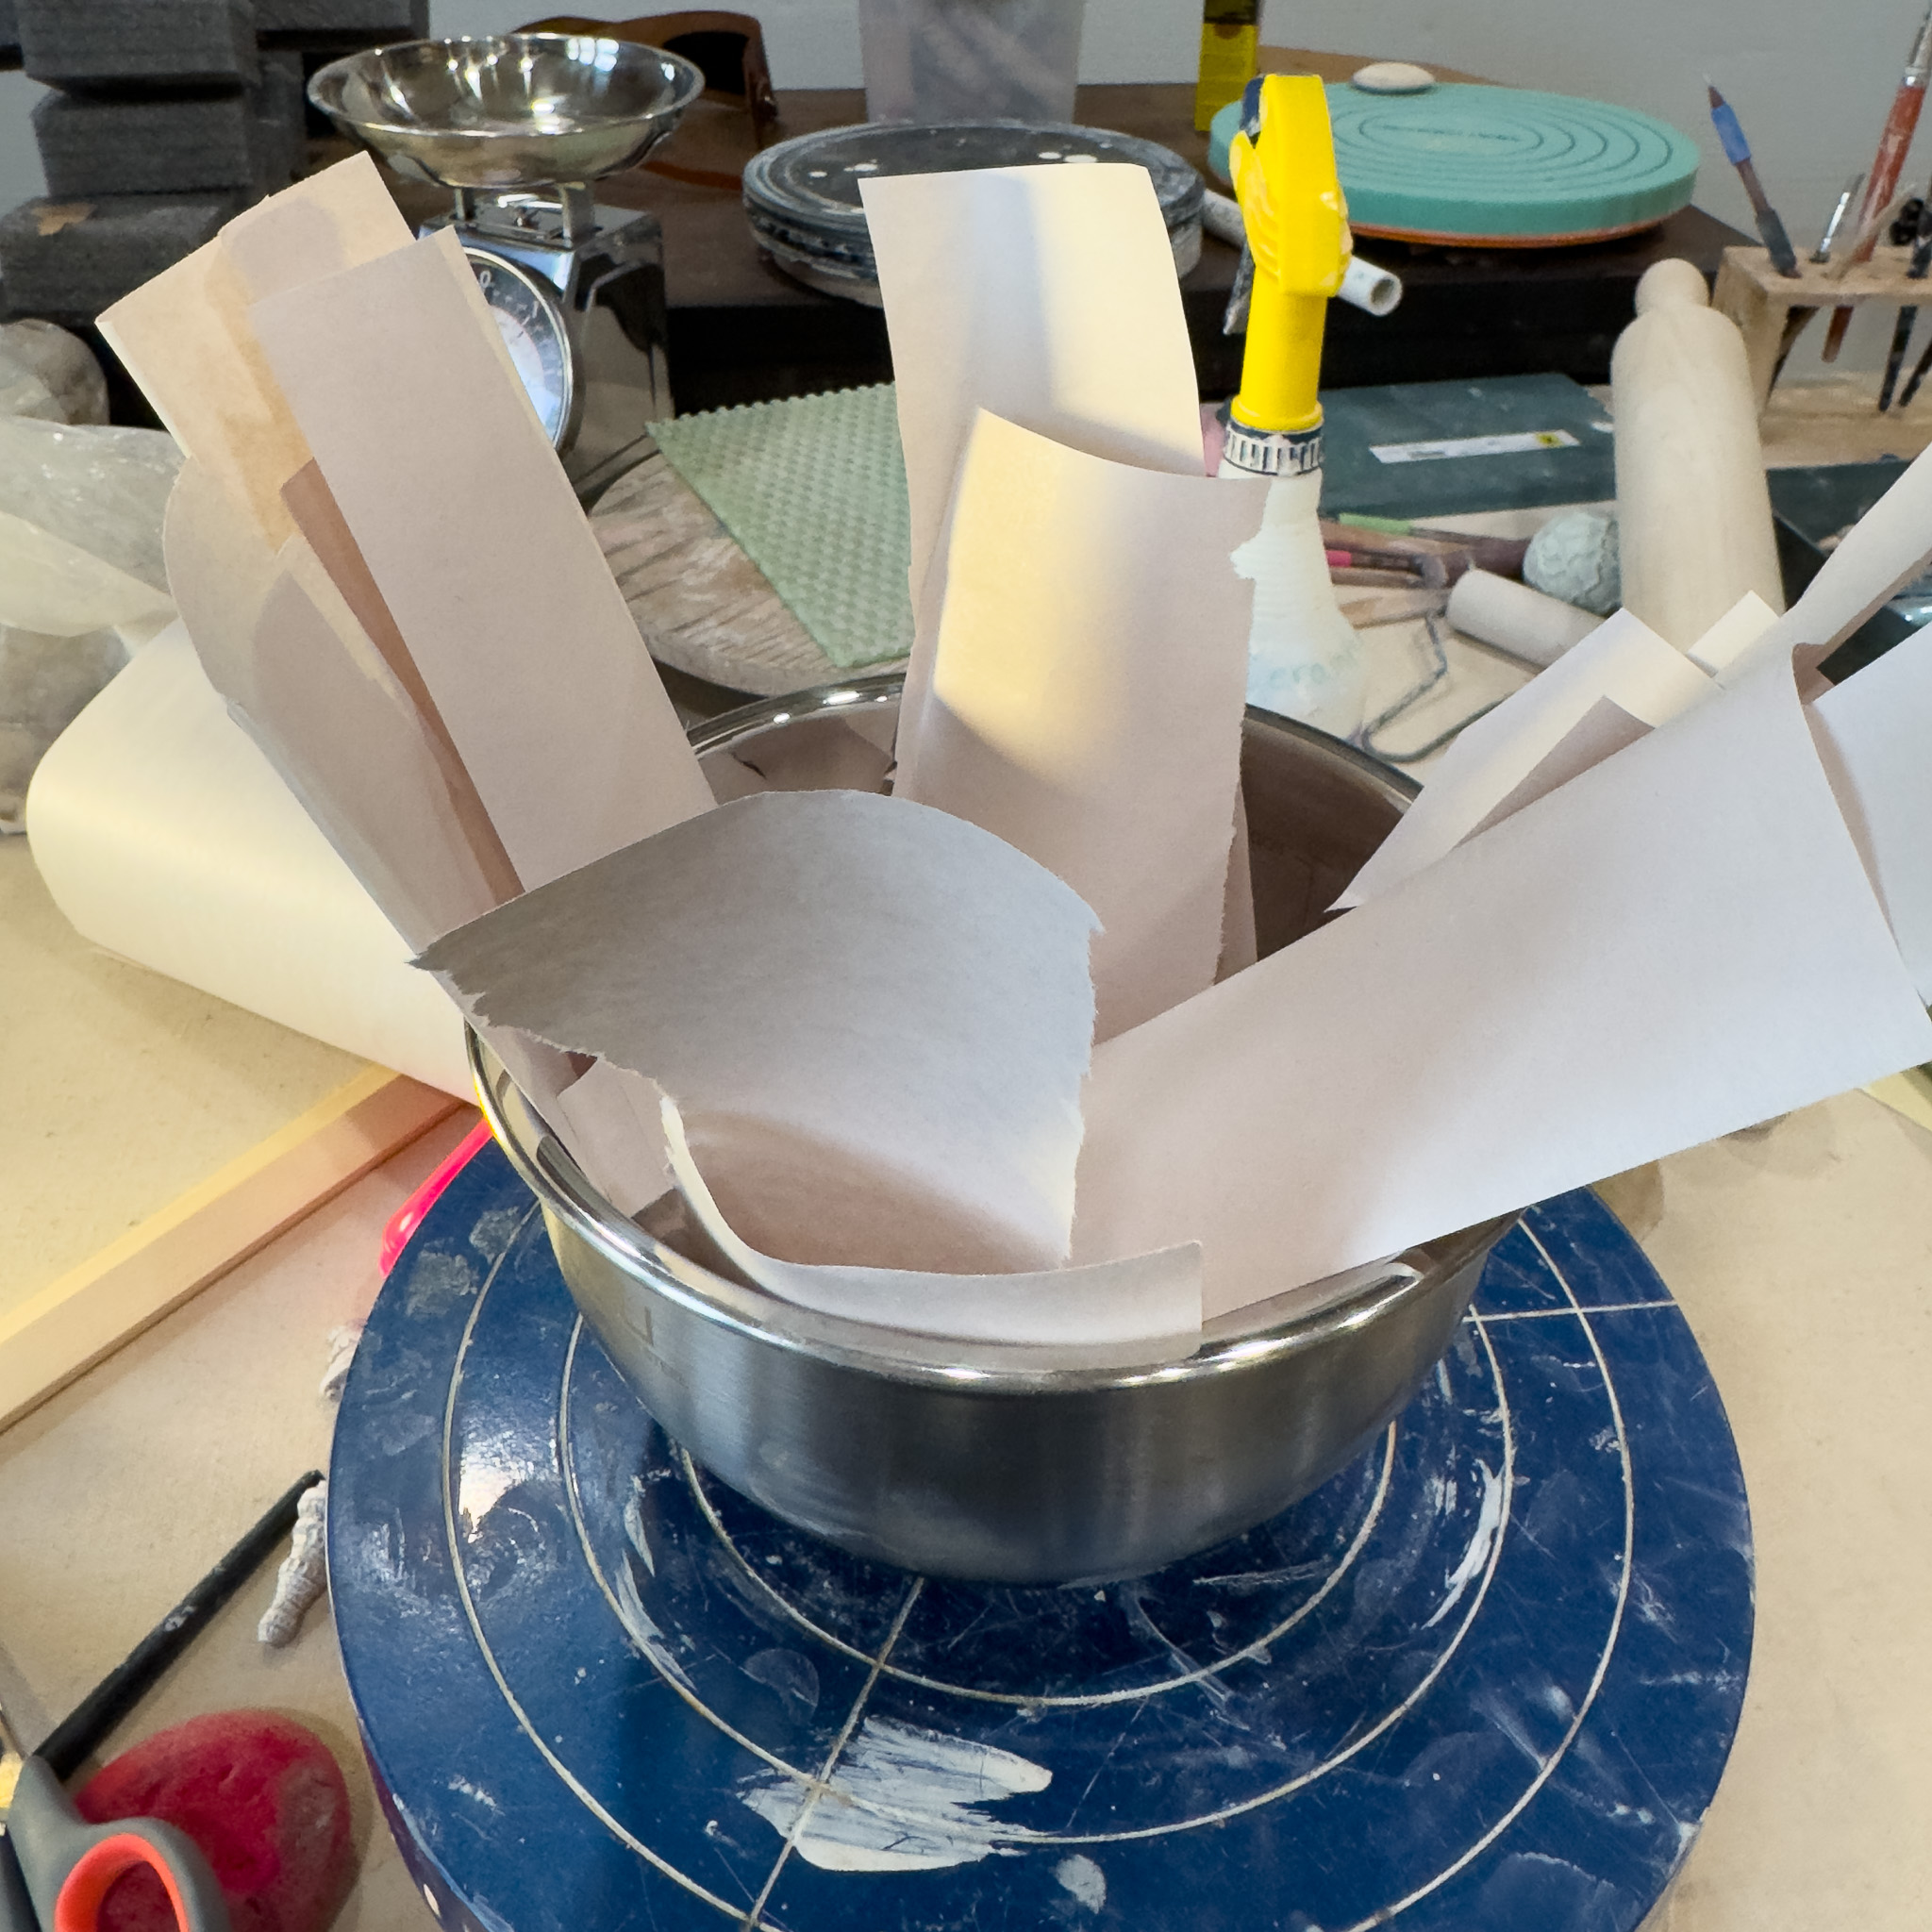
3. You will need a bowl-shaped form for your project. The larger the bowl, the more coils you will need, so a medium-sized bowl is recommended. Additionally, cut newspaper into strips to line the bowl, preventing the clay from sticking

Step 4
4. Line your bowl with wet strips of newspaper, ensuring they stick to the surface. This will prevent the clay from sticking to the bowl while shaping your design
Step 5
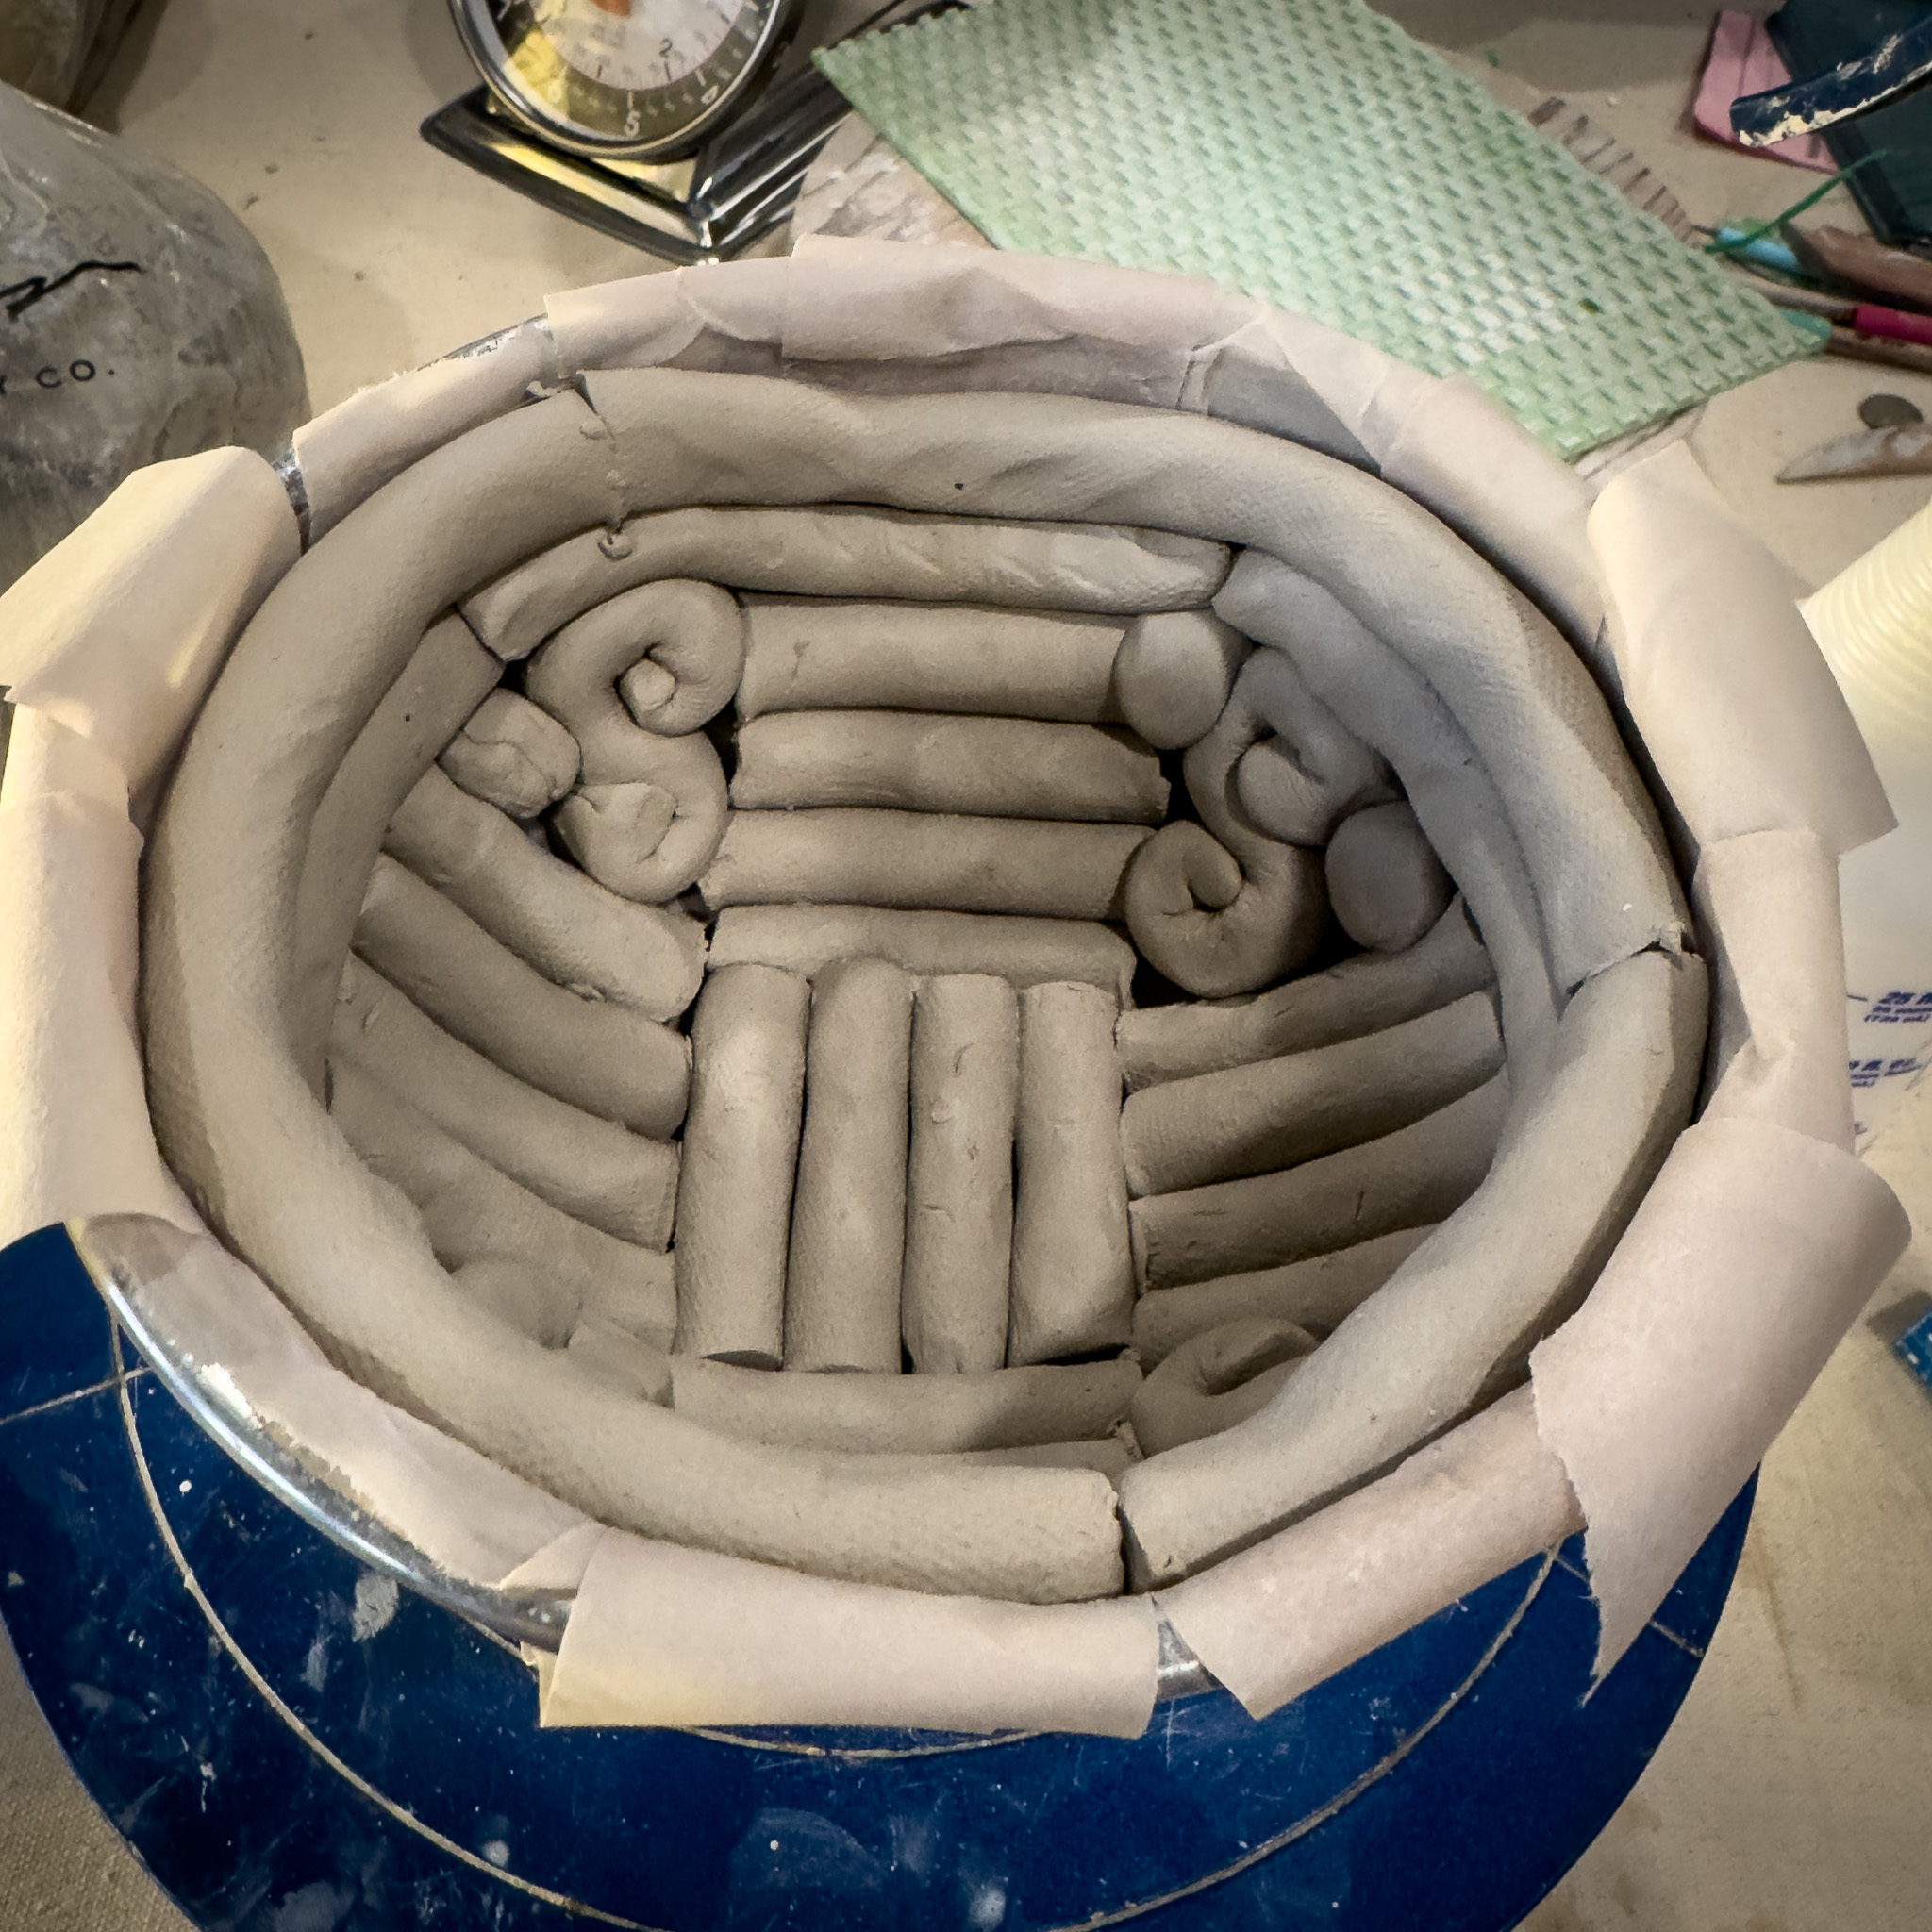
5. Begin placing your coiled shapes and designs inside the bowl, arranging them until the entire surface area is covered. If needed, use small balls of clay to fill in any gaps or spaces for a more secure and cohesive structure.
Step 6
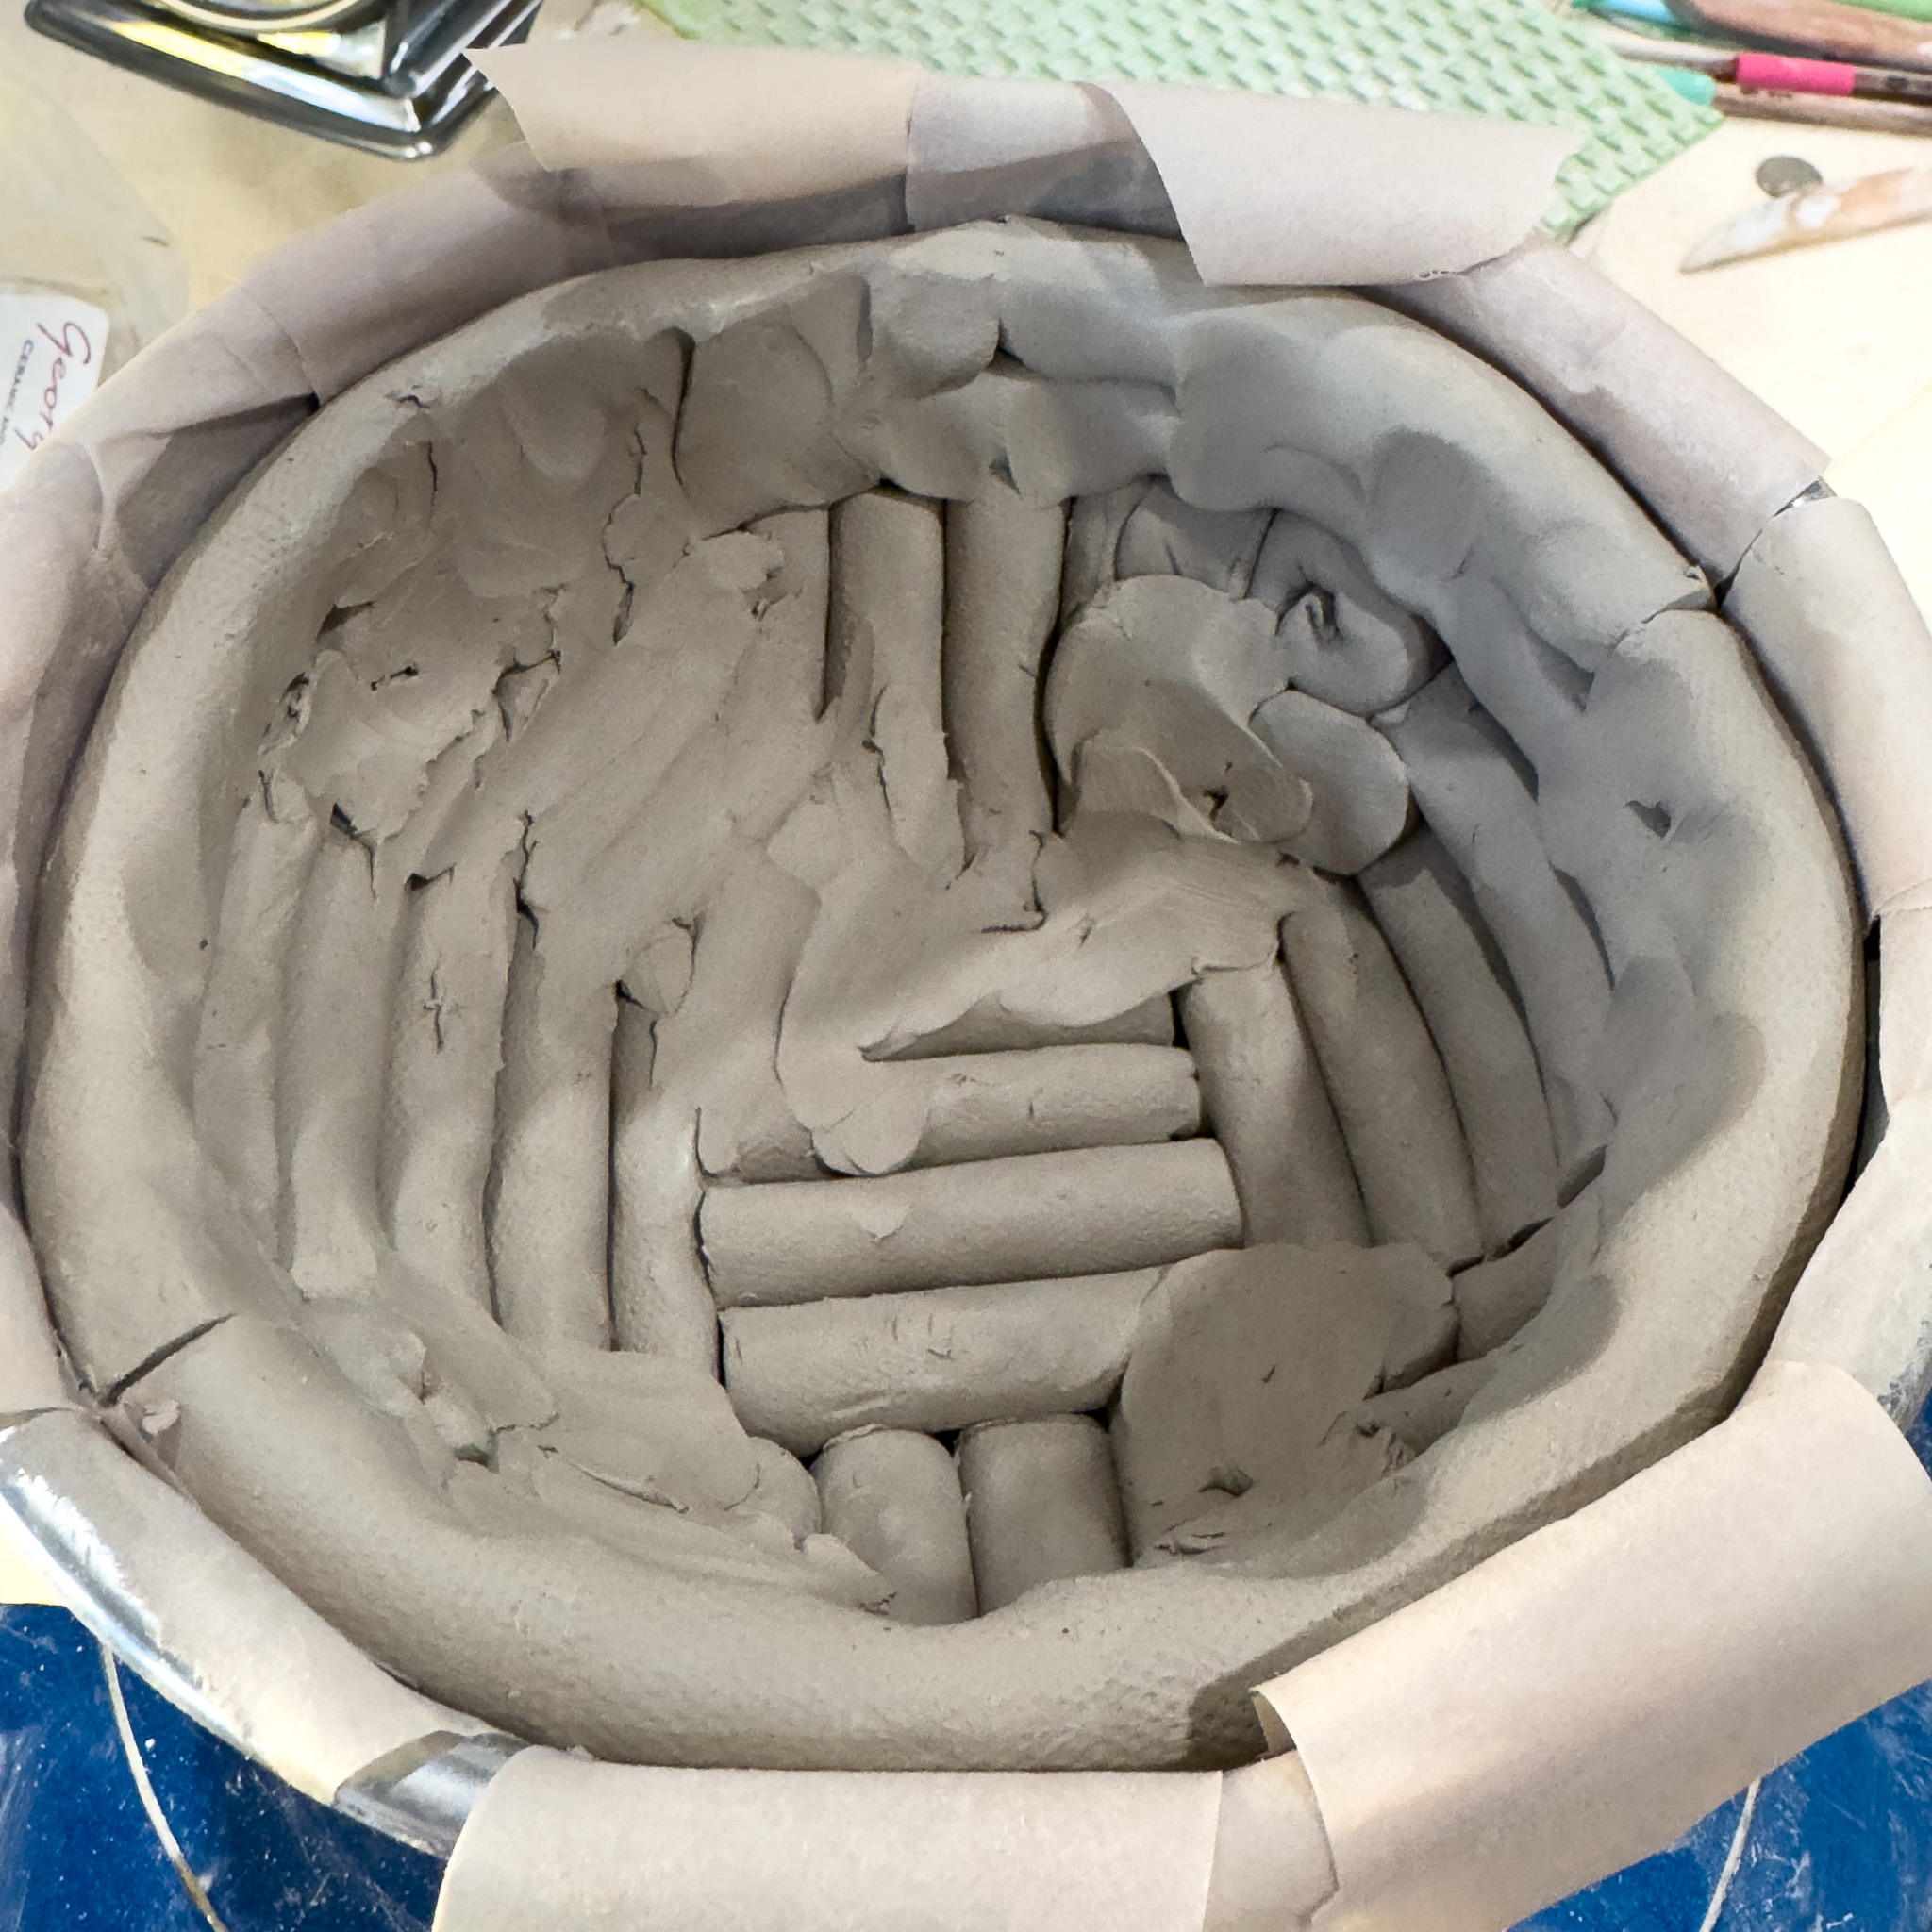
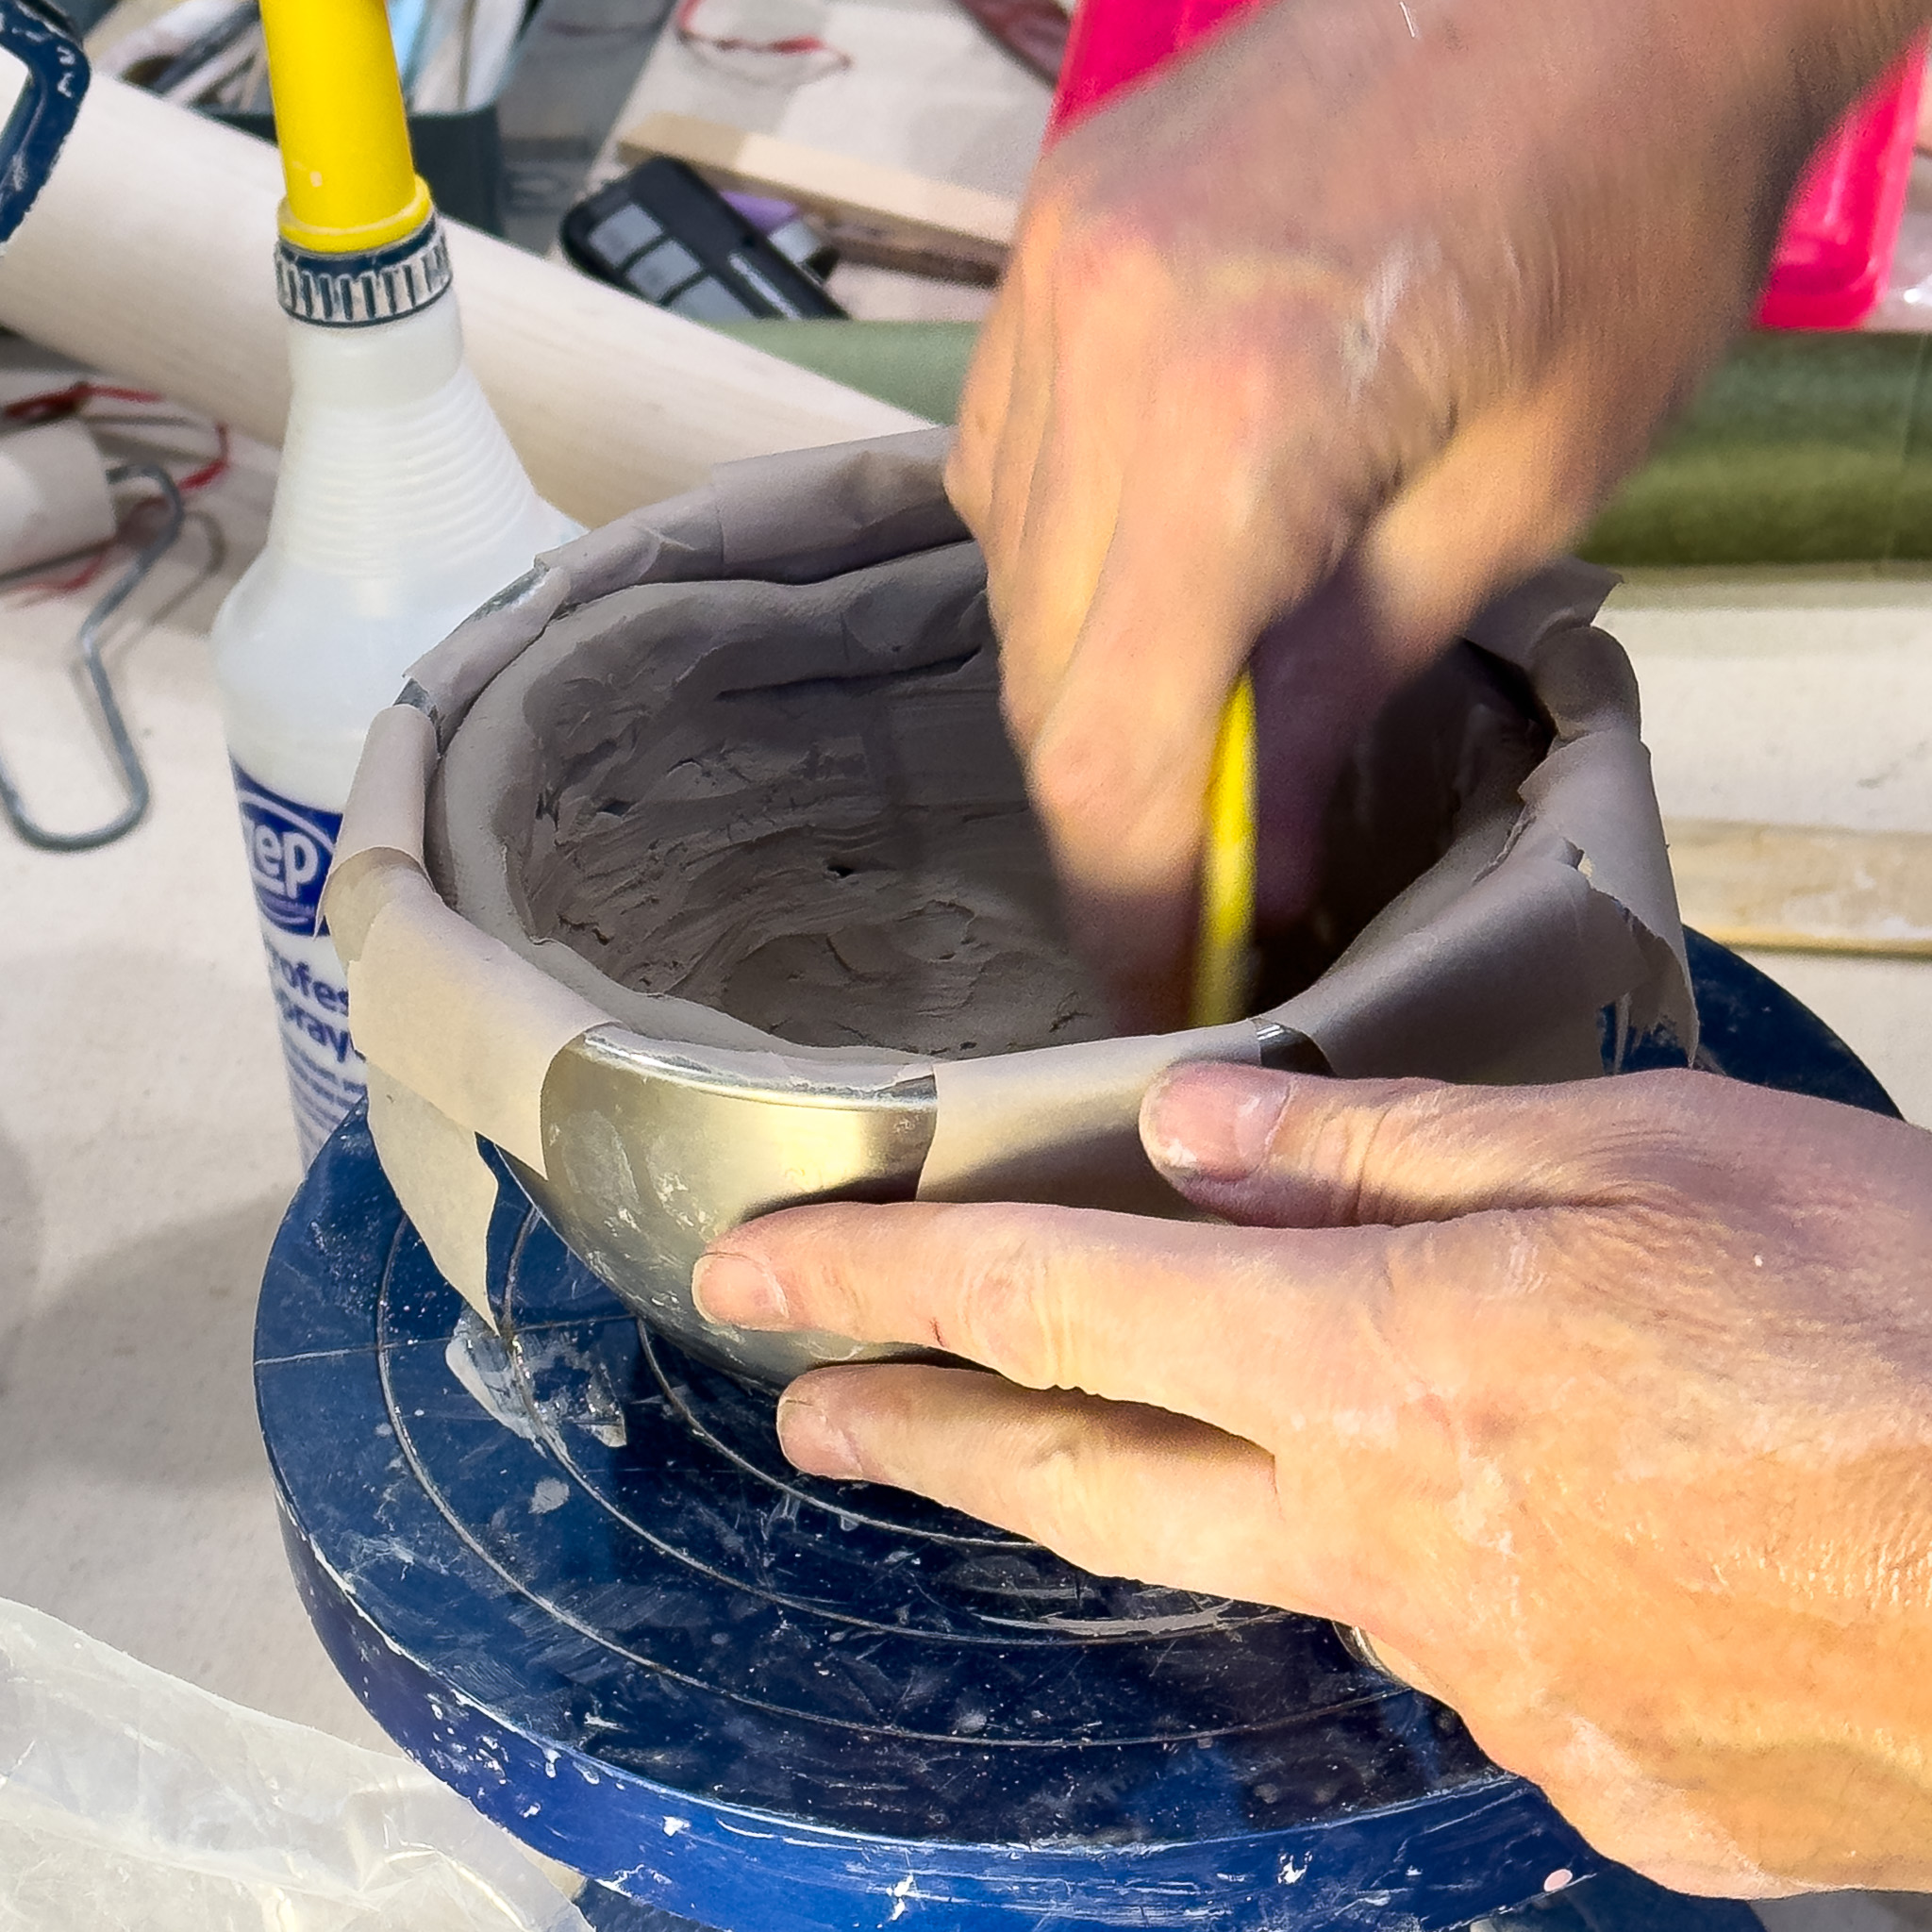
6. Once all the coils are in place, begin blending them together to create a strong structure. Don’t be afraid to add extra clay to fill gaps or reinforce thin spots. Be gentle while blending to avoid flattening or losing the outer details of your coil design.
Step 7
7. After trimming the top edge of the bowl, add a plain coil along the rim and blend it into the rest of the project for a smooth and finished look. To speed up the drying process, you can use a hair dryer, but apply heat gradually to prevent cracking. Be mindful that attaching thick clay to thin clay may cause cracks. Additionally, ensure all clay pieces are well compressed together to maintain structural integrity and prevent breakage.

Step 8
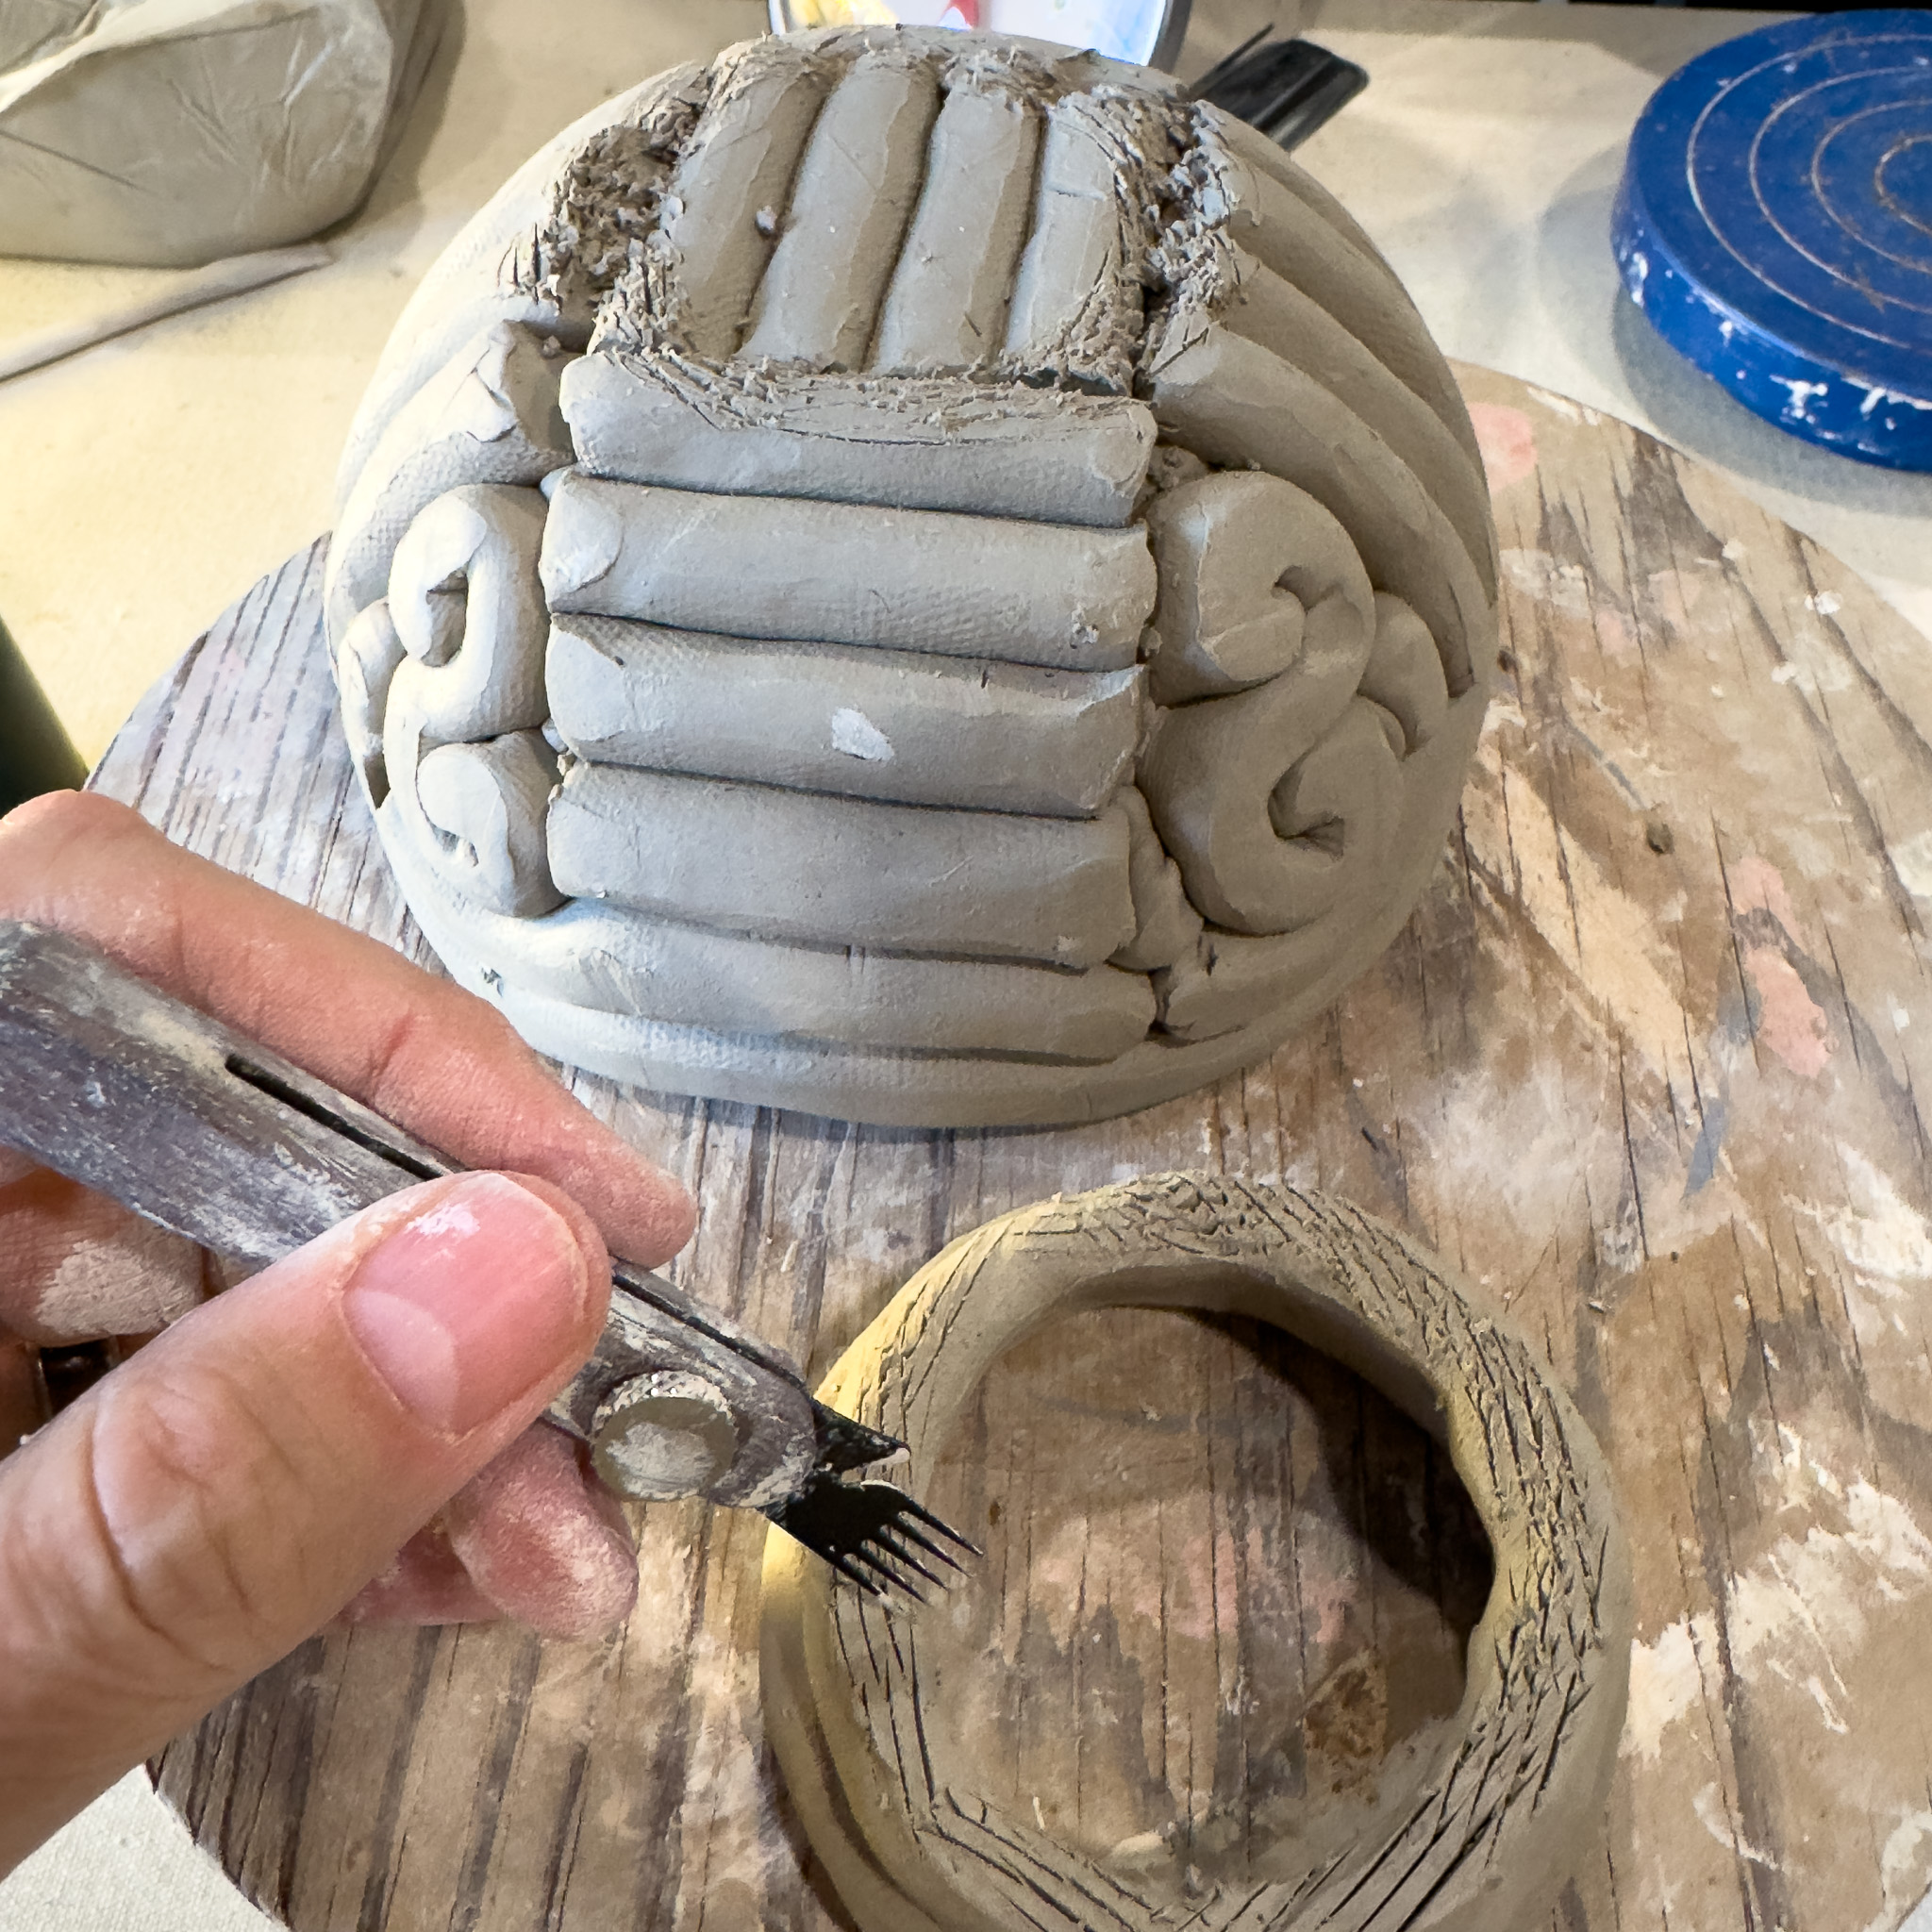
8. Let the bowl rest and begin to set up. Once the clay is no longer tacky to the touch, carefully flip the bowl onto a board for support and gently remove any newspaper that may be stuck to the clay.
Step 9
9. Once the outside of the bowl feels firm (this may take a day), you can add a foot to the bottom for stability. To do this, roll another coil that fits the bottom of the bowl, ensuring it is not too large or does not cover too much of the coil design on the outside. Remember to score and slip both the foot and the bowl before joining them together to ensure a strong bond

Step 10
10. Then, carefully flip it over to clean up and refine the inside surface. [Coil Bowl 15.jpg]

Step 11
11. Once the bowl is complete, let it dry slowly to prevent cracking and ensure an even drying process

