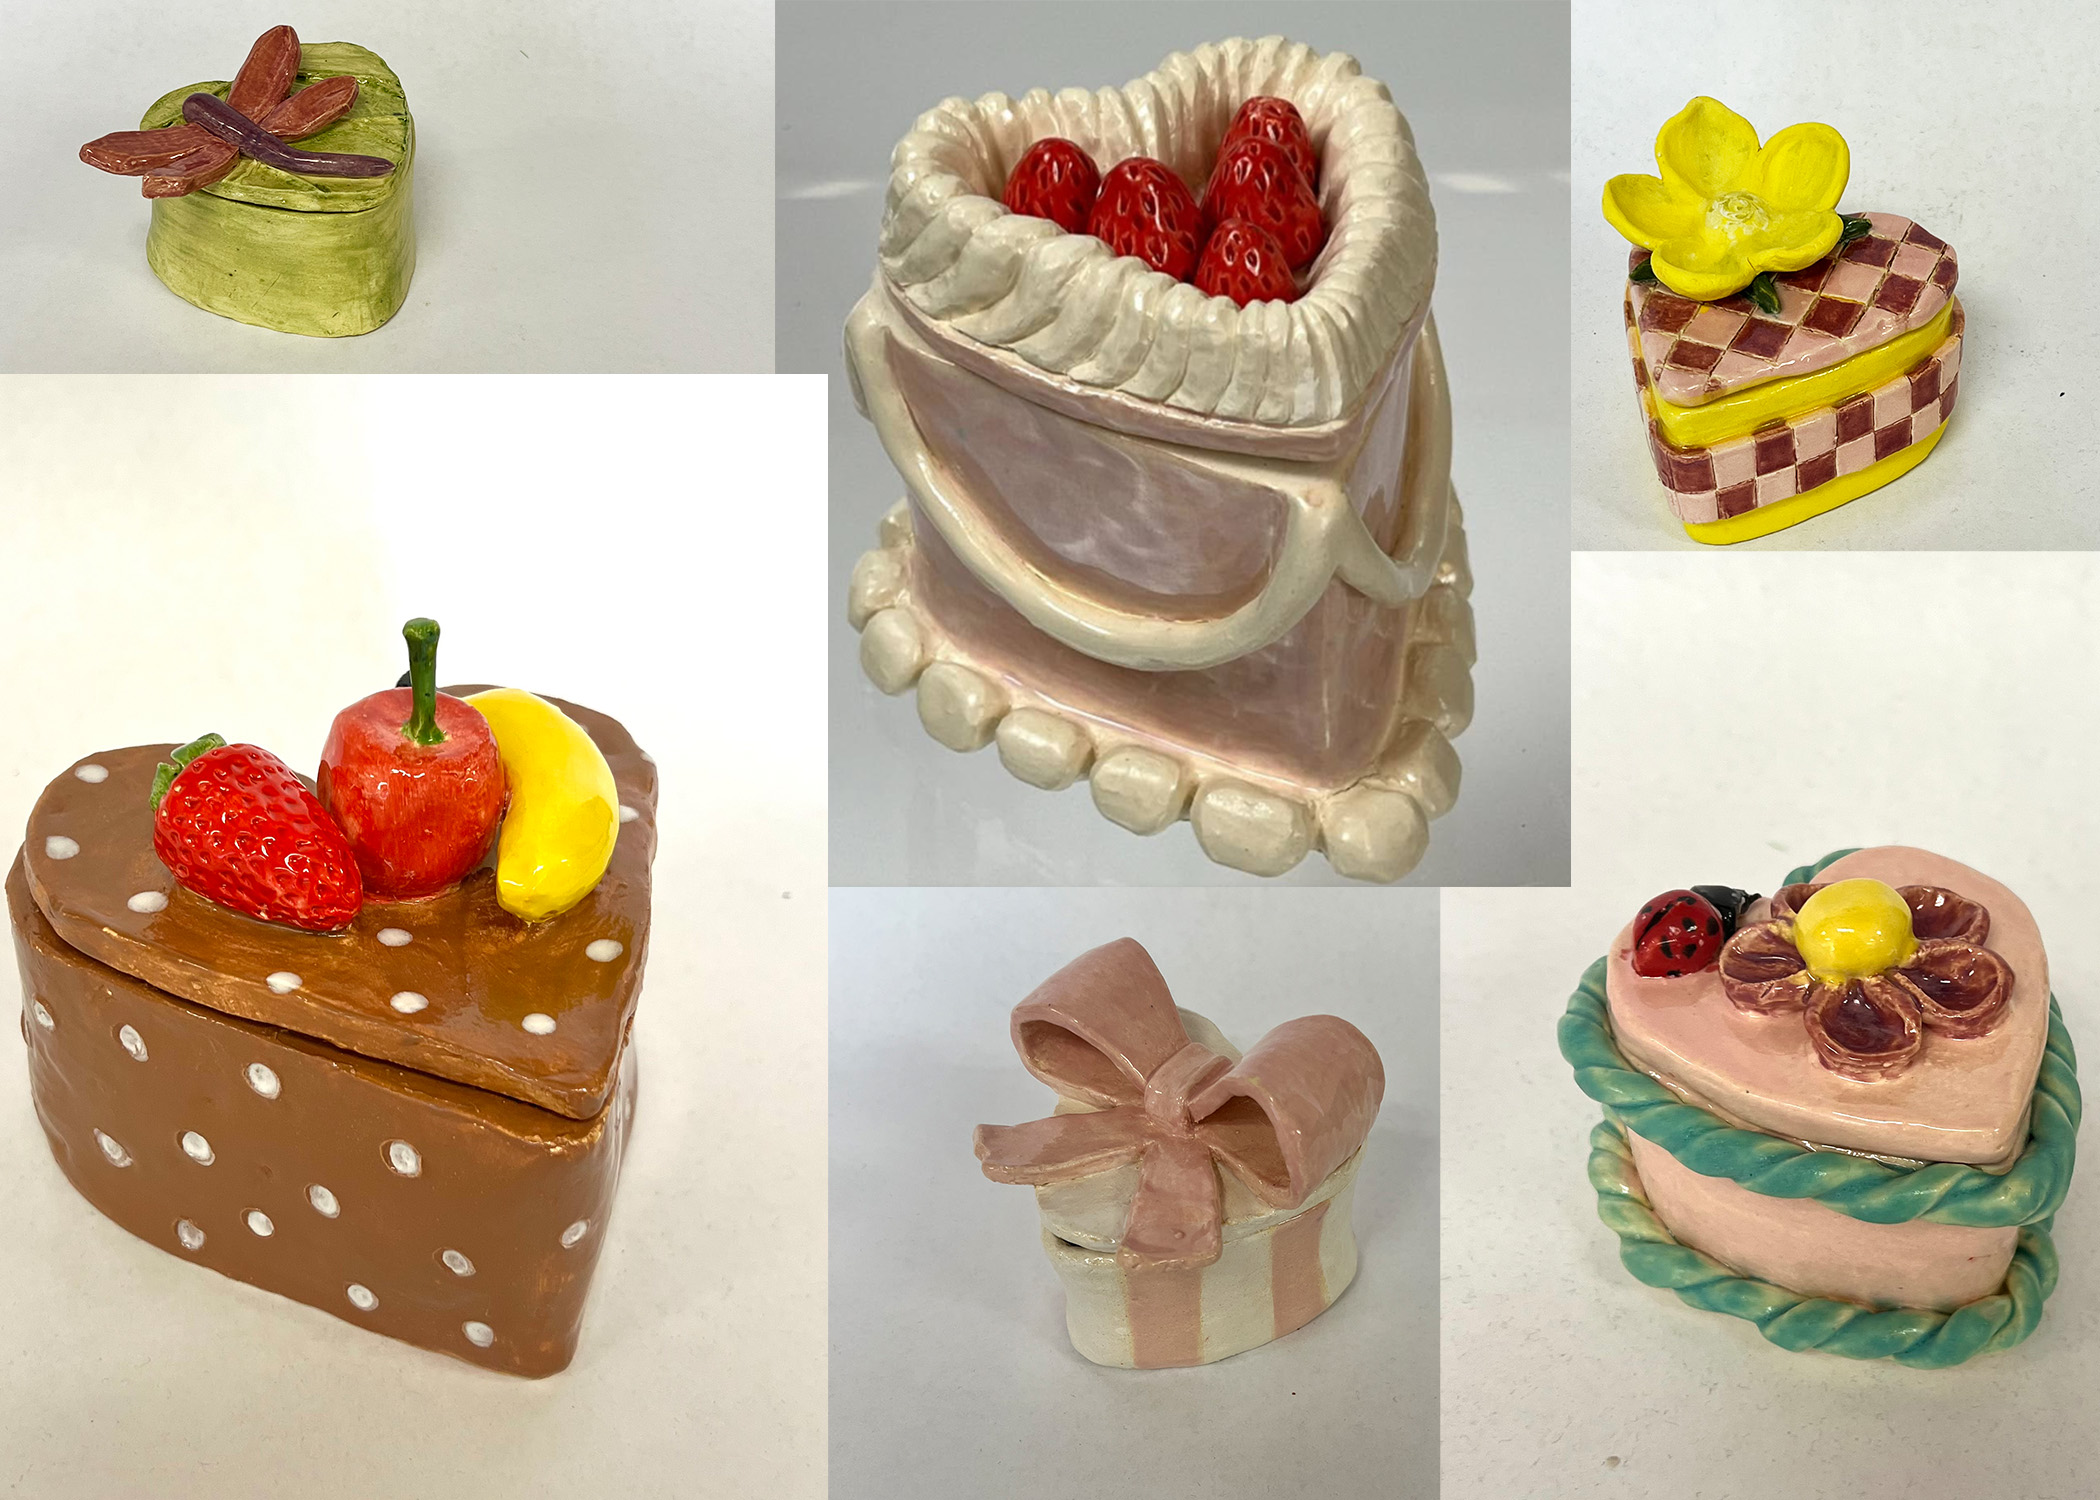
Slab Heart Box
Meet The Teacher: Amanda Zapp
Hello, I am Amanda Zapp, I teach ceramics at Porter High School. I love teaching art!
Project Description
In this project, students will design and construct a functional ceramic heart-shaped box using slab-building techniques. Students will explore how form, proportion, and surface design contribute to both functionality and aesthetic appeal.
Grade Level
High School
Difficulty
Easy
Student Hands-On Time
405 min (6 - 45 minute classes introducing, planning, building and 3 - 45 minute classes from glazing and reflecting)
Teacher Prep Time
10 min
Project Cost / Cost Per Student
2
National Core Arts Standards - Visual Arts
- Creating - Generate and conceptualize artistic ideas.
- Creating - Organize and develop artistic work.
- Creating - Conceiving and developing new artistic ideas and work.
- Responding - Evaluate and critique based on aesthetic and technical qualities.
- Connecting - Relate artistic ideas to historical, cultural, and social contexts.
- Connecting - Connect personal experiences with artmaking and meaning.
21st Century Skills
- Critical Thinking & Problem-Solving
- Creativity & Innovation
- Flexibility & Adaptability
- Social & Cross-Cultural Skills
- Productivity & Accountability
STEAM Education
- Arts
Differentiations and Accommodations
Differentiation
Advanced Learners
Accommodation
What else can you create using slabs?
Learning Objectives: Knowledge
Students will understand the importance of proportions, smooth joints, and surface textures, and how to maintain a project's structural integrity while building.
Learning Objectives: Skills
Students will be able to construct using the slab method.
Learning Objectives: Attitudes/Values
Students will have the opportunity to express their creativity by creating a surface design using their own original ideas. They will be focusing on form and texture to bring their designs to life.
Formative Assessment
Check for understanding along the way. Ask the class as a whole if they have any questions about slab building. Ask how to attach slabs together (score and slip).
Summative Assessment
Grade the final project using a rubric. 50% Following Instructions, 25% Craftsmanship, 25% Creativity.
Reflection and Discussion
Daily discussion:
- What was the most challenging part of constructing your heart box today?
- Did your lid fit correctly? If not, how will you adjust it next session?
Lesson Activities
Introduction
Introduce slab building. I usually do this project around Valentine's day, you can include SEL and social/cultural references. I end the introduction day by having students sketch their ideas for their heart box surface design.
Slab Heart-Box Making
1. Teach students how to use a rolling pin and/or slab rolling table to create slabs. Make slabs. Smooth slabs. Cut the heart box shapes from the template. 2. Attach slab pieces together by scoring and slipping. 3. Add a coil flange to the lid. 4. Add design details to the surface of the heart box by adding clay elements and subtracting (carving). 5. Allow the project to dry before firing.Allow 4-5 (45-minute classes) for building and designing bozes.
Glazing
After the bisque firing, glaze the heart-shaped boxes. Allow 3 (45-minute) classes for glazing.
Reflection
Have students answer the following reflection questions (2-3 complete sentences each): 1. What was the most challenging part of constructing your heart box? 2. Which techniques helped strengthen your box, and why were they important? 3. How does your design show attention to both aesthetics and functionality? 4. What do you like most about your project? 5. What is one thing you would change about your project?
Step-by-Step Instructions
Step 1
Teach students how to use a rolling pin and/or slab rolling table to create slabs. Make slabs. Smooth slabs. Cut the heart box shapes from the template.
Step 2
Attach the slab pieces by scoring and slipping.
Step 3
Add a coil flange to the lid.
Step 4
Add design details to the surface of the heart box by adding clay elements and subtracting (carving).
Step 5
Allow the project to dry before firing.

