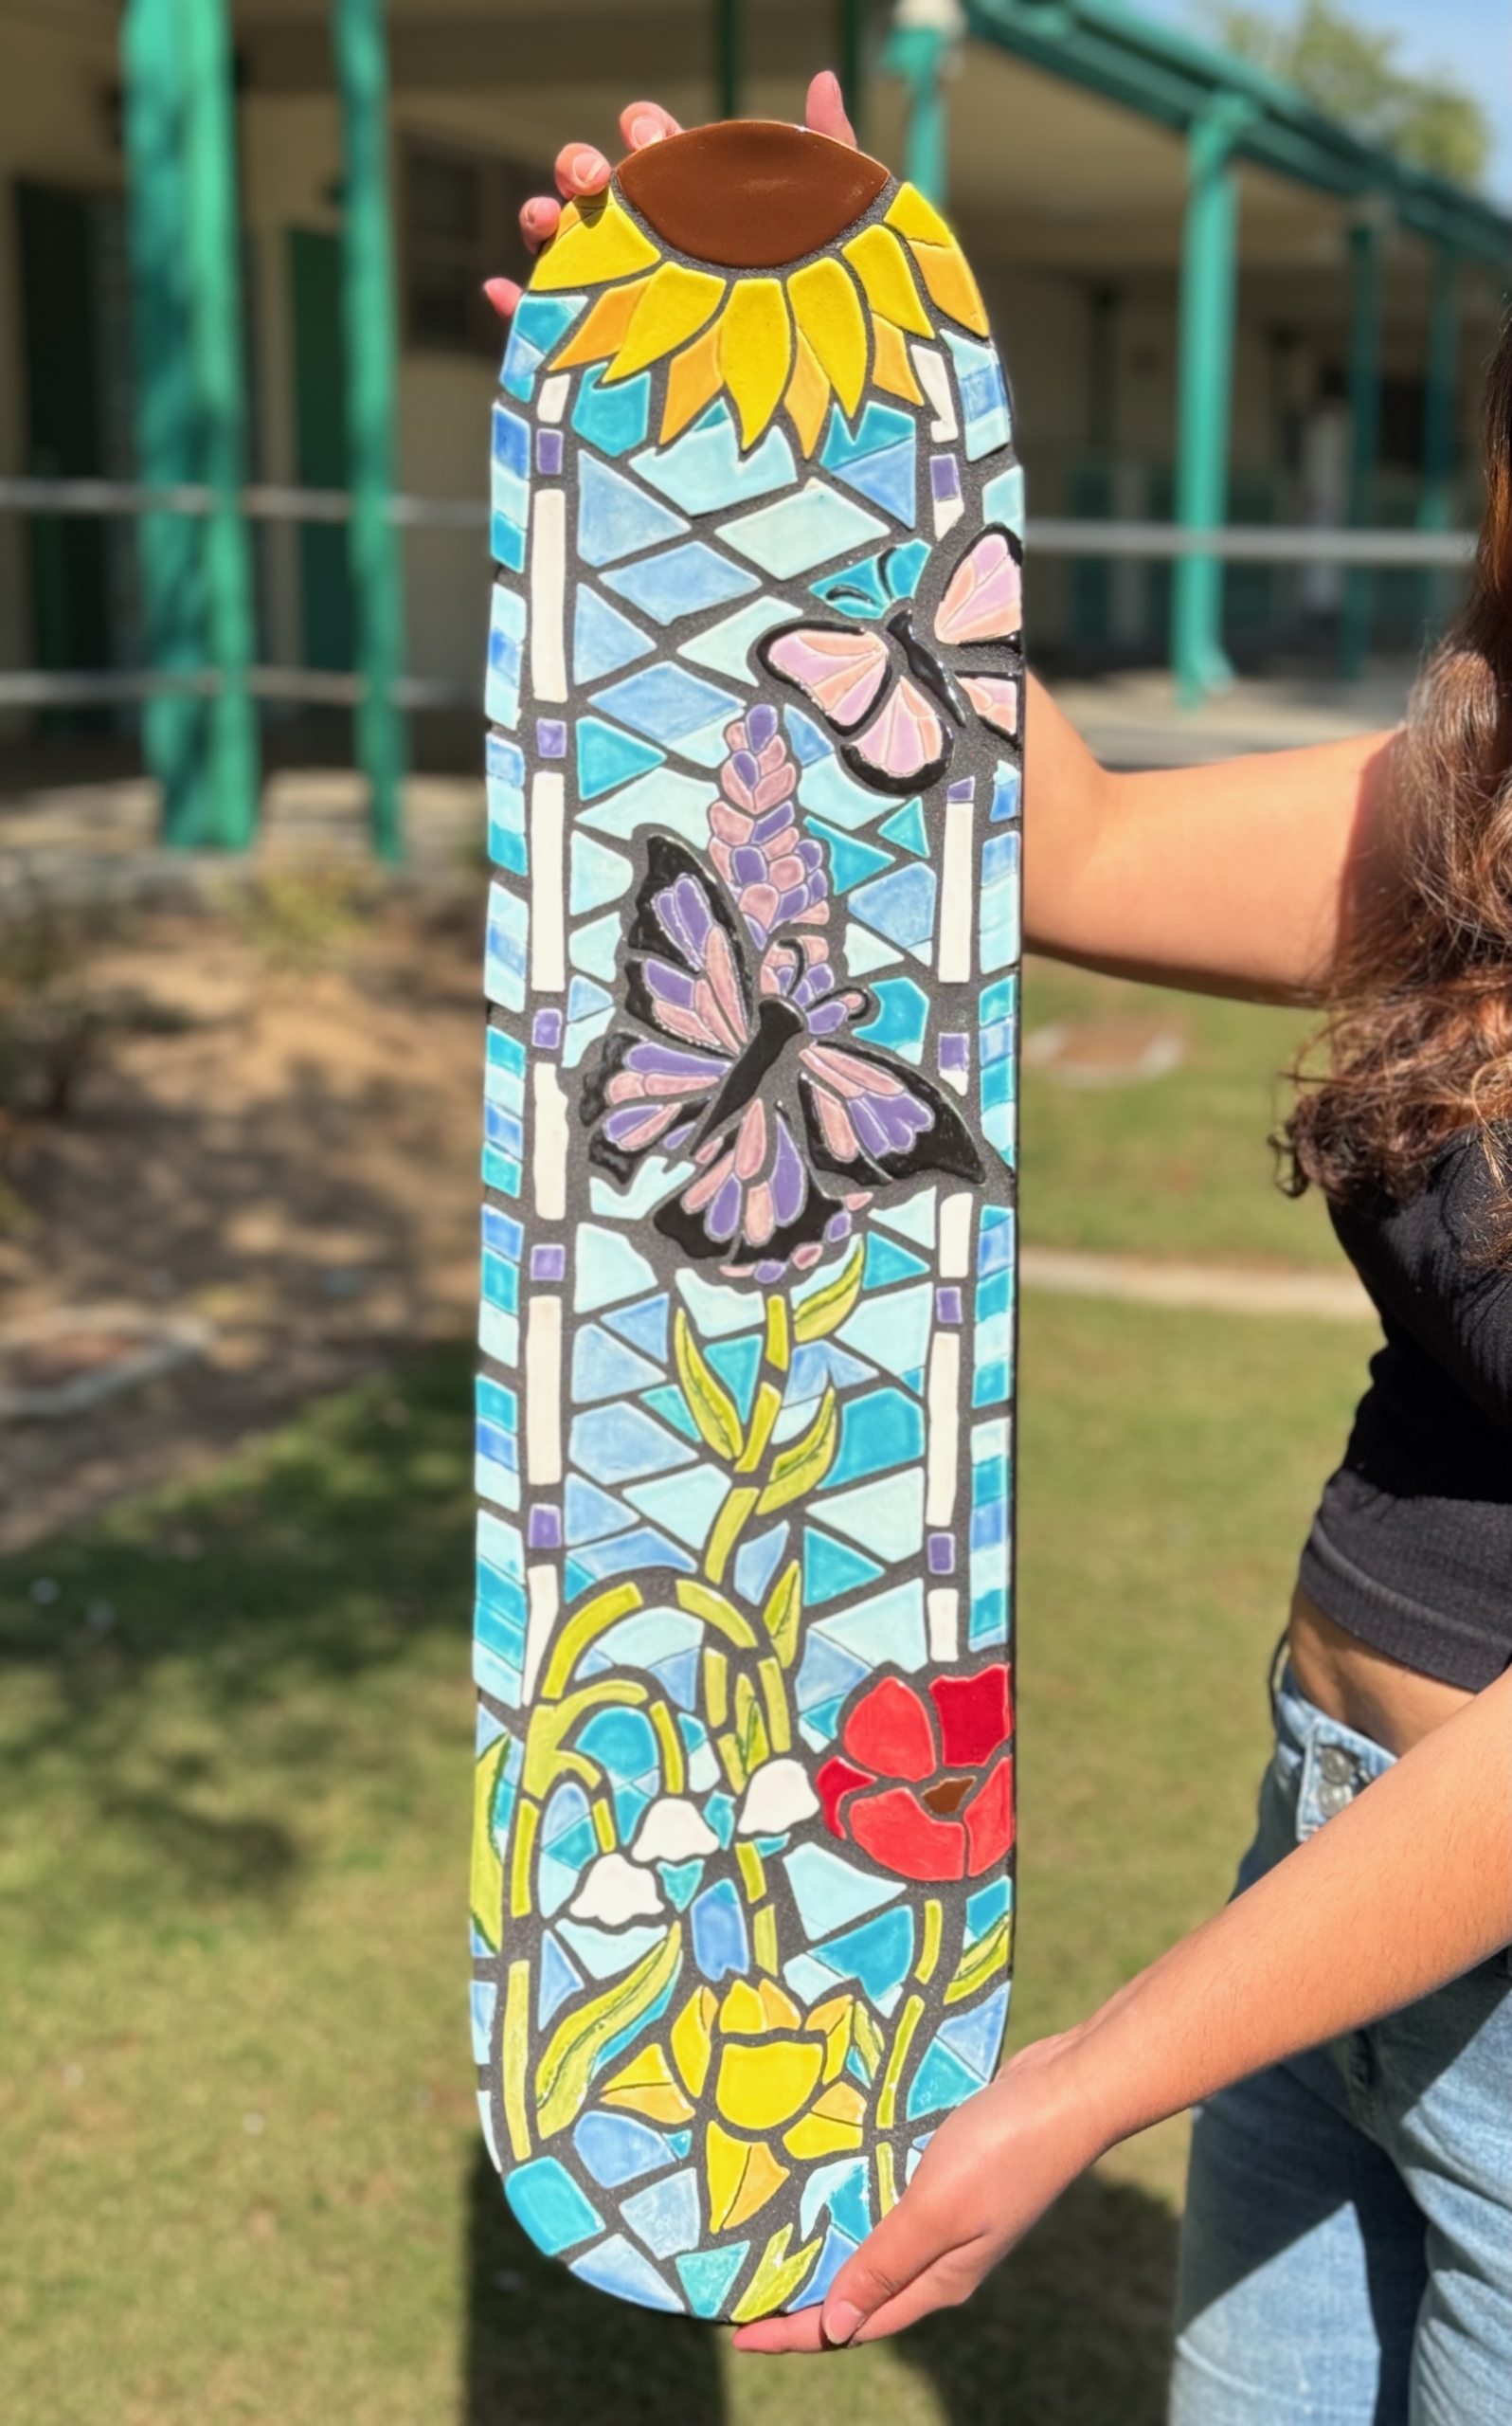
Skating into Mosaics
Meet The Teacher: Julie Neumann
I have been teaching Ceramics and Advanced Ceramics for 22 years. I deliver daily hand building and wheel throwing instruction to 180 students (9-12) at Granada Hills Charter High School in Los Angeles. My education research and passion is rooted in mosaic tile installations and community based art education.
Project Description
Students will design and create a custom mosaic tile installation on a wooden blank skateboard deck. Students will work through creative idea generation, working the clay, and final installation using tile adhesive and grout.
Materials
- Skateboard Deck Blank (32x8-full size $8) or (17x5 - mini size $3.5)
- 8 to 10 pounds clay
- Slab roller or rolling pins & dowel rods
- Plastic wrap or large plastic bags
- Individual plastic box with lid (for organization)
- Cutting tools
- Stylus tool (draw lines through paper onto clay)
- Bucket & sponge
- Glazes
- Gloves
- Tile adhesive (mastic)
- Spatula (dollar store)
- Grout
- Separate sponges for grout
- Acrylic paint
Grade Level
High School
Difficulty
Intermediate
Student Hands-On Time
4 weeks total work time. 1 week for design and paper template, 1.5 week for clay production, .5 for glazing, 1 week for installation (Based on 5-50 minute periods per week)
Teacher Prep Time
2 hours (30 minutes prep at the beginning of each week for materials prep and demos)
Project Cost / Cost Per Student
18
National Core Arts Standards - Visual Arts
- Creating - Generate and conceptualize artistic ideas.
- Creating - Organize and develop artistic work.
- Creating - Conceiving and developing new artistic ideas and work.
- Presenting - Develop skills for artistic presentation and exhibition.
- Responding - Perceive and analyze artistic work.
- Responding - Interpret intent and meaning in artwork.
- Responding - Evaluate and critique based on aesthetic and technical qualities.
- Connecting - Connect personal experiences with artmaking and meaning.
21st Century Skills
- Critical Thinking & Problem-Solving
- Creativity & Innovation
- Communication
- ICT (Information, Communications, and Technology) Literacy
- Flexibility & Adaptability
- Initiative & Self-Direction
- Productivity & Accountability
STEAM Education
- Technology
- Engineering
- Arts
Differentiations and Accommodations
Differentiation
Advanced Learners
Accommodation
Increase project difficulty by increasing the number of tiles, adding texture/design requirements on the clay, or including luster/decal firing to the complexity of the design.
Differentiation
Struggling Learners
Accommodation
Reduce the difficulty by using smaller youth skateboard blanks (17x5) or use a simple wood shape (square), simplify the design and make the tiles larger to reduce the number of tiles.
Learning Objectives: Knowledge
Students will know how to create a design that works for tile installation. Students will understand the challenges that the clay medium presents, specific to flat tile design. They will be able to evaluate the quality and execution of a mosaic tile design and installation. Students will understand the relationship between clay shrinkage and grout line spacing.
Learning Objectives: Skills
Students will understand how to transpose a drawn design from a small sketch to a large template. Students will know how to create tiles that will fit together well and are adequate for installation. Students will know how to install tiles onto flat surfaces using tile adhesive and how to finish a tile installation with grout to fill the gaps. The tile work skills gained through this project can apply to future tile opportunities in students' homes, jobs, or future artworks.
Learning Objectives: Attitudes/Values
Students will develop problem solving skills through real life experiences. Students will move through set-backs at different steps of the project and develop resilience as they come up with solutions. Students will learn to listen, understand, and value and other suggestions, support, and feedback.
Formative Assessment
Weekly goals are articulated at the beginning of the week. Teacher will assess progress ongoing and provide formative feedback to meet the weekly goals.
Summative Assessment
Summative assessment includes a project evaluation rubric to be completed by both the student and teacher. Student and teacher can conference to discuss the projects successes and examples of students overcoming issues to complete the project.
Reflection and Discussion
Why is the skateboard shape relevant to youth? What other shapes or surfaces would be interesting to use for a mosaic installation? How did you come up with your design? Where did you draw your inspiration? What are you most proud of on this work of art? What was challenging about designing the tiles to ensure a proper fit on the skateboard? What challenges did you encounter along the way and how did you overcome? What advice would you share with a student exploring this project in the future?
Lesson Activities
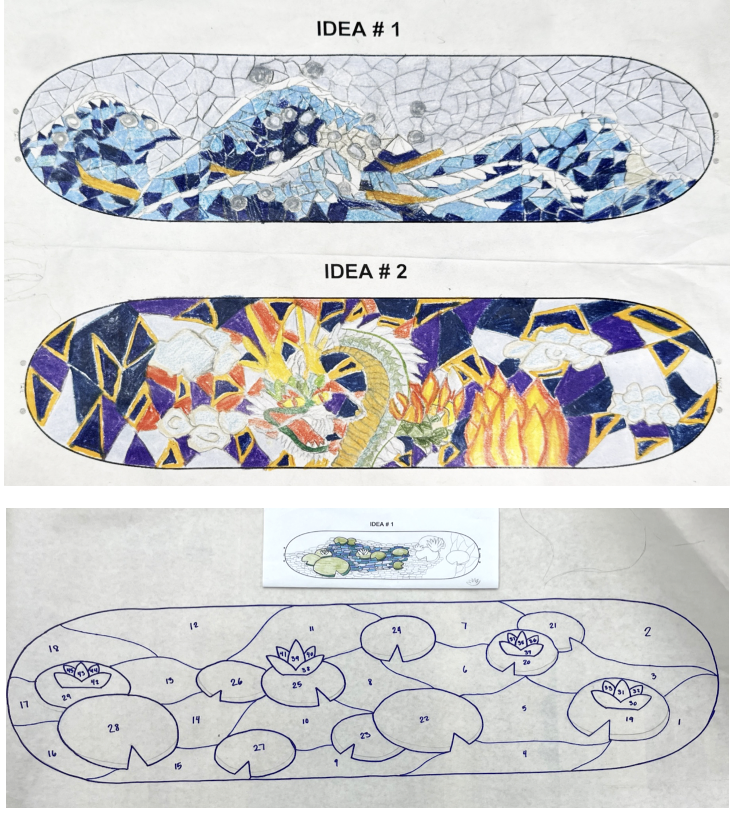
Idea Generation
Brainstorm and research, free draw ideas in sketchbook, select 2 ideas to refine and add colors on handout with colored pencil or markers. Select on option and transpose onto the full size paper template. Divide the tiles and number.
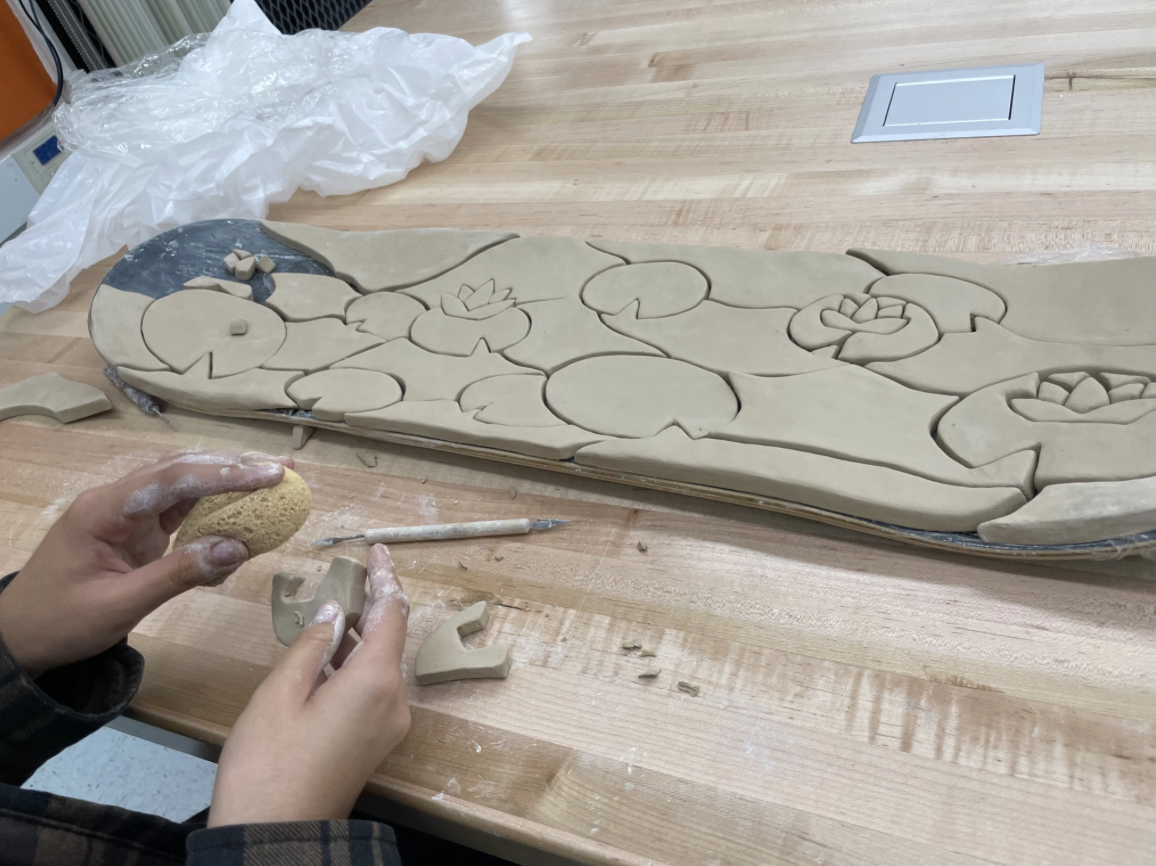
Working the Clay
Cover the skateboard with a consistently thick slab. Roll a long slab using the slab roller, or work in sections if using a rolling pin. Place the paper template on top of the clay and draw along the lines. Remove the paper and cut the tiles. Once leather hard, smooth and clean the tiles. Number the back and fire. After firing, glaze each tile and re-fire.
Installation
Place the finished tiles back onto the skateboard and space out to accommodate the grout lines. Glue tiles to the board with tile adhesive and allow to dry over night. Apply grout by spreading into the lines and clean immediately with a wet sponge. Dry overnight. Clean and shine tiles with a rag or a scouring pad. Apply black acrylic paint around the outside edge of the board to clean and finish.
Exhibition & Critique
These projects grab the attention of most high school students. The skateboard shape is relevant and engaging. Display the skateboards on campus or have the students carry them around at lunch to prompt conversation amongst their peers.At the completion of the project, engage in a critique of the work. Use the discussion and reflection prompts to facilitate a meaningful group conversation.
Step-by-Step Instructions
Step 1
IDEA GENERATION Teacher Prep: Copy the skateboard sketching template handout. Trace the skateboard shape onto a piece of card stock and cut it out. Student work: Student use technology to brainstorm and research. Create free draw ideas in sketchbook. Select 2 ideas to refine and add colors on handout with colored pencil or markers. Select one option and transpose the design onto the full size paper template (use a grid if needed). Divide the design into tiles, no smaller than a quarter and no bigger than an orange. (TEACHERS - LOOK out for extra small tiles, pointy/thin tiles, and "captured" shapes like circles within circles. Draw lines to divide these shapes so they can be released. These will often cause heartache later). Outline the tiles with a dark marker and number each tile. IMPORTANT: Take a photo of the sketch and template and keep these in a safe place throughout the entire project - if you lose this paper it is very difficult to get your tiles back together without the numbered template. The photo is your backup plan.
Step 2
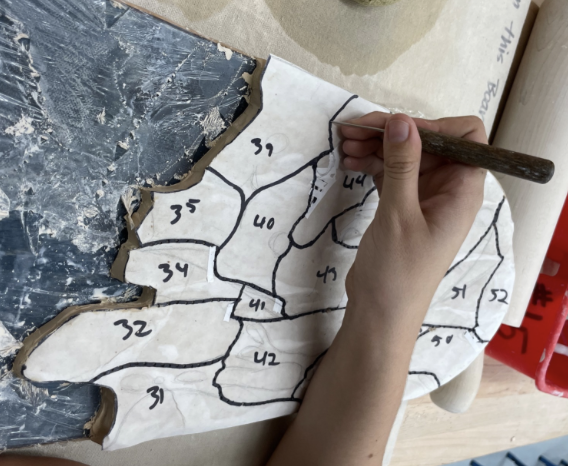
WORKING THE CLAY: Roll a long slab using the slab roller, or work in sections if using a rolling pin. Cover the skateboard with a consistently thick slab. Place the paper template on top of the clay and press onto the clay. Use the moisture in the clay to help the paper stick BUT do not leave the paper on the clay overnight. Use a stylus or the side of a pin tool. Work quickly to draw along the sharpie tile lines in one setting or the paper will be too wet and your tool will poke through the paper. Remove the paper and check the lines. Ensure the lines are all correct before you cut.
Step 3
WORKING THE CLAY: Use a sharp tool to cut the tiles while the clay is wet. Keep the tiles in place on the board. Wrap the board with plastic wrap or put in a trash bag while working day to day.
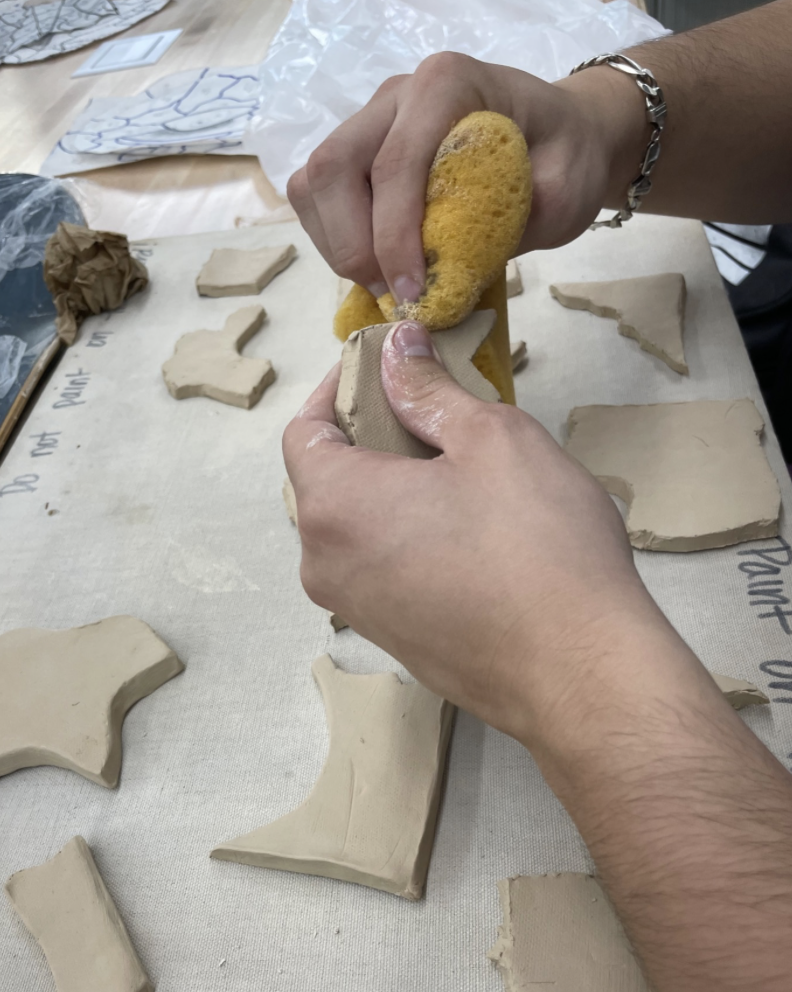
Step 4
WORKING THE CLAY: Once leather hard, smooth and clean the top edges of the tiles. Scratch the corresponding number on the back of the tile that aligns with your drawn template. When each tile is finished, place it into a plastic box with a lid (separate boxes for each student). This ensures you do not mix the tiles and can help with storage by stacking the boxes. Allow the tiles to dry and fire. When loading the tiles into the kiln for the 1st firing, leave a 1 inch gap between the stacks of tiles so you do not mix students tiles.
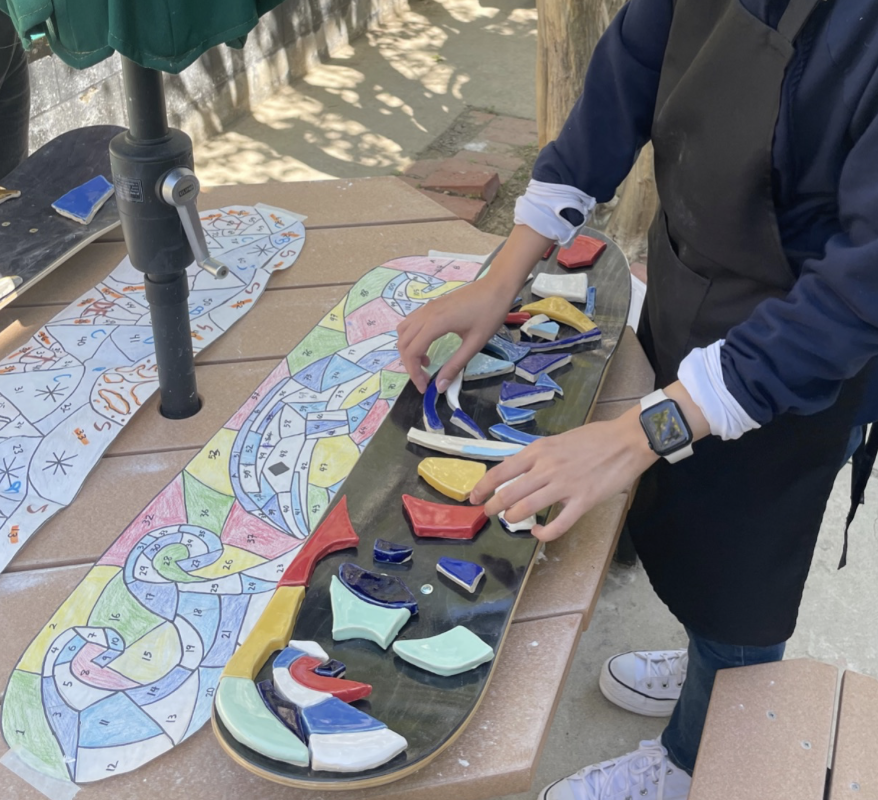
Step 5
WORKING THE CLAY: Place your paper template onto the skateboard and then dry fit the fired tiles on the board. Use a marker to assign a glaze color to each tile. Divide the marked tiles into stacks with the same glaze. Glaze each tile with the assigned glaze. Only the tops need to be glazed. Ensure there is no glaze on the bottom of the tiles. Students should place the glazed tiles into their box as they finish.

Step 6
WORKING THE CLAY: Place the tiles in the kiln. Depending not the kiln size, you can fire 1 to 3 students work per shelf. Fire. Once the kiln is finished and you can see the glazed colors, it is easier to divide the tiles back into the student boxes.
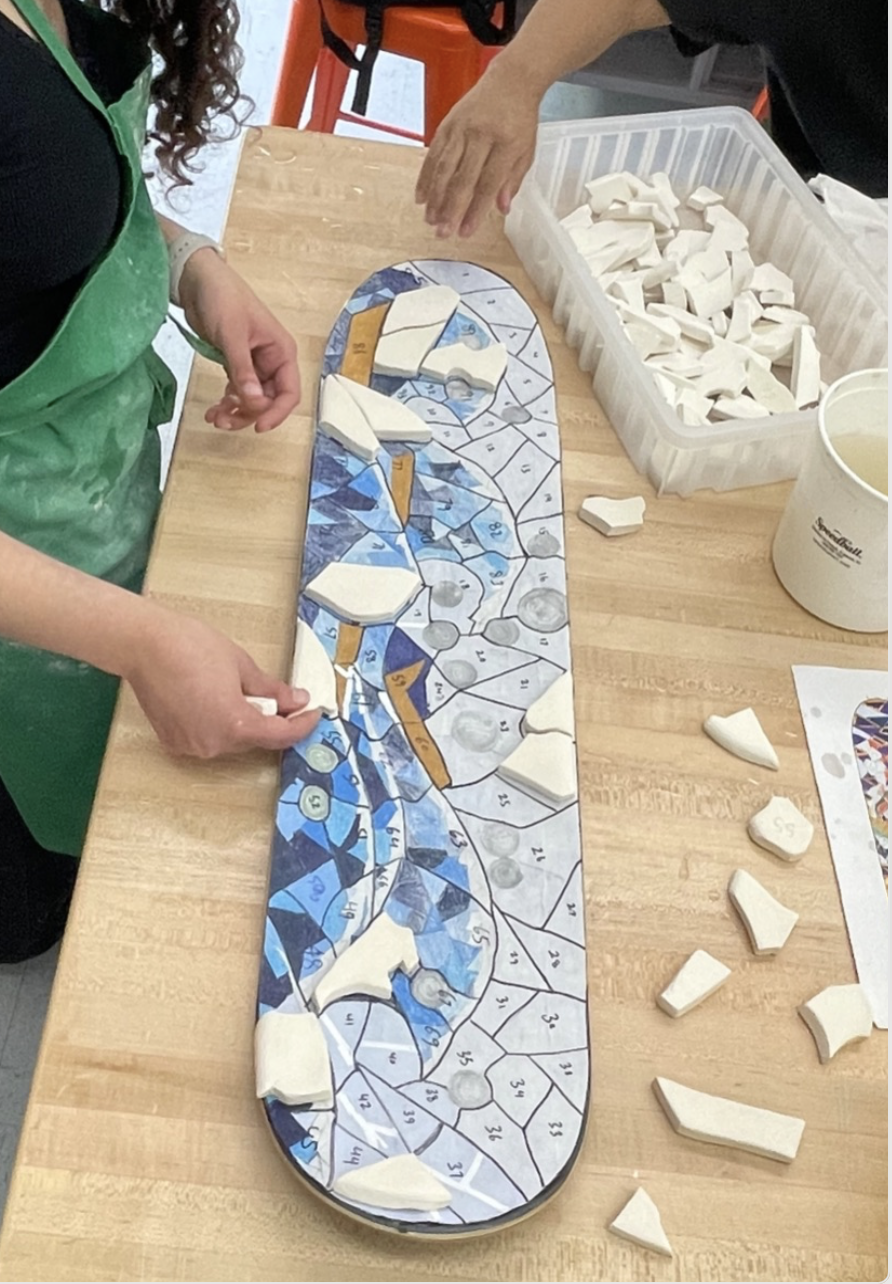
Step 7
INSTALLATION: Place the finished tiles back onto the skateboard and space out to accommodate the grout lines.

Step 8
INSTALLATION: Glue tiles to the board with tile adhesive (use gloves). You can either smooth 1/8" of adhesive into a small section of the board and place the tiles into the adhesive, or use a spatula and spread adhesive onto the back of each tile individually and then put the tile into place. Students will have a preference depending on their skill level and handling of the material. Lightly press each tile onto the board to ensure proper adherence. Ensure the spacing is even throughout. Allow to dry over night.

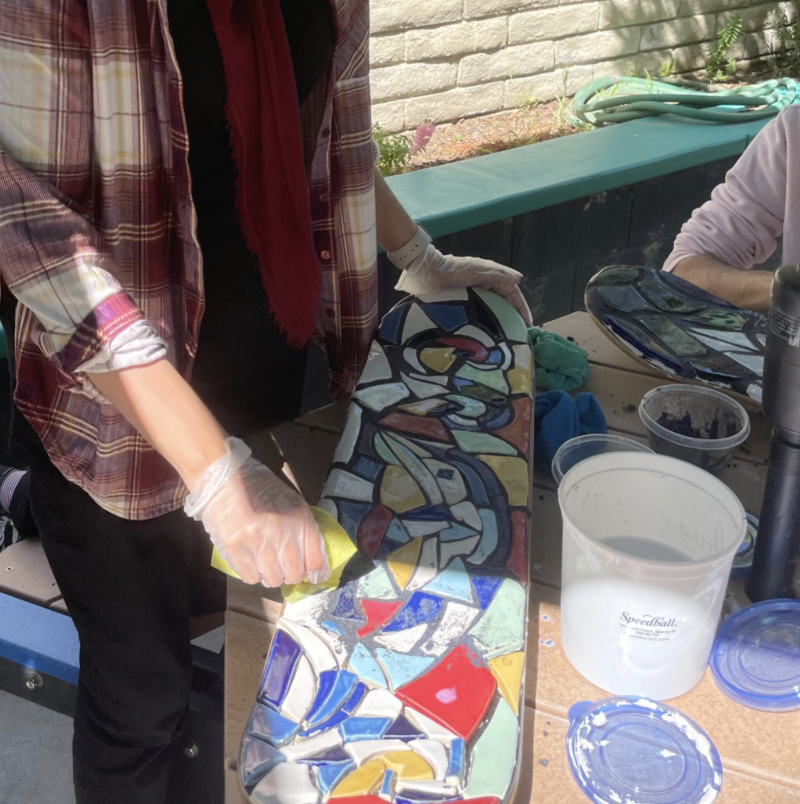
Step 9
INSTALLATION: Apply grout by spreading into the gaps using your hands (with gloves) or a spatula. Work in small areas by dividing the board into 5 sections. Clean the grout from the tops of the tiles immediately with a wet sponge. Keep rotating the sponge to a clean section not the sponge and then dunk the sponge into the bucket of water to clean. You should be cleaning the tiles by removing the excess grout. If you do not remove the grout from the surface, you will just spear it around. Use the sponge & water to smooth the grout lines. If an area dries too quickly, apply a small amount of water and spread around to rehydrate the grout. Allow to dry overnight.
Step 10
INSTALLATION: Clean and shine tiles with a rag or a scouring pad. Apply black acrylic paint around the outside edge of the board to clean and finish.

