Pottery Portals
Meet The Teacher: Elizabeth Anderson
I have been teaching high school art in North East Wisconsin since 2005. My focus is on designing projects that help every student find success and take genuine pride in what they create. Outside the classroom I enjoy creating colorful art, sewing and making jewelry.
Project Description
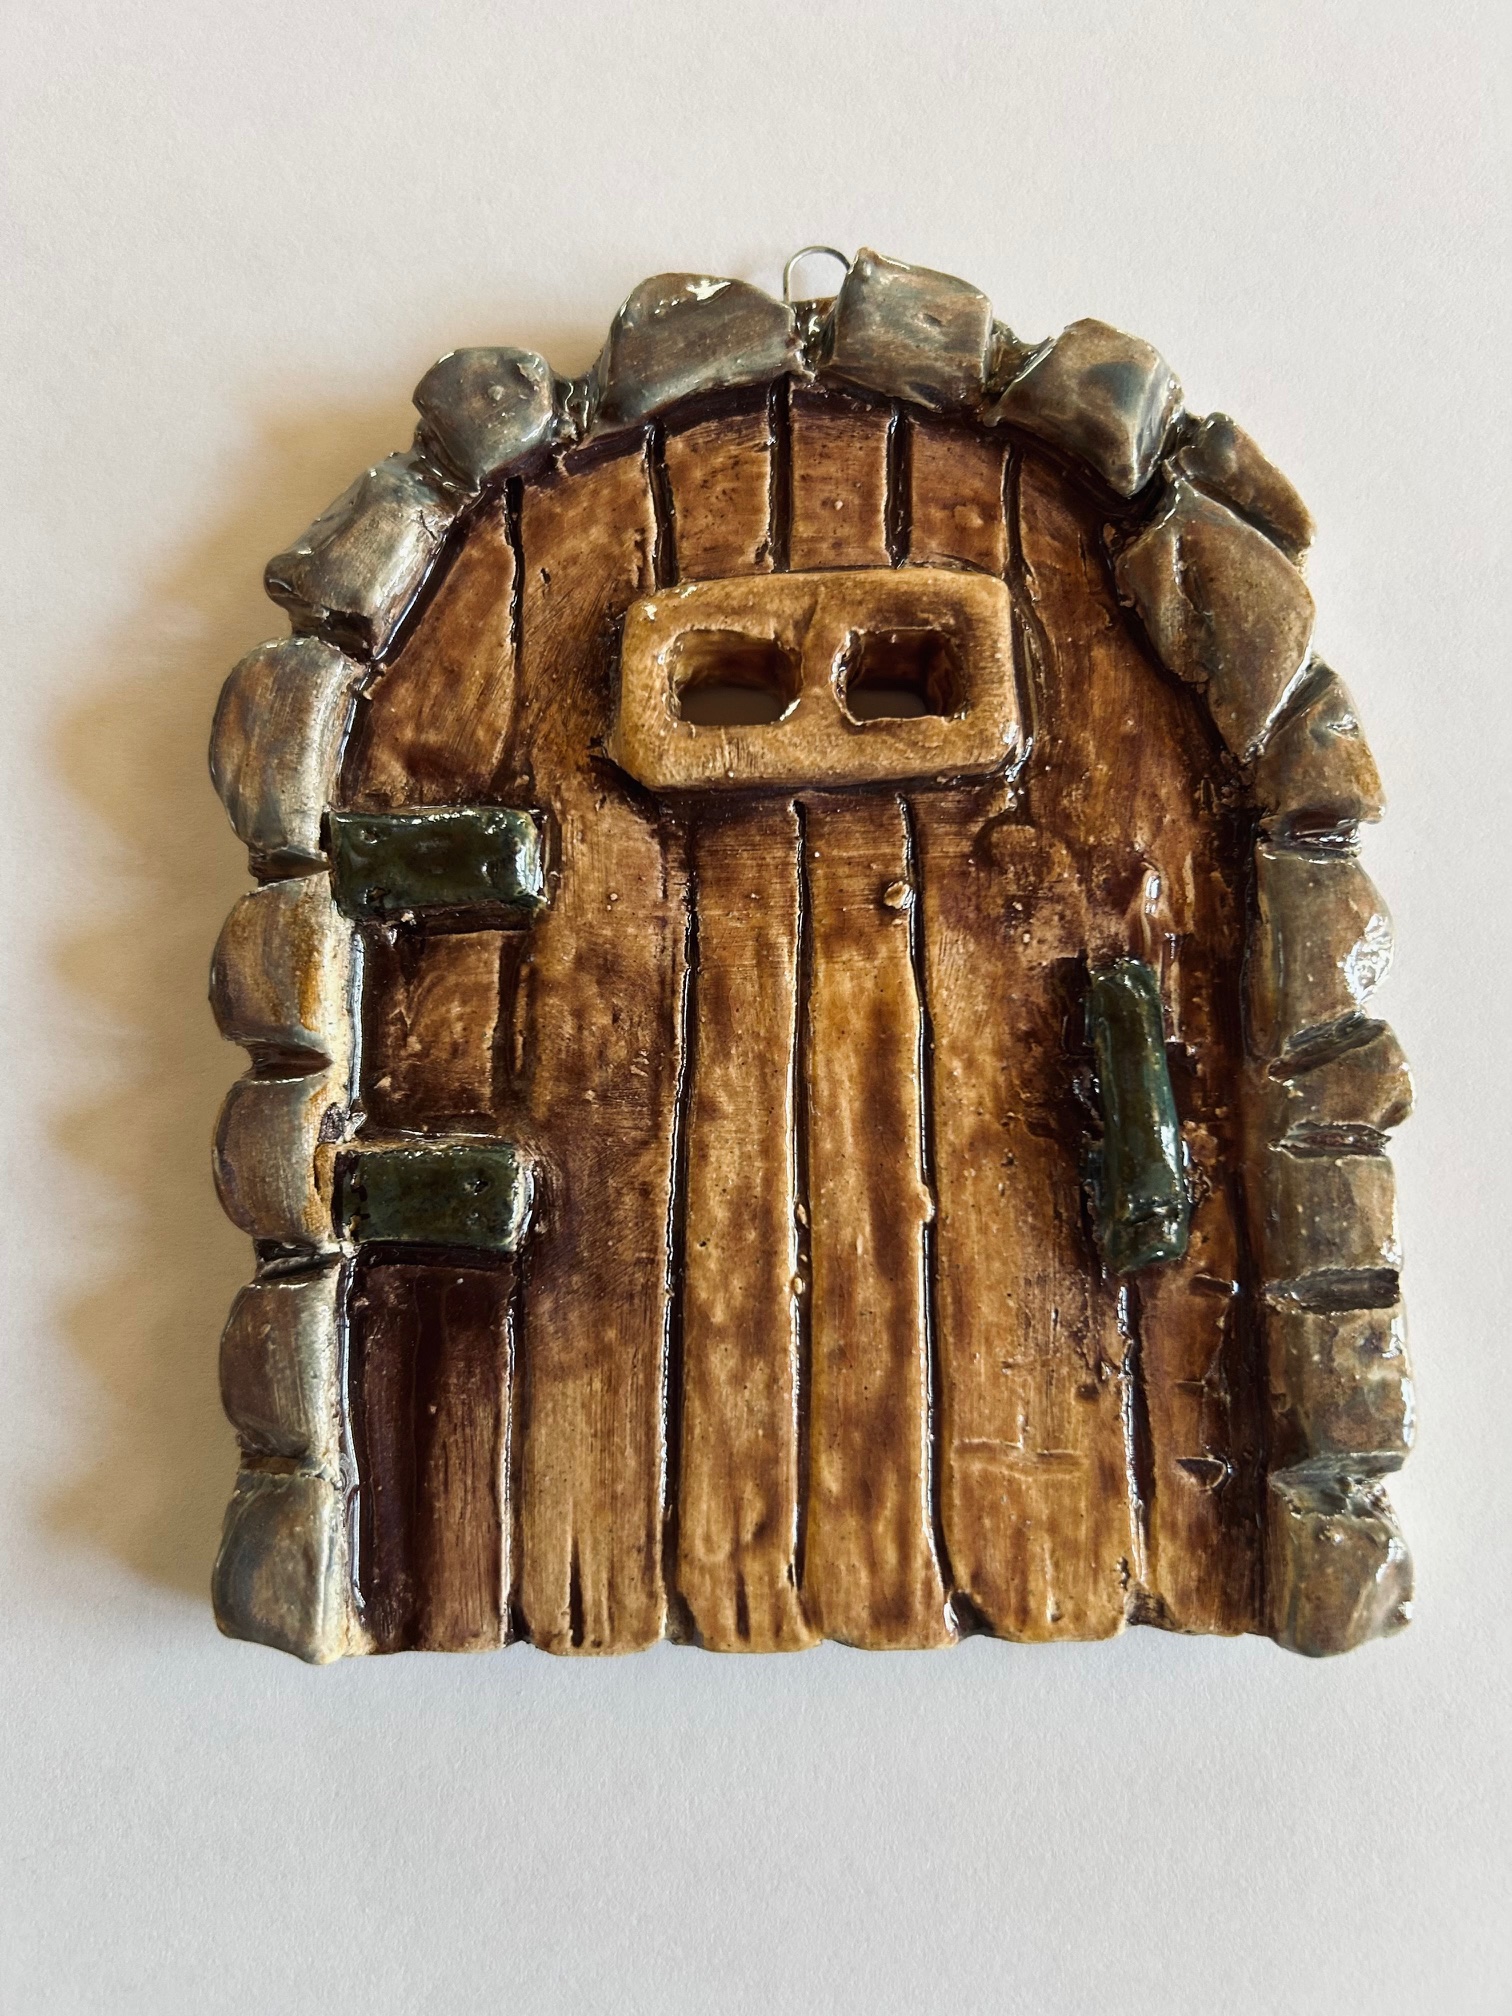
This project challenges students to create an imaginative mini door using slab and relief techniques. Students master the art of intricate attachments, creating small coils and hand-sculpted texture details.
Materials
- Clay (Goldart with Grog)
- glaze, underglaze, or paint
- clay tools
- High Temperature Nichrome u-shaped hooks
Grade Level
High School
Difficulty
Easy
Student Hands-On Time
90 minutes
Teacher Prep Time
20 minutes
Project Cost / Cost Per Student
4
National Core Arts Standards - Visual Arts
- Creating - Generate and conceptualize artistic ideas.
- Creating - Organize and develop artistic work.
- Creating - Conceiving and developing new artistic ideas and work.
- Connecting - Relate artistic ideas to historical, cultural, and social contexts.
21st Century Skills
- Critical Thinking & Problem-Solving
- Creativity & Innovation
- Initiative & Self-Direction
STEAM Education
- Arts
Differentiations and Accommodations
Differentiation
Struggling Learners
Accommodation
Use Pre-made slabs: Provide students with slabs that had already been rolled out this ensures the slab is level without the student needing to manage the tools and the clay simultaneously. Thicker Slabs: Encourage struggling learners to aim for 3/8" rather than 1/4". A slightly thicker slab is more forgiving of over-handling and less likely to flop or crack when being moved. Subtractive Texture: Instead of adding "Z-braces" or panels (which require the score-and-slip process), have students carve the lines of the braces into the slab using a blunt tool. They still achieve the "door" look with zero risk of pieces breaking in the kiln.
Differentiation
Advanced Learners
Accommodation
Instead of just scoring and slipping pieces on top, challenge advanced students to cut "windows" out of their main slab and "float" thinner panels inside them.Have students cut the edges of their trim at a precise 45° angle to create seamless mitered corners for a more sophisticated, high-end look. Encourage experimenting with new hot or cold finishes
Learning Objectives: Knowledge
Students will know how to achieve uniform slab thickness and compress clay to prevent cracking and warping. Students will know how to use templates to ensure the door is the appropriate size Students will know how to manage moisture through slow drying techniques to maintain a flat slab. Students will know how to achieve the desired surface texture Students will know basic rules of glazing or under glazing
Learning Objectives: Skills
Students will know how to use the slab roller and rib Students will know how to score and slip decorative elements Students will know how to use templates to ensure the door is the appropriate size
Learning Objectives: Attitudes/Values
Students will cultivate patience and discipline by adhering to a class timeline.Students will will know how to value craftsmanship and precision, recognizing that small details significantly impact the quality of the finished piece.Students will know how to develop resilience and problem-solving when faced with technical setbacks, such as surface cracks, glazing expectations or warping during the firing process.
Formative Assessment
Formative assessment is through teacher observation.
Summative Assessment
Rubric: Structural Integrity- Door is perfectly flat; no warping or cracks; all details are firmly attached, Minor warping at the corners; one detail is slightly loose but attached., or Significant warping; pieces fell off in the kiln; visible cracksTexture- Texture is clear and intentional; no unwanted finger marks; rib compression is evident. Texture is visible but "muddy" or faint in some areas. Surface is rough; unwanted tool marks or air bubbles are presentDisplay- Wire hook is centered, deep-set, and supports the weight of the door, Wire is off-center or feels slightly loose, Wire fell out or was not installed correctly.Craftsmanship- Edges are clean and smoothed, Edges are mostly clean but have some "burrs" or sharp spots, Edges are jagged; door is noticeably out of square.
Reflection and Discussion
To help students brainstorm ask them to think about the narrative, environment, and character that is behind the door.If students are making a Hobbit-style door, brainstorm a story about who lives behind it.
Lesson Activities
Day 1
Preparation: Wedge the clay to remove air bubbles. Slab: Use guide sticks or a slab roller to achieve a uniform thickness (aim for 1/4" to 3/8"). Compress: Use a metal or rubber rib to burnish both sides of the slab. This aligns the clay particles to prevent warping during the drying and firing stages. Template: Lay a paper template onto the slab. Use a needle tool or fettling knife to trace the pattern Cleanup & Storage: Place the slab on a covered wooden board to begin a slow, even drying process that prevents the edges from curling. Wrap project with plastic loosely
Day 2
Texture: Use stamps, rollers, or found objects to press "wood grain" or decorative patterns into the door while the clay is still wet Additive Details: Hand-build Z-braces, panels, trim pieces or rocks to give the door architectural depth. Score and Slip: Use the score and slip method to securely attach all decorative details. This ensures a strong mechanical bond that won't pop off in the kiln. Wire Hook: Cut a piece of high-fire wire (Nichrome or Kanthal) and bend it into a "U" or use a premade wire and push into the top edge of the door. Check that the hook is centered and the door hangs level before moving it to the drying rack.
Day 3
Add choice of finish like glaze, under glaze, or paint

