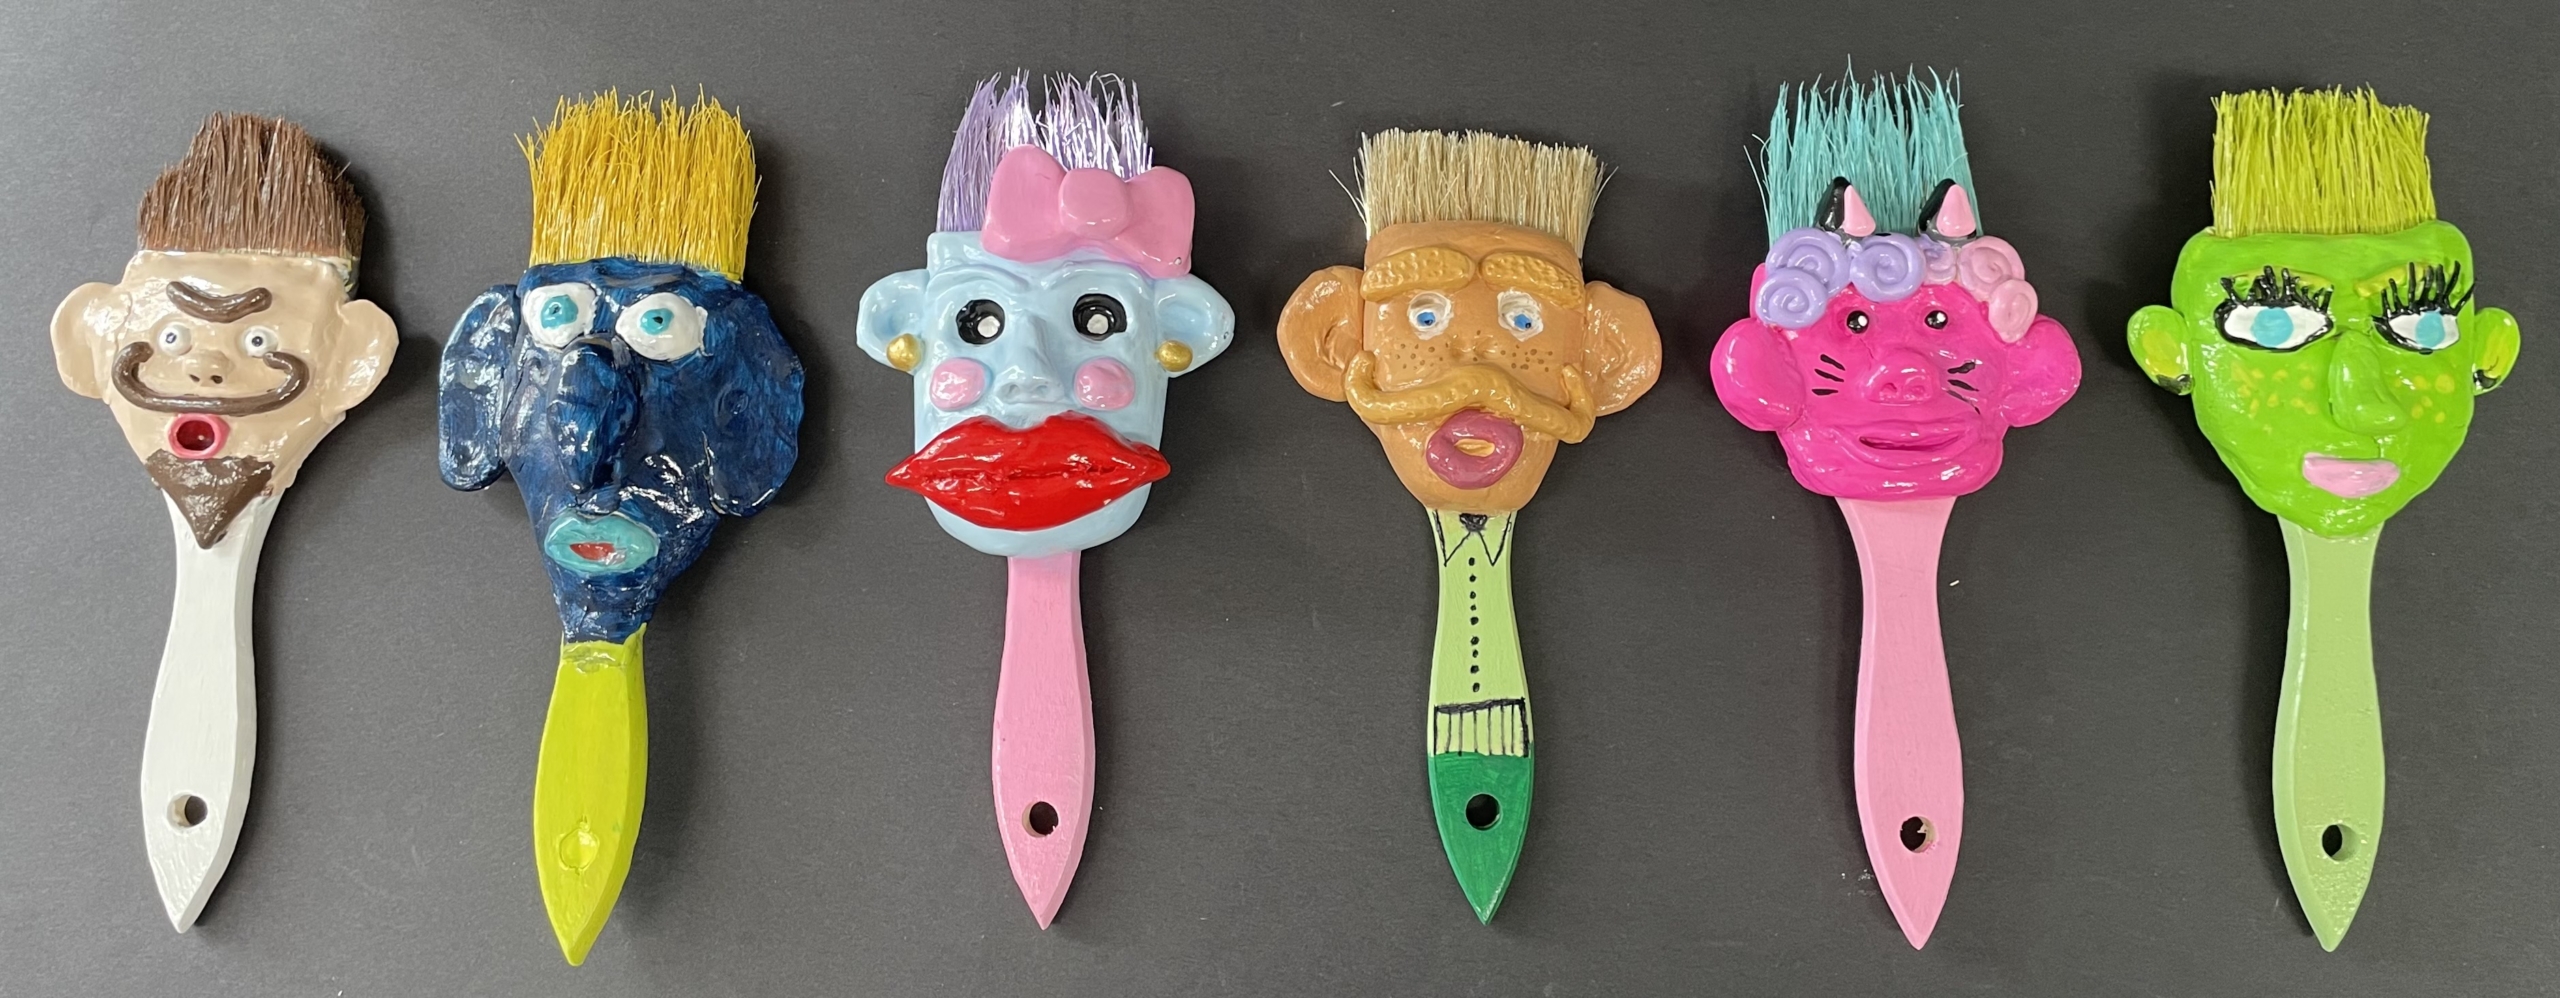
Character Creatures
Meet The Teacher: Heather Robinson
Heather Robinson teaches visual arts at Brookstone School in Columbus, GA, where she encourages students to explore a variety of media, challenge themselves creatively, and find joy in the process of making art.
Project Description
In this imaginative and tactile lesson, students will combine their love of mixed media and ceramics to create whimsical character sculptures using air-dry clay and paintbrushes. Inspired by the expressive forms of folk art, students will mold faces and features directly onto the handle of a paintbrush—transforming the brush into original art.
Grade Level
Middle School
Difficulty
Intermediate
Student Hands-On Time
120-160 minutes
Teacher Prep Time
15 minutes
Project Cost / Cost Per Student
2
National Core Arts Standards - Visual Arts
- Creating - Generate and conceptualize artistic ideas.
- Creating - Conceiving and developing new artistic ideas and work.
- Connecting - Relate artistic ideas to historical, cultural, and social contexts.
21st Century Skills
- Critical Thinking & Problem-Solving
- Creativity & Innovation
- Communication
- Flexibility & Adaptability
- Initiative & Self-Direction
- Productivity & Accountability
- Leadership & Responsibility
STEAM Education
- Arts
Differentiations and Accommodations
Differentiation
Struggling Learners
Accommodation
For Beginners / Struggling Learners:Provide pre-made clay shapes (balls, coils, slabs) to help with starting forms.Offer step-by-step visual guides for sculpting facial features (eyes, nose, mouth).Allow use of simplified characters (e.g., emoji faces, animals with minimal detail).Use one-on-one or small-group instruction during sculpting time.Give choice to focus on either sculpting OR painting for students easily overwhelmed.
Differentiation
Advanced Learners
Accommodation
For Advanced / Confident Students:Challenge them to add accessories (glasses, horns, hats, jewelry) to their character.Encourage complex textures or layered facial expressions.Invite them to create a mini backstory or personality profile for their character.Let them help peers as “student experts” or co-demonstrators.
Differentiation
IEP
Accommodation
Offer themed prompts (e.g., “Mythical Creatures,” “Space Explorers,” “Zoo Escape”) to spark interest.Allow freedom of character type—animal, person, fantasy, robot, alien, etc.Invite students to bring in embellishment materials from home that reflect their personality (fabric scraps, buttons, beads).Let students choose how to reflect on their work—verbally, through writing, or by drawing their character’s story.Visual Learners:Use photo references, diagrams, and teacher-created sample sculptures.Provide visual checklists and progress charts for steps.Kinesthetic Learners:Offer hands-on demos with teacher modeling each stage.Allow students to practice features in small clay bits before adding to final piece.Auditory Learners:Offer verbal directions and group discussions to process ideas.Use think-aloud strategies during demos to explain techniques and decisions.ELL / Language Support:Use labeled visuals for tools and materials.Provide sentence stems for reflection (e.g., “My character is a ___ who likes to ___.”)Pair with peers for buddy support or shared planning.Neurodiverse / Sensory Needs:Allow gloves or tools instead of direct clay contact if needed.Offer noise-canceling headphones or quiet workspace options.Allow breaks during sculpting or painting as needed.Additional Supports Flexible Grouping: Peer partners or choice to work independently.Tiered Tasks: Different levels of complexity in character detail or number of added materials.Choice Boards: Optional extension activities for early finishers (draw background scene, create a comic with their character, etc.).
Learning Objectives: Knowledge
Understand how to manipulate air-dry clay to create facial featuresRecognize how artists use mixed media and found objects (like paintbrushes) in folk artIdentify elements that make a character expressive or unique
Learning Objectives: Skills
Sculpt simple 3D forms using hand-building techniquesApply acrylic paint and embellishments with attention to detailPlan and execute a character design from concept to completionBegin developing the fine motor skills and clay confidence needed for earthenware projects
Learning Objectives: Attitudes/Values
Creativity & Imagination Value the process over perfection. Encourage students to explore wild, whimsical, or unconventional ideas—even if they don't turn out exactly as planned. This helps build creative risk-taking and personal voice.Growth Mindset Sculpting takes practice. Help students understand that working with clay can be challenging at first, and improvement comes with experience. Mistakes are part of learning and not a sign of failure.Respect for Materials & Tools Emphasize proper care for tools (e.g., not wasting paint, keeping brushes clean) and respecting shared resources.Treat materials like air-dry clay as valuable—don't waste, and use thoughtfully.Open-mindedness & Appreciation Appreciate diverse ideas and artistic styles. Expose students to a variety of folk art traditions and encourage them to embrace different cultural expressions and character styles.Positive Peer Feedback Teach students how to give kind, constructive feedback and to celebrate each other’s ideas, not compare. For example: “I love the expression your character has!” instead of “Mine looks better.”Observation & Reflection Foster habits of looking closely and thinking critically—what makes a character expressive? What story does their creation tell? Encourage students to reflect on their choices and process.Confidence & Ownership Promote a sense of pride and ownership in their work, no matter the outcome. Celebrate effort and individuality over "realism" or technical accuracy.
Formative Assessment
Throughout the project, observe and document:1.Engagement during clay work and painting2. Willingness to try new techniques3. Problem-solving and decision-making during construction4. Peer collaboration or idea sharing
Summative Assessment
Students will complete a short reflection (written or oral) answering prompts like:What inspired your character?What was the most challenging part of this project?What techniques did you use to show expression?How would you change or improve your work next time?Teacher completed rubric (see attached)
Reflection and Discussion
Closure / Reflection: Gallery walk or character “show-and-tell”Ask students: What choices did you make to bring your character to life?What was challenging about sculpting with clay? What did you enjoy?
Lesson Activities
Introduce students to examples of folk art and character sculpture—emphasize creativity, use of materials, and expressive features.Discuss how paintbrushes can become "bodies" and bristles "hair."Sketch character ideas and decide: person, animal, monster, alien?Begin sculpting with air-dry clay around the paintbrush handle.Focus on face shapes, features, and proportion.Keep clay slightly damp; remind students to press firmly so clay adheres well.
5. Finish sculpting and add surface texture (fur, wrinkles, scales, etc.). 6. Allow sculptures to dry overnight (or longer if needed).
7. Paint characters with acrylic paint—focus on color contrast and detail. 8. Once dry, glue on embellishments (hair, accessories, etc.). 9. Display completed characters and have students reflect or share their creations.
Step-by-Step Instructions
Step 1
Day 1: Introduction & PlanningIntroduce students to examples of folk art and character sculpture—emphasize creativity, use of materials, and expressive features.Discuss how paintbrushes can become "bodies" and bristles "hair."Sketch character ideas and decide: person, animal, monster, alien?Begin sculpting with air-dry clay around the paintbrush handle.Focus on face shapes, features, and proportion.Keep clay slightly damp; remind students to press firmly so clay adheres well.Day 2: Finishing Clay Work & Drying 5. Finish sculpting and add surface texture (fur, wrinkles, scales, etc.). 6. Allow sculptures to dry overnight (or longer if needed).Day 3: Painting & Embellishing 7. Paint characters with acrylic paint—focus on color contrast and detail. 8. Once dry, glue on embellishments (hair, accessories, etc.). 9. Display completed characters and have students reflect or share their creations.

