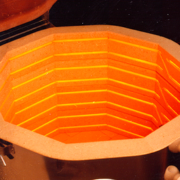
Top 5 Ways to Extend the Life of your Kiln Elements
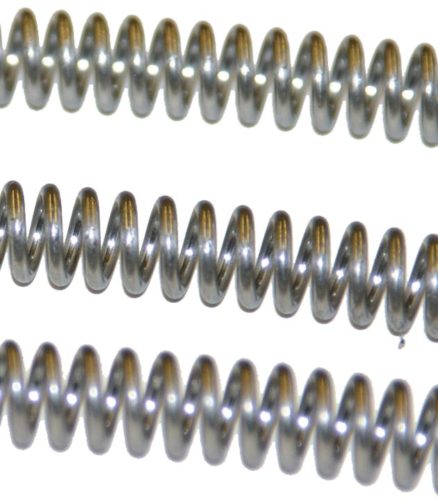 Let’s face it, elements are expensive and there are plenty of things you would rather be doing on a Saturday than spending an afternoon replacing them. Unfortunately, just like the brakes on your car, you are eventually going to have to replace them. The good news is that, also just like brakes, there are a number of things you can do to extend their life. In order to better understand why we recommend certain practices it is helpful to know a little something about how elements age.
The most widely used element wire is Kanthal A-1. It is composed primarily of Iron, Cromium and Aluminum. Element life is determined by the rate at which the Aluminum oxidizes. The hotter the element temperature, the faster it oxidizes. The amount of time you spend at high temperatures (ex: slow cooling Cone 6 glazes) compounds the problem.
Whether it is a new kiln, or you have just installed new replacement elements, the first firing is critical. You will notice new elements are bright and shiny. The outside surface of the element begins to oxidize when it reaches 1832 F. The temperature of the kiln could be significantly less. The degree of temperature difference will depend on the element design, the rate at which you are firing and a number of other factors. As the element oxidizes it forms an aluminum-oxide layer around the core. The goal is to form a uniform, dense oxide layer that is well bonded to the base metal. We have found a Medium Speed, Cone 04 ConeFire program does a very good job of achieving this.

This oxide layer prevents the further oxidation of the alloy base metals by providing a barrier that resists the diffusion of oxygen into to the alloy and also prevents the diffusion of metal ions to the alloy surface. The first time you fire the element it is basically naked with nothing to protect it. If you fire the kiln empty with nothing to release damaging gases, it helps the element form a nice uniform oxide coating with minimal initial damage to the metal.
As you continue to heat and cool your kiln the element continues to expand and contract. Every time it expands and contracts, tension is formed between the the oxide coating and the base metal because they expand at slightly different rates. This forms little fissures in the oxide layer which expose the core. The exposed core then oxidizes and fill the fissures with new aluminum oxide. This both elongates the element and reduces it’s diameter.
As the core gets smaller and smaller, the resistance of the wire increases causing the element to run hotter thus compounding the problem.The net effect is a reduction in the power potential of the element.
 As the element gets longer and thinner, the distance between coils becomes less. This is what is called element creep. When the distance between coil turns becomes less, the element gets hotter because the coil turns are radiating more heat on to each other. Remember that hotter is bad so this also compounds the problem.
A well designed element will ideally have the largest diameter (more core material to fill the cracks) and the largest distance between the coils (runs cooler). The heavier gauge elements also have more dimensional stability. When elements get above 1700 F they start turning into the consistency of cooked spaghetti. As they soften, the coils want to start laying down, causing the distance between the coil turns to lessen. Therefore, the thicker they are, the better they can support themselves at higher temperatures. Because of this you can also increase the distance between the coils (increase the pitch).
Okay, now that we know how elements degrade, lets look at what we can do to slow the process.
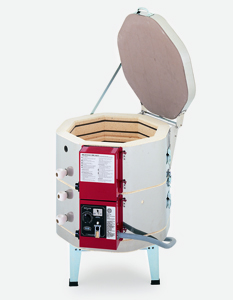
1. Choose the Right Kiln for the Job
Every kiln has a maximum temperature rating listed on the serial plate. It is the maximum temperature a kiln can achieve under “normal” conditions. This is a lot like the maximum load capacity for a pick-up truck. Just because a 1/2 ton truck is capable of hauling a bed full of gravel, it does not mean it is the best choice if you are a contractor who hauls gravel everyday, up hill, low on transmission fluid, in the Mojave Desert… you get the point. Things always last longer when you do not push them to their limits. A good example of this are 10 cu/ft kilns.
Kilns like the KM1227-3 are designed to use a common sized 50 amp plug. Manufacturers need to limit the amperage of this size model to accomodate the plug, therefore they cannot put the power into the design that they would prefer. At Skutt we offer the “PK” version of these size kilns for those people who are not restricted by this plug requirement. This would be a much better choice for artists that are consistently wanting to fire their kilns at high temperatures. One of the biggest reasons why elements last longer in more powerful kilns is because they can reach temperature faster and are not spending unnecessary time at high temperatures. If you are consistently firing to cone 6, you will be much happier with a kiln rated to cone 10
Ideally everyone would use low fire ceramics. In reality, there are a lot of characteristics (i.e crystal glazes) and properties (i.e. freeze resistant tile) that are impossible to achieve at low fire temperatures.
2. Keep Your Elements Clean
Road or rail vibration during shipping can cause brick dust to become airborne and settle on the elements. When you fire your kiln for he first time this dust can interfere with the creation of a good oxidation coating on the elements. It can also cause the element to run hotter as it restricts heat from escaping and burns off any combustibles. This also happens over time with just normal use. As the elements expand and contract they can loosen brick material that settle on the elements. In addition the normal dust associated with a clay studio can settle on the elements when the kiln is being loaded and unloaded. Occasionally bits of clay and glaze can fall into the element groove. These are extremely important to remove since they have the potential to completely burn through the element.
A good rule of thumb is to vacuum out your element grooves at least one a month and always vacuum out the kiln before it is fired with new elements.
3. Fire New Elements With the Kiln Empty
Just as dust is bad for the creation of a good oxide coating, so are the fumes that can emit from clay and glazes. Therefore, make sure your first firing with new elements is with the kiln chamber empty. As mentioned earlier, run a Cone 04, Medium Speed ConeFire program for best results.
4. Vent! Vent! Vent!
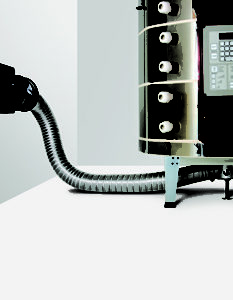
Even if you have the best oxide coating ever, the fumes that emit from clay and glazes can still attack the element when it expands through heating and forms cracks in the coating. Downdraft vents are your best defense against potentially harmful fumes. Downdraft vents pull the fumes from the kiln chamber before they have a chance to damage the elements. If you do not have a downdraft vent your next best option is to prop the lid a couple of inches until the kiln reaches 1000 F to allow the fumes a path to flow out of the chamber. You should also leave the top peephole out during the entire firing to handle those fumes that escape above 1000 F. Trying to reduce in your kiln will clobber their useful life and is definitely not recommended.
5. Keep the Elements Supported
We mentioned earlier that elements soften when the are heated above 1700 F (again this is the temperature of the element not the kiln chamber) and can actually droop out of a broken element groove and eventually break from elongation. Eventually this brick should be replaced but if you do not have the time you can help things by creating a little fence to hold the element in place using element pins. Usually a good time to replace brick is when it is time to replace your elements.
By following these guide lines you can easily double the life of your elements. In future blogs we will discuss the benefits of APM elements. Until then, be safe, creative and happy!

