Kindness Woven Hearts

Meet The Teacher: Kristi Martinez
I teach 2nd-8th graders at an all dyslexic school in the Bay Area, CA. I've been teaching art for over 20 years and am passionate about guiding my students to become more aware of the world around them, through SEL lessons, environmental and social justice issues. My personal favorite mediums are clay, printmaking and found object sculpture.
Project Description
"Woven Hearts" is the main project in a SEL Kindness unit. Young students (2nd grade) learn how to roll slabs, make impressions with mats, cut and trace a heart template, glaze and weave. We discuss the importance of kindness, learn a variety of ways to weave, and create other heart-inspired multi-media artworks.
Materials
- White paper for drawing a heart
- Pencil
- Scissors
- Clay slab
- Texture mats
- Rolling pin
- Smoothing tools
- Sharp Tool for cutting out
- Hole cutter (for teacher to make holes)
- Glaze & Brushes
- Yarn
Grade Level
Elementary School
Difficulty
Easy
Student Hands-On Time
4-5 50 minute classes for woven heart project only
Teacher Prep Time
2 hours
Project Cost / Cost Per Student
5
National Core Arts Standards - Visual Arts
- Creating - Generate and conceptualize artistic ideas.
- Creating - Organize and develop artistic work.
- Presenting - Develop skills for artistic presentation and exhibition.
- Responding - Perceive and analyze artistic work.
- Responding - Evaluate and critique based on aesthetic and technical qualities.
- Connecting - Connect personal experiences with artmaking and meaning.
21st Century Skills
- Critical Thinking & Problem-Solving
- Creativity & Innovation
- Communication
- Flexibility & Adaptability
- Initiative & Self-Direction
- Social & Cross-Cultural Skills
- Leadership & Responsibility
STEAM Education
- Science
- Arts
Learning Objectives: Knowledge
Students will know: ways to show Kindness to others, how clay is made, stages of clay and firing process, how to create textures in clay, some history of weaving through images and discussion.
Learning Objectives: Skills
Young students will be able to: draw and cut a heart template, roll a slab, impress texture mats, smooth clay, trace a template and cut out, weaving in a simple pattern, color selection (glaze, yarn).
Learning Objectives: Attitudes/Values
Students will gain understanding of: following step by step instruction in a ceramics lesson, learning how mistakes can be fixed in clay, having patience for art making, celebration of differences in choices and creative styles.
Formative Assessment
Support that students are understanding paper folding process for heart template, helping with cutting adjustments, provide feedback for all stages of the project (cutting, texture, glazing, weaving).
Summative Assessment
Since this is a young age, we do gallery walks where students display their work at their tables, and we walk quietly around to admire the work. They are thinking about compliments for their classmates and are able to share out compliments in full group discussion. They also do a 1 point rubric (see additional document) based on Focus/Craftsmanship/Communication - and reflection questions: 1) Something they are proud of 2) Something they would change.
Reflection and Discussion
After a Gallery Walk, students are encouraged to compliment their classmates' work and share why they Like/ or what they Feel about the work.
Step-by-Step Instructions
Step 1
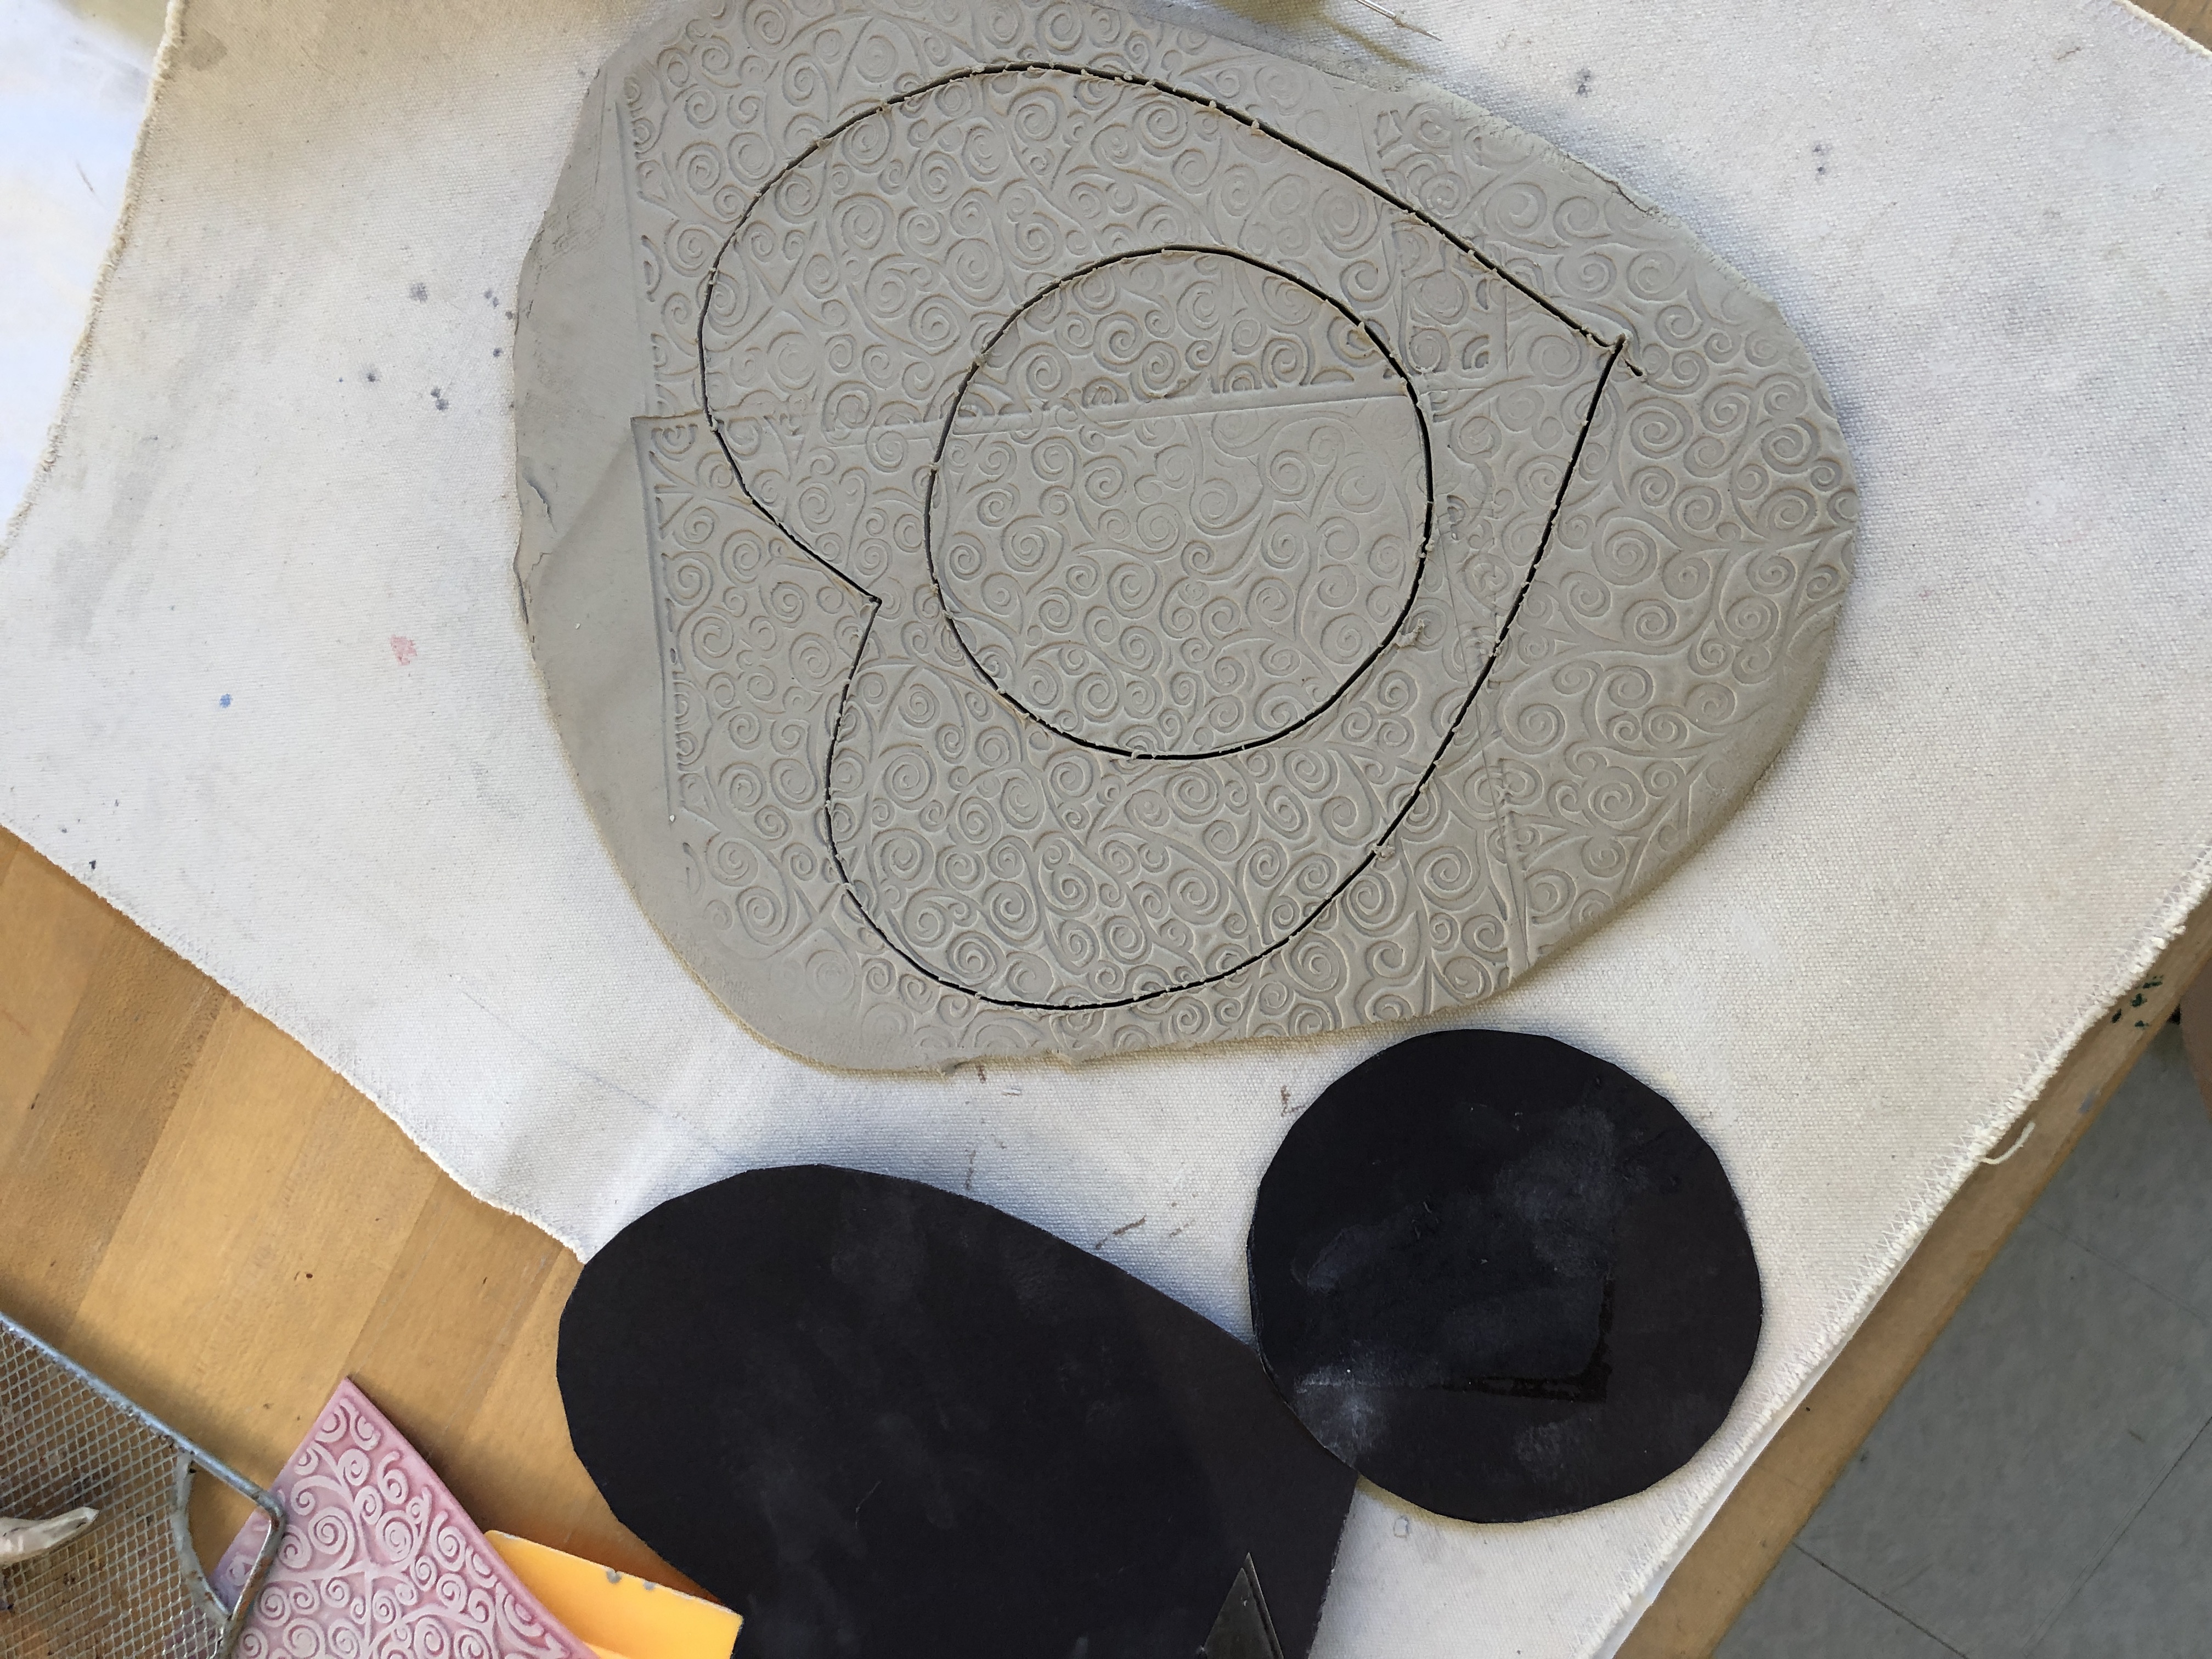
1) Provide folded paper 2) Show students how to draw half of a heart, with lines touching the folded side of the paper 3) Cut out heart along line 4) Make adjustments to fit slab

Step 2
1) Demonstrate how to use the slab roller. 2) Students take turns rolling their slab and taking clay to their table. 3) Smooth clay slab with smoothing tool 4) Choose texture mat and roll with rolling pin, check for deep enough impressions
Step 3
1) Position paper heart template on top of slab 2) Cut around template carefully, keeping sharp tool straight up/down for even edge 3) Smooth out clay around outside edge Teacher will cut out center circles & make all the holes (7 for weaving, 2 for hanging)
Step 4
After bisque firing, students will choose from many colorful glazes. Teacher will demo glazing and layering/combining colors. 1) Students will learn about glaze and see Before and After photos 2) They will select color(s) based on preference and teacher guidance 3) Students will glaze 3 layers, letting dry in between

Step 5
Once the pieces are glaze fired and the centers are strung up for weaving, students will begin weaving in the center of their heart. They will have already learning the weaving over-under pattern with a CD weaving activity, so will be able to start in right away. Little bundles of yarn have been prepared for them to choose from. Yarn to hang the heart will be tightly tied by a teacher.

Step 6
Because this is a Kindness Unit, as a "kindness gift" to each student, I form each student's inner circle clay slab into a little pinch bowl for them take home when their projects are done. On glaze day, I surprise them with the "gift", we talk about how the dish can be used, and they glaze it with colors of choice. They take this home after firing (and I keep the hearts for the end of year STEAM show).

