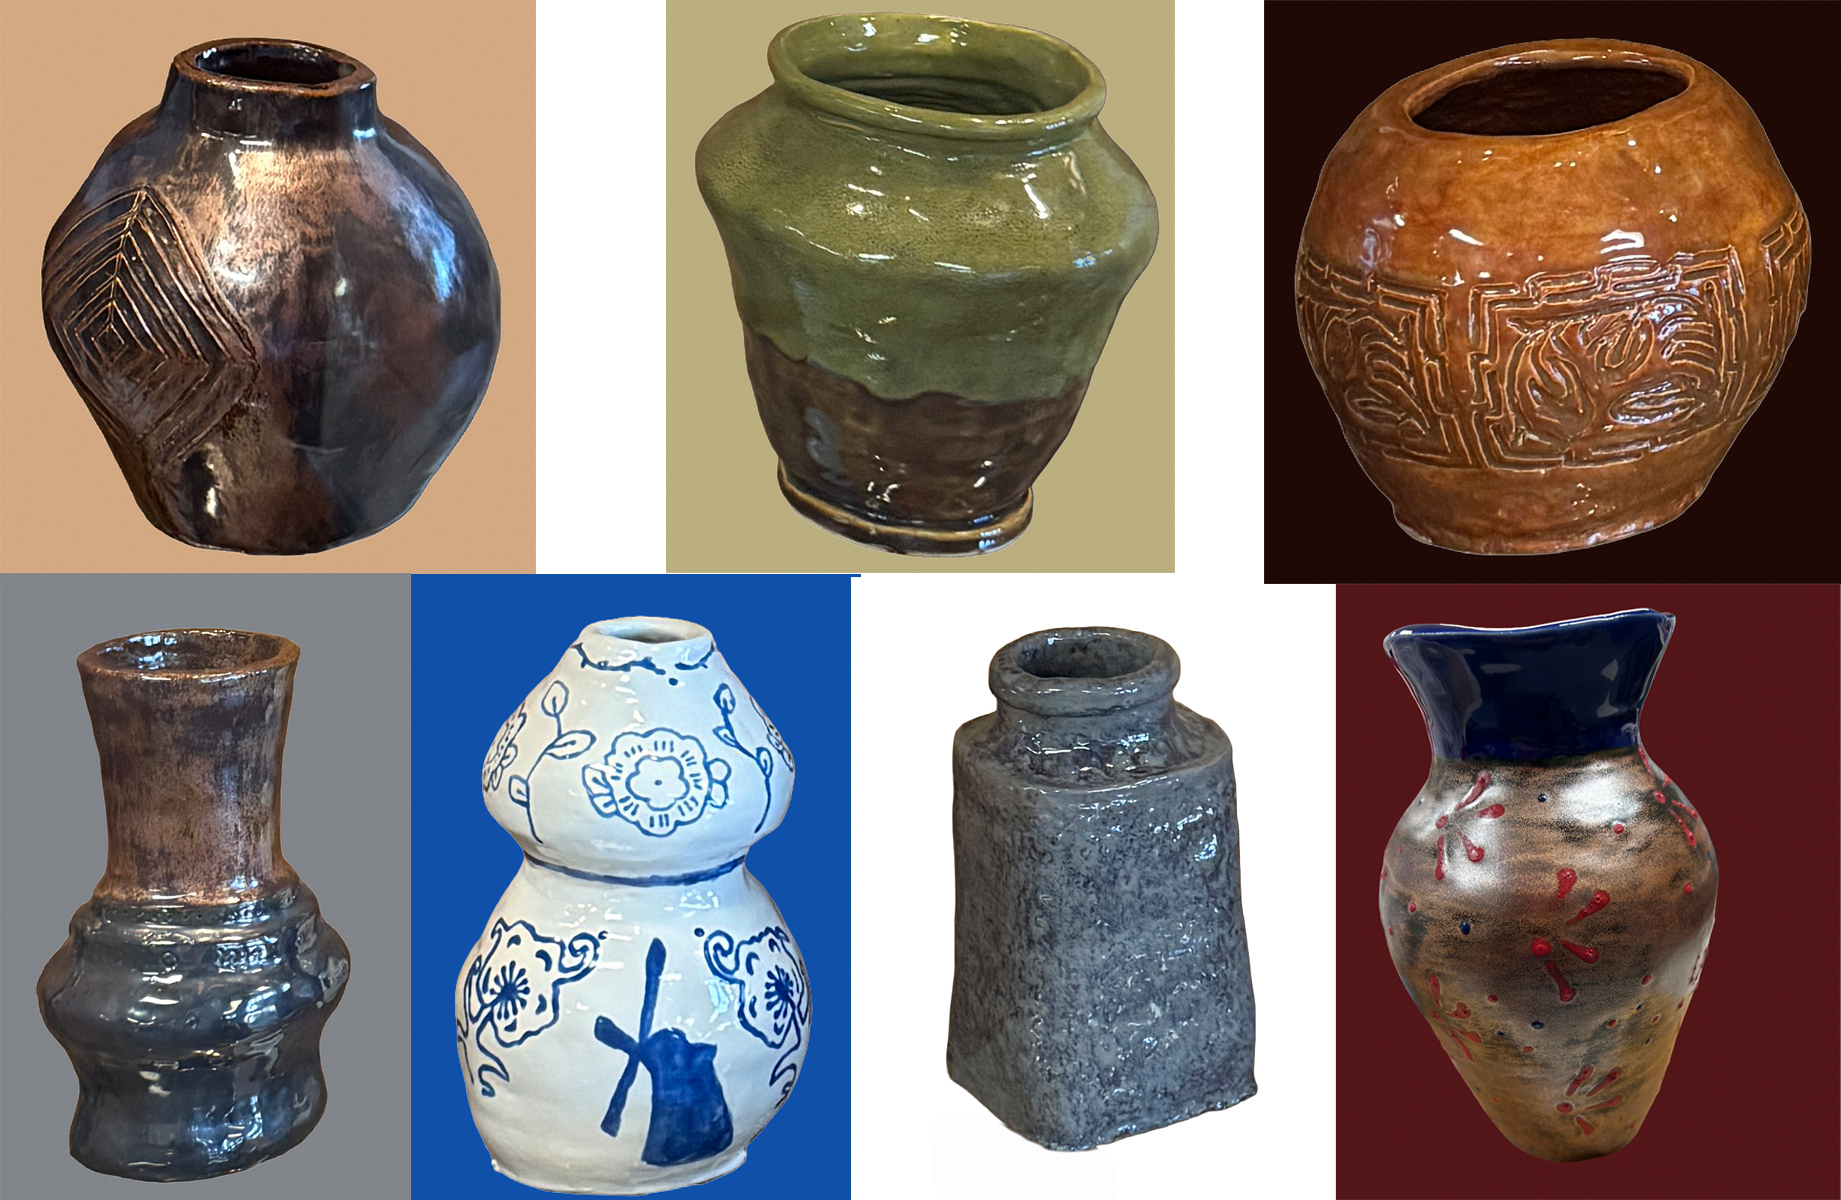
Coil Heritage Vessel
Meet The Teacher: Michele Banks
Michele Banks is a high school visual arts teacher at The Independent School in Wichita, Kansas. Teaching art is a second career for Michele as she decided late in life that she wanted to share her passion for art with the younger generation. Teaching ceramics is a favorite and her pottery classes are always full of enthusiastic potters.
Project Description
The Heritage Vessel project is a high school ceramics unit where students research their personal heritage (cultural, ethnic, ancestral traditions) and create a coil vessel that reflects elements of that heritage. Students will incorporate surface decoration, form, texture, motifs, or symbols inspired by their research.
Materials
- Clay (stoneware or earthenware, wedged and ready)
- Water containers and spray bottles
- Canvas or boards for working surfaces
- References Images/printouts from student research
- Pencils, sketchbooks, rulers
- scoring tools
- slip or vinegar
- Glazes, underglazes, engobes or stains for surface decorations
- kiln or kiln access for firing
- safety items: aprons, dust masks for dry clay cleanup
- Various clay tools (ribs, wooden tools, sponges)
Grade Level
High School
Difficulty
Intermediate
Student Hands-On Time
3 Class weeks including glazing, 50 minutes class periods
Teacher Prep Time
30 minutes for demonstration materials
Project Cost / Cost Per Student
5
National Core Arts Standards - Visual Arts
- Creating - Generate and conceptualize artistic ideas.
- Connecting - Relate artistic ideas to historical, cultural, and social contexts.
21st Century Skills
- Critical Thinking & Problem-Solving
- Creativity & Innovation
- Communication
- Information Literacy
STEAM Education
- Arts
Differentiations and Accommodations
Differentiation
IEP
Accommodation
• Provide modified research options: shorter written requirements, oral presentations, teacher-provided sources, or visual timelines instead of essays. • Extended time for construction phases; allow smaller minimum height (e.g., 6”) if motor challenges exist, while still meeting core objectives. • Adaptive tools: larger-handled tools, pre-rolled coils, or slab bases for easier starting; seated work options or support stands. • Simplified steps: break tasks into smaller, sequenced visuals/checklists; peer buddies or teacher modeling. • Alternative expression: incorporate mixed media (e.g., attached found objects) if hand-building is physically limited; focus on surface decoration over extreme height. • Sensory accommodations: noise-reducing headphones, quiet zones, or textured tools for tactile preferences. • Assessment flexibility: rubric emphasis on effort/process over perfect execution; multiple checkpoints for feedback.
Learning Objectives: Knowledge
Knowledge (Content Understanding) • Students will understand coil construction as a foundational hand-building technique in ceramics and its historical/cultural significance across global traditions. • Students will gain knowledge of their personal heritage through research, identifying symbols, patterns, forms, or motifs relevant to cultural pottery or artifacts.
Learning Objectives: Skills
Demonstrate proficient coil-building techniques: scoring/slipping, even coil rolling, joining without cracks, building upward with compression, shaping, refining form, and adding surface decoration. • Develop research, sketching, and planning skills to translate cultural/heritage concepts into 3D form. • Refine and problem-solve during construction (e.g., structural stability for height).
Learning Objectives: Attitudes/Values
Foster appreciation for cultural diversity and personal identity through respectful exploration of heritage. • Encourage pride in one’s background while valuing others’ stories. • Promote perseverance, risk-taking in creative expression, and reflection on how art preserves and communicates cultural narratives.
Formative Assessment
Teacher will observe throughout coil building and offer feedback regarding construction
Summative Assessment
Student will complete rubric and self reflection/observation including what were strengths of the build and what were weaknesses as well as what was learned from the activity.
Reflection and Discussion
1. “Share one symbol or motif from your heritage research and explain how you incorporated it into your vessel’s form or surface. How does it represent something personal?” 2. “What challenges did you face in building a tall, stable coil vessel? How did problem-solving connect to resilience in your cultural/heritage stories?” 3. “How does your vessel compare to traditional pottery from your heritage culture? What modern or personal twists did you add, and why?” 4. “Listen to a peer describe their vessel—what cultural element surprised you or made you think differently about heritage?” 5. “How has creating this piece deepened your understanding of identity? How might art like this preserve or evolve cultural traditions?” 6. “What emotions or values (pride, connection, curiosity) emerged during research and making? How can sharing these stories build community?”
Lesson Activities
Research
(1–2 class periods) Research your personal heritage (e.g., family origins, ethnic background, cultural traditions). Focus on pottery, vessels, symbols, patterns, colors, or forms significant to that heritage. Collect images, notes, and sketches. Create one slide with three images/example and a short artist statement (1 paragraph) explaining your inspiration.
Design and Planning
(1 class period) Sketch 3–5 thumbnail ideas for your vessel shape (e.g., rounded, tall neck, flared rim) and surface designs inspired by research. Plan height (min. 8”), function (vase), and techniques (e.g., impressed textures, sgraffito, added coils for patterns). Get teacher approval.
Step-by-Step Instructions
Step 1
Wedging and Base Preparation (1 class period) Wedge clay thoroughly. Create a stable base: roll a slab ~½” thick or coil a flat spiral disk (4–6” diameter depending on individual design). Score and slip edges for strength.Coil Building (5-8 class periods) Roll consistent coils (~1/4-3/8”thick, even length). Score and slip base edge. Attach first coil in a circle, press firmly inward to compress. Build upward in layers, staggering joints. Maintain even wall thickness (~¼–⅜”). Shape as you go (widen/narrow with ribs/tools). Build to at least 8” tall. Smooth interior/exterior as needed. Add structural supports if form is complex. Make a cardboard template in the shape of the profile of your form to ensure consistent profile around the vessel. If a smooth surface is desired, use a rib to smooth the coils every 4-6 coils while they are still soft. Refining and Detailing (2–3 class periods) Refine shape for evenness and stability. Add decorative elements: impress textures/symbols, attach coils for raised patterns, carve sgraffito, or apply slip trails inspired by heritage. Ensure no weak joins; compress all seams.Drying and Pre-Fire Check (ongoing) Dry slowly under plastic to even moisture (leather-hard stage for refinements). Check for cracks; repair with slip. Bisque fire when bone-dry. Surface Finishing and Glazing (2–3 class periods) Apply underglazes, engobes, or glazes based on design (test first). Consider heritage colors/patterns. Wax resist for contrast if desired. Final Firing and Reflection (post-firing) Glaze fire. Complete self-reflection (written or discussion): What worked? How does the finished vessel express your heritage? Participate in group critique using prompts.

