
Glass 101
WHAT IS GLASS FUSING?
Unless you have been living under a rock for the past several years, you more than likely have noticed that fusing and slumping glass has become, excuse the pun, Very Hot!
Fired glass is fascinating to work with and brings a unique perspective to 3 dimensional art, but what does glass fusing mean?
Glass fusing is simply the process of stacking two or more layers of “compatible” glass together to make a design, and then placing the stacked glass into a kiln, where it melts (fuses) together.
It’s that Simple!
GLASS COMPATIBILITY
What is Glass “Compatibility”?
Glass expands when it is heated and contracts when it cools. All glass has a distinct rate at which it expands and contracts, generally referred to as the Coefficient of Expansion (C.O.E.). You cannot fuse glasses with differing C.O.E. rates together — breakage will result!
This is why choosing a family of glass products should be the first step in fusing.
Most manufacturers of fusing glass test their own products consistently to assure compatibility within their own lines. The phrase “Tested Compatible” is often used to assure a specific family of products will correctly fuse together well.
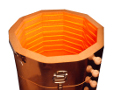
KILNS AND GLASS
The biggest stumbling block to getting started with any Fired Art has always been the kiln. A common misconception is that you cannot fuse or slump glass in a ceramic kiln. The fact is people fuse in ‘ceramic’ kilns everyday. If you have a programmable controller on your kiln you can begin fusing glass right now!
The main difference between a glass kiln and a ceramic kiln, is that glass kilns generally heat a single layer from the top and ceramic kilns heat multiple layers from the side.
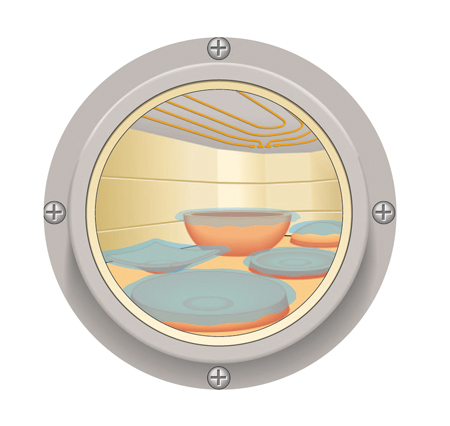 The reason glass kilns were designed to heat the kiln from the top is because the majority of glass projects tend to be relatively flat. With the heat being radiated from the top, the entire face of the glass ‘sees’ the heat at the same time. This keeps temperature differences within the glass project uniform and prevents cracking.
The same uniform heating results can be attained in a ceramic kiln by simply slowing down the firing.
Most ceramic and glass kilns sold today come with automatic controllers and almost always have a programming mode called Ramp and Hold Mode which is perfect for writing glass programs. If your ceramic kiln has a KilnSitter instead of an automatic controller, fusing glass can be very difficult and is not recommended.
GETTING STARTED
Once you have chosen which family of compatible glass products to use, it is best to consult the glass manufacturer for recommended firing schedules, and other information.
GLASS TYPES
The glass will be available in a variety of forms to help you with your designs. Here is a list of the more common glass forms offered by manufactures:
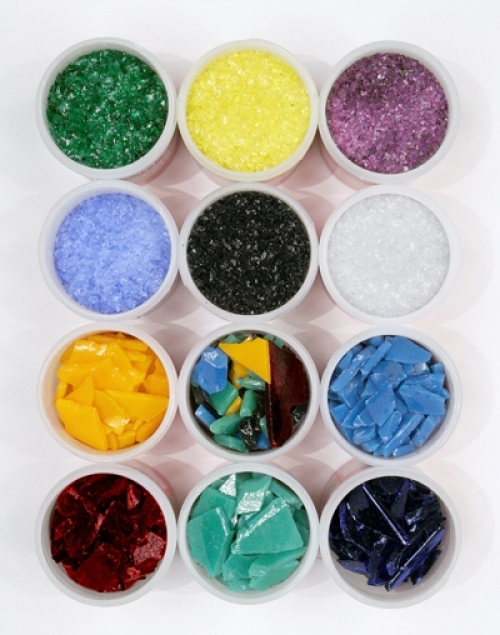
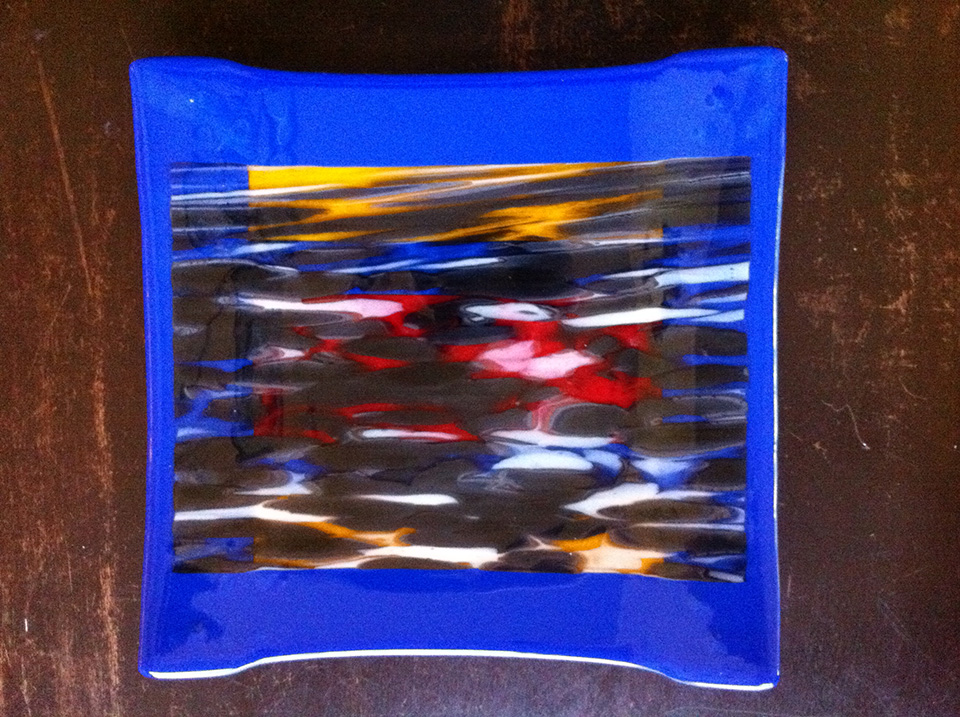
- Sheet – The basic building block of fused glass. Sheet glass is available in a wide array of colors, textures, surface effects, transparencies, opasities, shapes and sizes. Honestly the hardest part is deciding what you will use.
- Frits – Sheet glass that has been broken up and ground into different sizes. Generally offered in mosaic, coarse, medium, fine and powder. Used for ‘frit painting’ or creating mosaic patterns on sheet glass.
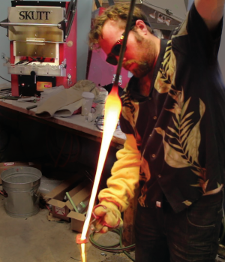
- Cane – Glass that has been stretched into long thin rods that sometimes resemble spaghetti and linguini noodles (called noodles and stringers).
CUTTING TOOLS
Now that you know what kind of glass you will be working with, you will need some basic tools to help you design and manipulate the glass into your works of art. The following list gives the most basic of tools needed to cut glass:
- Glass Cutters – Used to score lines into the surface of sheet glass that will then allow you to break the glass into the shapes you desire. Available in several styles to fit your needs and skill level.
- Running pliers – These pliers have padded ends with slight curves that allow you to break or ‘run’ the score line you scratched into the surface of the sheet with your cutter. Very useful for cuts that are to small or dangerous to break by hand.
- Mosaic Cutters – These plier shaped tools have cutting tips that allow glass sheet or rods to be nipped into shapes. Great for making your own custom mosaic size frit.
- Ruler – A metal straight edge will help you draw your cuts onto the glass surface as well as acting as a guide for your glass cutter when making straight cuts. A cork or rubber backing on the ruler will keep it from slipping around on the surface of the glass.
- Markers – Permanent markers will allow you to see your designs on the glass without the worry of accidentally rubbing them off. Don’t worry, you can clean them off with glass cleaner when you are done and small residual amounts will burn off in the firing!
- Protective Eye-ware – When cutting, breaking or nipping glass, small sharp fragments can pop off, make sure you have your eyes protected!
- Gloves – Glass gloves will help you protect yourself from the sharp edges of sheet glass and are available in a variety of styles to suit your preference.
WORK SPACE
You will want to have an area that you can dedicate to glass work and that can be kept largely clear of dust and debris that might get trapped in your glass when fired. Here are a few things to consider when setting up a glass working station:
- Space – You will want enough space to lay out glass selections, cut your shapes out of the sheet glass and assemble your project into its final design. It’s hard to move your working design out of the way to cut more shapes, so at least have enough space to cut and assemble at the same time.
- Light – Glass can look different in different light sources. Having a variety of light like natural, florescent, incandescent and LED can give you a better idea of the design you are trying to achieve. Also keep in mind that some glass may look different depending on whether you are viewing light that has reflected off of the surface versus light that it transmitted through the glass.
- Safety – Working in glass will create small shards and chips no matter how careful you are when cutting and shaping. Small children and pets should be a consideration when setting up a glass working area.
- Storage – Sheet glass can be fairly easy to store, but as you cut and shape the glass you will create scraps of various sizes. Coming up with a system for storing your scraps will save you time on future projects and a great deal of money since all glass scraps can be used in some way. (even your fired ‘mistakes’ can be cut up and reused later!)
There are also many classes available to help you learn about, and explore the numerous and exciting possibilities of kiln-fired glass. Look through the ‘I AM A…‘ pages on this site to learn more in-depth information on glass work.
FIRING TYPES
After cut or nipped pieces of compatible glass are assembled, the project is placed in a kiln. The kiln will heat the glass slowly from room temperature up to fusing temperatures (1300º-1500º Fahrenheit) and slowly back down again according to the Firing Program or Schedule selected. Different effects such as how smooth or dimensional the finished surface of the fused piece will be, can be created through controlling the firing program.
There are three basic firing types in warm glass working:
FUSING : The most common of the glass firing types, fusing can be broken down in to three sub categories: (temperatures given are ranges that encompass different types of glass)
- Soft Tack (Fuse to Stick) – 1350°F to 1400°F – Glass layers are fired just hot enough to allow them to fuse together (laminate) with soft rounded edges, but they each still retain their own distinct shapes and textures.
- Hard Tack (Contour) – 1400°F to 1450°F – Glass layers are fully laminated and edges continue to soften and round. (any point between soft tack and full fuse)
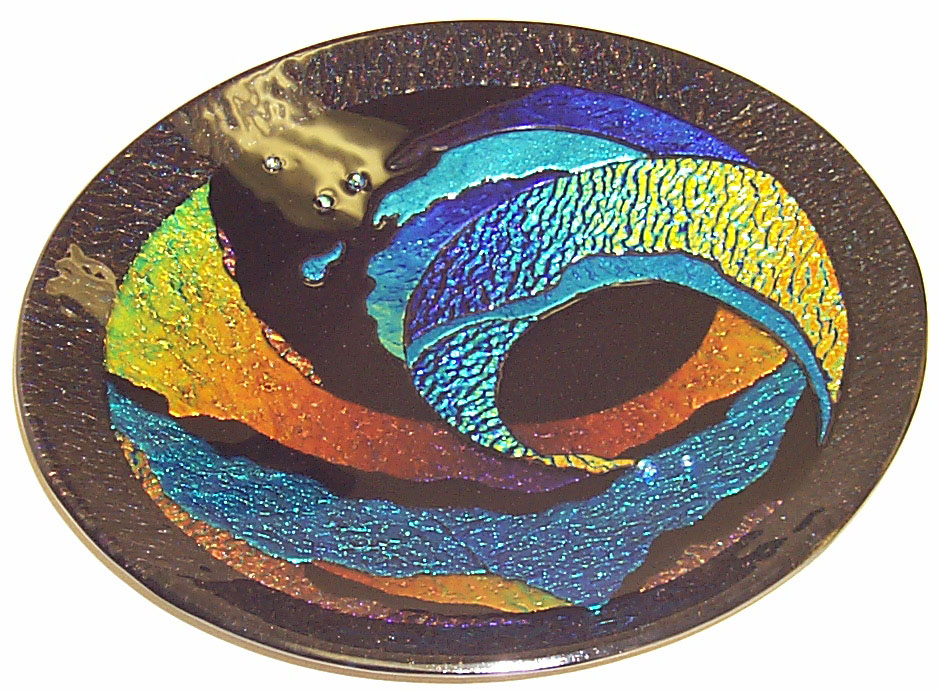
- Full Fuse – 1450°F to 1550°F – Glass layers have fully fused and integrated into one another creating a new smooth glass sheet containing your design.
SLUMPING : The forming stage of warm glass work that allows you to shape your fused projects into beautiful and functional items by heating them just enough to bend or ‘slump’ them into ceramic/or metal forms.
- Slumping range of most glass 1200°F to 1300°F
- Bottle slumping is within or close to this range, but close observation is recommended as different bottles will deform at different ranges.
CASTING : A glass firing technique using hollow or open faced molds to contain and shape the melting glass.
- Pâte de Verre – 13oo°F to 1400°F – This casting technique uses crushed glass (frit) and produces a textured / frosted surface. Size of frit will affect needed temperatures for this process.
- Cavity or Open Face – 1450°F to 1700°F – Firing temperatures for casting range wildly based on sizes and thickness of both the molds and the glass used, consult your glass manufactures for more detailed guidelines.
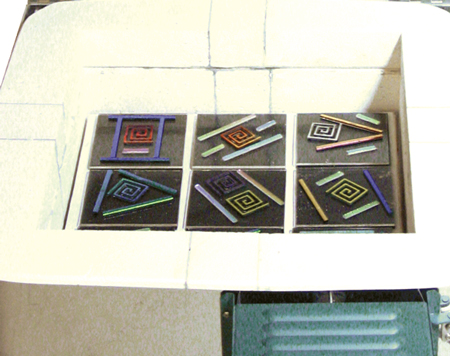
LOADING
All that is left before firing is to assemble your work for the kiln. Smaller projects can be constructed and then moved onto a prepared kiln shelf already set in the kiln, or the kiln shelf can be loaded with projects and then set inside the kiln as long as you can safely lower the shelf in without endangering your work or your back. Remember, once on the kiln shelf your glass must be kept level when moving and/or firing!
SUPPLIES
These are the supplies you will need to have on hand for the final preparations before firing your glass work:
- Kiln Shelves – The shelves you use for fusing glass need to be perfectly flat with a surface that is free of scratches and textures as these can transfer to your glass when firing.
- Kiln Wash – A good glass quality kiln wash acts as a separating agent preventing the melting glass from sticking to your kiln shelves. Wash must be freshly applied before each firing, if reused it will stick to the glass. Ensure that the kiln wash is completely dry before each firing to prevent gas bubbles from forming under the glass. When scraping off old kiln wash wear the appropriate dust mask.
- Shelf Paper – An alternative to kiln wash, shelf paper can be trimmed to just over the dimensions of your glass work and placed on the shelf before loading your project. Wear appropriate dust mask when removing glass from kiln and when cleaning fired shelf paper off of glass and kiln shelves.
Clearances
How you space projects within the kiln chamber can have a great impact on the end results:
- From the Elements – Placing projects too close to the elements can shock the piece from the intense radiation when the element cycles on. In the case of side-fired kilns you also need to be concerned with one side of the project receiving more heatwork than the rest of the piece. For example, when fusing 2 or more layers you may see a more aggressive fuse on the side closest to the elements. A good rule of thumb is to keep your projects at least 2″ from the elements.
- From The Bottom (Slab) – The bottom of the kiln generally is a little cooler than the rest of the kiln. It is good practice to post up your kiln shelf at least 1″. This allows the heat within the chamber to get under the shelf and heat it from the bottom as well.
- From the Lid – If your kiln has elements in the lid you will want to load your pieces with a minimum of 2″ from the lid. If your kiln has elements in the side only, you will also want to provide 2″ clearance from the lid since the kiln loses much of it’s heat through the lid and therefore it can run a little cooler.
- Between Projects – As you fuse stacked glass it wants to find a level of 1/8″. The higher your stack, the more the project will spreadout and therefore the further apart you need to place projects from each other and the edge of the shelf.
UNLOADING
It is vital that glass work not be disturbed when cooling to avoid temperature induced stresses that can lead to cracking and breaking. Wait until the kiln is completely cooled or at least until you can remove the glass safely with your bare hands. Peeking into the kiln for even just a glimpse of your work can have devastating consequences !
When removing the glass from the kiln caution should be used as there can be extremely sharp points on the edges of the glass that will need to be smoothed. Any cracked or broken forms may have razor sharp edges so pay close attention when removing any damaged glass items from your kiln.
It is a good idea to vacuum out the kiln chamber after each firing to make it ready for the next glass load. Small beads of glass left over from the previous firing can cause problems when loading your next round of glass work and if you are using a ceramic kiln, any glass bits left in the kiln can cause damage to the kiln chamber if they are fired to ceramic temperature ranges.