Troubleshooting Glass Defects – Thermal Shock Cracks
There are few things more disappointing than opening your kiln and finding your glass project destroyed by a cracks, bubbles, divitrification, foreign objects, or other reasons.
We do not consider ourselves glass experts (although some of us love fusing glass), but as kiln experts we have chased down a lot of solutions to imperfections through research. Usually the best people to ask about glass problems are the glass manufacturers themselves. All of them have great information on their website and are more than happy to help. That being said, we would like to share some of the successful solutions we have come across. In this blog we will start with cracks caused by thermal shock.
What are Thermal Shock Cracks
Thermal shock cracks occur when one part of the glass is expanding (heating) or contracting (cooling) faster than another part of the glass. This difference in expansion rates creates cracks and causes the glass to crack.
Glass will not crack after it reaches 1000 °F because above this temperature it behaves more like a liquid than a solid. Glass is considered an Amorphous Solid which technically is neither a liquid or a solid but that is a whole different conversation.
How Can You Avoid Them
Potential Kiln Issues
Many people’s first instinct is to blame the kiln. Sometimes it is the kiln, which is great news for us because we know how to fix kilns. More often than not thou there is something else going on. Kilns are pretty simple creatures. They basically just do what they are told. The most common kiln problems associated with thermal shock would be a failed element or relay that causes the kiln to cool too quickly or unevenly.
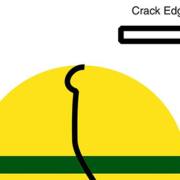
You can tell if a crack occurred during the heating or cooling process by looking at the edge of the crack. You know that they occurred before the kiln reached temperature when the edges had time to soften after the crack occurred. If it occurred on the cooling phase of the firing it will have sharp edges. If this is the case you may want to test fire your kiln to see if all the elements are working correctly
Use the Right Kiln
To avoid these cracks you want to make sure the piece expands and contracts evenly throughout the piece. This is easy to do with small thin pieces because heat can transfer through the whole piece fairly quickly and thus stay uniform. Really wide, tall or thick pieces are more difficult to manage the expansion uniformity.
The keys to success lie in the direction of heat radiation for a given project and the rate at which you increase or decrease temperature.
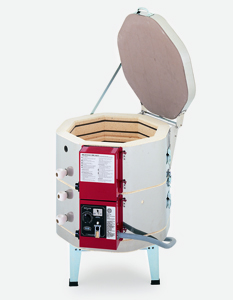
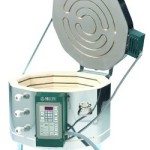
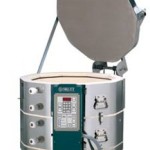
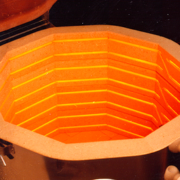
Most glass kilns have elements, in the lid (FireBox14), the side walls (GM1018) or both (GM1014). Most larger kilns will have at least one element in the bottom to provide a heat source under the shelf. Kilns that are designed to fire on multiple layers will not have lid elements because the top shelf would fire too hot. Kilns with elements in the bottom or rare due to the fact that debris tends to collect in the the bottom of the kiln and can contaminate the elements. Conductive heat from the shelf helps to compensate for this.
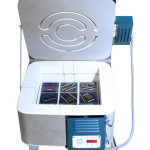
On a wide project that is not very thick, like a flat fused panel or a shallow slump or drape mold, it is best to heat the piece from the top. This helps ensure that the heat is dispersed across the entire project evenly.
Tall pieces are kind of hybrids. Good examples would be tall drape molds or very deep slump molds. In both cases, the project starts out flat and then becomes tall as it deforms. Ideally you would want to heat these pieces from both the top and the side. Thick pieces like deep cast molds would also benefit from top and side heating.
Slow it Down
Okay so not everyone has the benefit of owning multiple kilns designed to fire a variety of projects so what do you do if you want to fire a flat fused panel in a side fired kiln or a tall drape mold in a top fired kiln. The answer is slow down your firing rate.
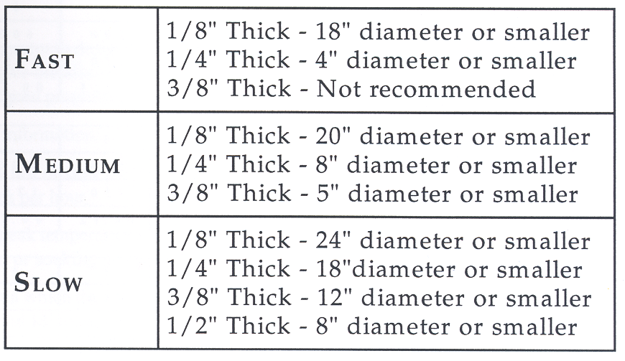
If you are using Skutt’s Glass Fire Mode, be sure to consult the GlassFire Mode sizing chart in your manual before you choose a firing speed.
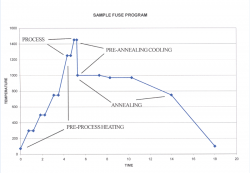
If you are writing your own programs using Ramp/Hold, you may want to do a little research on the proper firing speed for the size of the piece you are firing. Sometimes building steps into your program can help. An example of this would be adding a 15 minute hold at every 250 degree increment to allow the heat to balance out before you move to the next segment in the program.
Conclusion
- Keep projects at least 2 inches from the elements. If you still have problems, shield your project from direct exposure form the elements with shelf posts or fiber.
- Post up your shelf at least 1 inch to allow heat to flow under the shelf.
- When using GlassFire Mode use the slow speed and make sure your piece falls within the guidelines of the Glass Fire Mode Chart.
- When designing your own programs in Ramp/Hold Mode, slow down the firing rate between start up and 1000F and again from 1000F to room temperature and add holding steps to the program.
- Wait until the kiln is at room temperature before you open the lid.
Annealing Cracks look very similar to Thermal Shock Cracks. Happy Firing!
 Let’s face it, elements are expensive and there are plenty of things you would rather be doing on a Saturday than spending an afternoon replacing them. Unfortunately, just like the brakes on your car, you are eventually going to have to replace them. The good news is that, also just like brakes, there are a number of things you can do to extend their life. In order to better understand why we recommend certain practices it is helpful to know a little something about how elements age.
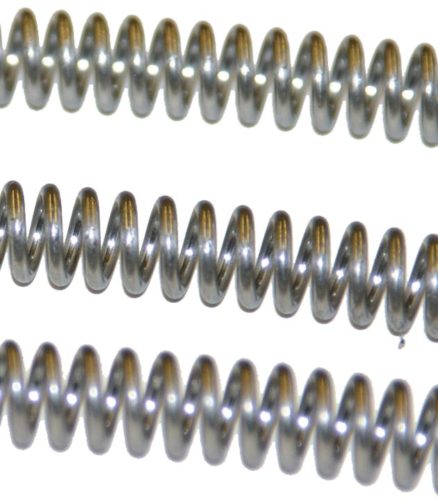
 As the element gets longer and thinner, the distance between coils becomes less. This is what is called element creep. When the distance between coil turns becomes less, the element gets hotter because the coil turns are radiating more heat on to each other. Remember that hotter is bad so this also compounds the problem.